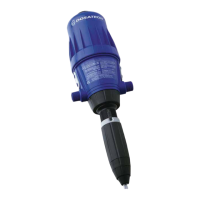
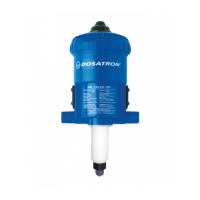
The Dosatron Rebuild Kit D14MZ3000 is designed to extend the life of your Dosatron D14MZ3000 water-powered dosing injector by providing genuine replacement parts for both the piston and seal components. This kit is essential for maintaining the optimal performance and longevity of your Dosatron injector, ensuring accurate and consistent dosing in various applications.
Function Description:
The Dosatron D14MZ3000 is a water-powered proportional dosing pump that injects a precise amount of concentrate into a water line, regardless of variations in water pressure or flow rate. It operates without electricity, using the flow of water as its power source. The rebuild kit addresses wear and tear on critical internal components, restoring the injector's efficiency and preventing leaks or inaccurate dosing.
The kit is divided into two main parts:
- Part 1 - Piston Kit: This section focuses on the internal mechanical components responsible for the pumping action and proportional dosing. Replacing these parts ensures the correct movement and sealing of the piston, which is vital for the injector's accuracy and reliability.
- Part 2 - Seal Kit: This section provides replacement seals and check valve components that are crucial for preventing leaks and maintaining proper fluid dynamics within the injector. Worn seals can lead to concentrate bypass, water leaks, or inconsistent dosing.
By replacing these key components, the rebuild kit allows users to perform routine maintenance and extend the operational life of their existing Dosatron D14MZ3000 injector, rather than replacing the entire unit. This is a cost-effective solution for users who rely on their Dosatron for consistent and accurate chemical injection.
Important Technical Specifications (Parts included in the kit):
Part 1 - Piston Kit Contents:
- PDI651 - Omega Spring: A crucial spring component that facilitates the mechanical action of the piston, ensuring proper movement and return.
- PDI649 - Connecting Rod: Connects various internal piston components, transmitting motion and force within the dosing mechanism.
- PDI648 - Push Rod Seal: A seal specifically designed for the push rod, preventing fluid bypass and maintaining pressure within the piston assembly.
- PDI643 - Upper Flange: A structural component that helps secure and guide the piston assembly within the injector body.
- PDI644 - Lower Flange: Similar to the upper flange, this component supports and guides the lower part of the piston assembly.
Part 2 - Seal Kit Contents:
- PJDI140 - Check Valve Assembly: A complete assembly that ensures one-way flow of the concentrate, preventing backflow into the concentrate container and maintaining prime.
- JDI120 - Injection Stem O-Ring: A critical O-ring that seals the injection stem, preventing leaks where the concentrate is introduced into the water line.
- JDI100 - Injection Sleeve O-Ring: Another essential O-ring that seals the injection sleeve, contributing to the overall integrity of the dosing system.
- PJDI138 - Plunger With Seal: The plunger, complete with its seal, is responsible for drawing concentrate into the injector and injecting it into the water flow. A proper seal on the plunger is vital for accurate dosing.
The kit is compatible with Dosatron D14MZ3000 models, identified by part numbers such as MKD14MZ3000AF, MKD14MZ3000K, and MKD14MZ3000VF.
Usage Features (Rebuilding Process):
The rebuild process involves a series of steps to disassemble the existing piston and seal components, replace them with new parts from the kit, and reassemble the injector. The manual provides clear, step-by-step instructions with accompanying images to guide the user through the process.
Part 1: Piston Kit Instructions
- Piston Removal: Begin by unscrewing and removing the bell housing, then pulling the piston out of the injector body.
- Plunger Removal: Use needle nose pliers to twist and remove the plunger counter-clockwise.
- Flange Removal: Locate the small notch inside the black piston shell where the flange locks. Apply pressure to the flange on either side of the notch and twist counter-clockwise to remove the upper flange.
- Lower Flange Removal: Flip the piston upside down and repeat the flange removal process for the lower flange.
- Motor and Valve Support Assembly Removal: Use a flat head screwdriver to remove the upper valves from the guide, allowing the motor and valve support assembly to be lifted out of the piston shell.
- Subassembly Separation: Grasp the top of the white plastic parts of the mechanism and lift straight up to separate the push rod and valve support frame subassemblies.
- Push Rod Disassembly: Remove the connecting rod from the Omega spring.
- Omega Spring Replacement: Twist to remove the old Omega spring and install the new PDI651 Omega Spring by carefully pushing it into the push rod.
- Connecting Rod Installation: Slide the other end of the Omega spring into the new PDI649 Connecting Rod, ensuring the curved top of the push rod faces the same direction as the Omega spring.
- Push Rod Seal Replacement: Remove the old PDI648 Push Rod Seal by grasping and turning counter-clockwise. Slide the new seal onto the push rod and twist a quarter turn clockwise to lock.
- Upper Flange Installation: Install the new PDI643 Upper Flange by aligning its small tooth with the notch on the piston shell. Press down and twist a quarter turn clockwise to lock.
- Lower Flange Installation: Install the new PDI644 Lower Flange in the same manner.
- Valve Support Frame and Push Rod Reinstallation: Align the valve support frame with the four holes in the piston shell grooves and the push rod assembly with the single hole, ensuring the curved top faces inward. Push on the spring until it clicks into place.
- Upper Valves Installation: Insert the upper valves into the bottom of the upper area, snapping them into the valve support frame.
- Piston Test: Test the piston by pulling the push rod up and pressing it down a few times; it should click in both directions.
Part 2: Seal Kit Instructions
- Suction Hose Removal: Unscrew the suction hose nut and remove the suction hose.
- Injection Stem Nut Removal: Unscrew the injection stem nut.
- Injection Stem Removal: Pull the injection stem straight out from the body of the injector.
- Check Valve Nut Removal: Unscrew and remove the check valve nut.
- Check Valve Assembly Removal: Grab the barb and pull the check valve assembly straight out. Discard all old check valve parts.
- Lock Nut Removal: Unscrew and remove the lock nut.
- C Clamp Removal: Spread the opening of the C clamp and slide it down over the threads to remove it.
- Adjusting Nut Removal: Unscrew and remove the adjusting nut.
- Injection Stem Removal from Sleeve: Push the white injection stem up and out of the black sleeve.
- Injection Stem O-Ring Replacement: Remove and replace the JDI120 Injection Stem O-Ring.
- Injection Sleeve O-Ring Replacement: Remove and replace the JDI100 Injection Sleeve O-Ring.
- Injection Stem Reinstallation: Align the groove in the white stem with the tooth inside the lower portion of the black sleeve and slide the stem down as far as possible.
- Adjusting Nut Reinstallation: Thread the adjusting nut back onto the black sleeve.
- C Clamp Reinstallation: Replace the C clamp by sliding it over the threads and rotating until it clicks into place.
- Lock Nut Reinstallation: Thread on the lock nut and hand tighten.
- Check Valve Assembly Installation: Install the new PJDI140 Check Valve Assembly into the stem, ensuring it is in the correct position.
- Check Valve Nut Reinstallation: Reinstall the check valve nut.
- Plunger with Seal Reinstallation: Reinstall the new PJDI138 Plunger with Seal into the bottom of the piston shell. Use needle nose pliers to twist the plunger a quarter turn clockwise to lock.
- Piston Reinstallation: Carefully press the piston back into the injector and install the bell housing.
- Plunger into Injection Stem Assembly: Carefully insert the plunger into the injection stem assembly, taking care not to bend the plunger.
- Body Alignment: Align the notches in the lower part of the blue body with the teeth on the top of the injection stem assembly. Ensure the preferred scale is facing out. If not, loosen the stem nut, remove, pull the stem down slightly, rotate 180 degrees, and push it back up.
- Nut Reinstallation: Reinstall the nut hand tight.
- Suction Hose Preparation: Before installing the suction hose, slide the ferrule back onto the hose and cut a half inch off the top of the hose.
- Ferrule Repositioning: Reposition the ferrule as shown.
- Hose Installation: Insert the hose onto the barb.
- Hose Nut Tightening: Hand tighten the hose nut.
- Hose Connection Check: After tightening, pull on the hose to ensure it is securely connected. If it comes off easily, cut another half inch off and reattach.
Maintenance Features:
- Genuine Parts: The kit contains genuine Dosatron parts, ensuring compatibility, quality, and optimal performance with your D14MZ3000 injector.
- Cost-Effective Repair: Instead of purchasing a new injector, this kit allows for the repair and refurbishment of existing units, saving costs.
- Extended Lifespan: Regular replacement of wear parts with this kit significantly extends the operational life of the Dosatron injector.
- Detailed Instructions: The manual provides comprehensive, illustrated instructions, making the rebuilding process manageable for users.
- Safety Precaution: Users are reminded to wear proper protection (gloves, eyewear, apron) when performing maintenance.
- Video Support: QR codes and a URL are provided for accessing D14MZ3000 Piston Video and Troubleshooting Video, offering visual guidance for the rebuilding process.
- Customer Support: Contact information (phone numbers and website for chat) is provided for additional support.
This rebuild kit is an essential tool for any Dosatron D14MZ3000 owner looking to maintain their equipment, ensure accurate dosing, and maximize their investment.