The Dosatron Rebuild Kit, Part #: MKD14MZ2VF, is designed to extend the life of your Dosatron D14MZ2VFII water-powered dosing injector by providing essential replacement parts for both the piston and seal components. This kit allows users to perform maintenance and restore optimal functionality to their Dosatron injector, ensuring continued accurate dosing without the need for a full unit replacement.
Function Description:
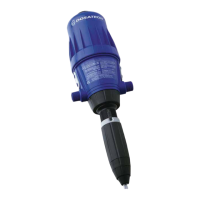
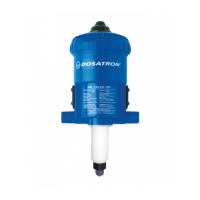
The Dosatron D14MZ2VFII is a water-powered proportional dosing pump that injects a precise amount of concentrate into a water line, regardless of variations in water flow or pressure. It operates without electricity, using the water flow as its power source. The rebuild kit addresses wear and tear on critical internal components, which can affect the injector's accuracy and reliability over time. By replacing these parts, the kit helps maintain the injector's ability to accurately draw and inject concentrates, ensuring consistent dosing for various applications such as horticulture, livestock, water treatment, and vehicle wash.
Important Technical Specifications (Kit Components):
The MKD14MZ2VF Rebuild Kit is comprehensive, divided into two main parts:
Part 1: Piston Kit
This section includes components crucial for the mechanical operation of the piston, which is responsible for the volumetric measurement and movement of water and concentrate.
- PDI651 - Omega Spring: A critical spring component that provides tension and allows for the proper movement and return of the piston mechanism.
- PDI649 - Connecting Rod: Connects different parts of the piston assembly, facilitating the transfer of motion.
- PDI648 - Push Rod Seal: Ensures a tight seal around the push rod, preventing leaks and maintaining pressure within the system.
- PDI643 - Upper Flange: A structural component that helps secure the piston assembly within the injector body.
- PDI644 - Lower Flange: Similar to the upper flange, it provides structural support and helps contain the piston components.
Part 2: Seal Kit
This section focuses on the sealing elements that prevent leaks and ensure the proper functioning of the injection and check valve systems.
- PJDI115 - Check Valve Assembly: A complete assembly that prevents backflow of injected concentrate into the water line and ensures one-way flow.
- JDI120 - Injection Stem O-Ring: A rubber O-ring that seals the injection stem, preventing leaks of concentrate.
- JDI100 - Injection Sleeve O-Ring: Seals the injection sleeve, maintaining the integrity of the concentrate injection pathway.
- J009 - Plunger Seal: Seals the plunger, which is responsible for drawing and injecting the concentrate, ensuring accurate volumetric displacement.
Usage Features (Maintenance and Installation):
The Dosatron Rebuild Kit is designed for user-friendly installation, allowing individuals to perform maintenance on their D14MZ2VFII injector. The manual provides detailed, step-by-step instructions with accompanying images for both the Piston Kit and Seal Kit installation.
Part 1: Piston Kit Instructions
- Disassembly: Begin by removing the piston from the Dosatron injector, unscrewing the bell housing, and pulling the piston out. The plunger is then removed by twisting it counter-clockwise.
- Flange Removal: The upper and lower flanges are removed by locating a small notch inside the piston shell and applying pressure while twisting counter-clockwise.
- Motor and Valve Support Assembly Removal: A flat head screwdriver is used to remove the upper valves from the guide, allowing the motor and valve support assembly to be lifted out.
- Push Rod Disassembly: The connecting rod is removed from the Omega spring to disassemble the push rod.
- Component Replacement: The old Omega spring is twisted out and replaced with the new PDI651 Omega Spring, ensuring it's carefully pushed into the push rod. The new PDI649 Connecting Rod is then slid onto the Omega spring, aligning its curved top with the Omega spring. The old Push Rod Seal is removed by grasping and turning counter-clockwise, and the new PDI648 Push Rod Seal is slid on and twisted clockwise to lock.
- Flange Reinstallation: The new PDI643 Upper Flange is installed by aligning its small tooth with the notch on the piston shell, pressing down, and twisting clockwise to lock. The new PDI644 Lower Flange is installed similarly.
- Reassembly of Internal Components: The valve support frame and push rod are inserted into the piston shell, aligning the valve support frame with four holes and the push rod with a single hole. The connecting rod should drop into the notches. The upper valves are then snapped into the valve support frame.
- Testing: The piston is tested by pulling the push rod up and pressing it down several times; it should click in both directions.
- Final Assembly: The plunger is reinstalled into the piston shell and twisted clockwise to lock. The piston is then carefully pressed back into the injector, and the bell housing is installed.
Part 2: Seal Kit Instructions
- Suction Hose and Injection Stem Removal: Unscrew and remove the suction hose nut and hose. Then, unscrew the injection stem nut and pull the injection stem straight out from the injector body.
- Check Valve Removal: Unscrew and remove the check valve nut. The old check valve assembly is then grabbed by the barb, pulled straight out, and discarded.
- Lock Nut and Adjusting Nut Removal: Unscrew and remove the lock nut, followed by the adjusting nut.
- Injection Stem Removal from Sleeve: Push the white injection stem up and out of the black sleeve.
- O-Ring Replacement: The old JDI120 Injection Stem O-Ring is removed and replaced. Similarly, the old JDI100 Injection Sleeve O-Ring is removed and replaced.
- Reassembly of Injection Stem: Align the groove in the white stem with the tooth inside the lower portion of the black sleeve and slide the stem down as far as possible.
- Nut Reinstallation: Thread the adjusting nut back onto the black sleeve. Replace the C clamp by sliding it over the threads and rotating until it clicks into place. Thread on the lock nut and hand tighten.
- Check Valve Reinstallation: Install the new PJDI115 Check Valve Assembly into the stem. Reinstall the check valve nut.
- Plunger Seal Replacement: Set the stem aside. Pick up the blue body, remove the old J009 Plunger Seal by pinching and rolling it off, and install the new plunger seal into the groove.
- Final Assembly and Adjustment: Align the notches in the lower part of the blue body with the teeth on the top of the injection stem assembly. Reinstall the nut hand tight. If the scale is not facing out, loosen the stem nut, rotate 180 degrees, and push it back up.
- Suction Hose Reinstallation: Inspect the suction hose; if it flares out, cut an inch or so off. If cracked or rigid, replace it. Thread the suction hose nut onto the hose, slide the hose onto the barb, and reattach the hose nut.
Maintenance Features:
- Proactive Maintenance: The kit enables proactive maintenance, preventing potential failures and extending the overall lifespan of the Dosatron injector.
- Cost-Effective: Replacing specific worn parts with the rebuild kit is more cost-effective than purchasing a brand-new injector.
- Genuine Parts: The kit contains "GENUINE DOSATRON PARTS," ensuring compatibility, quality, and optimal performance with the D14MZ2VFII model.
- Safety Recommendation: Users are advised to wear proper protection (gloves, eyewear, and apron) when performing maintenance.
- Support Resources: Dosatron provides video instructions via QR codes and a website link (www.dosatronusa.com/d14mz2/) for visual guidance on both piston and seal kit installations and troubleshooting. Customer support is available via phone (800-523-8499 or 727-443-5404) and online chat (www.dosatronusa.com).
This rebuild kit is an essential tool for maintaining the efficiency and longevity of Dosatron D14MZ2VFII injectors, ensuring continued reliable performance in various dosing applications.