Maintenance & Repair (cont’d)
CAUTION:
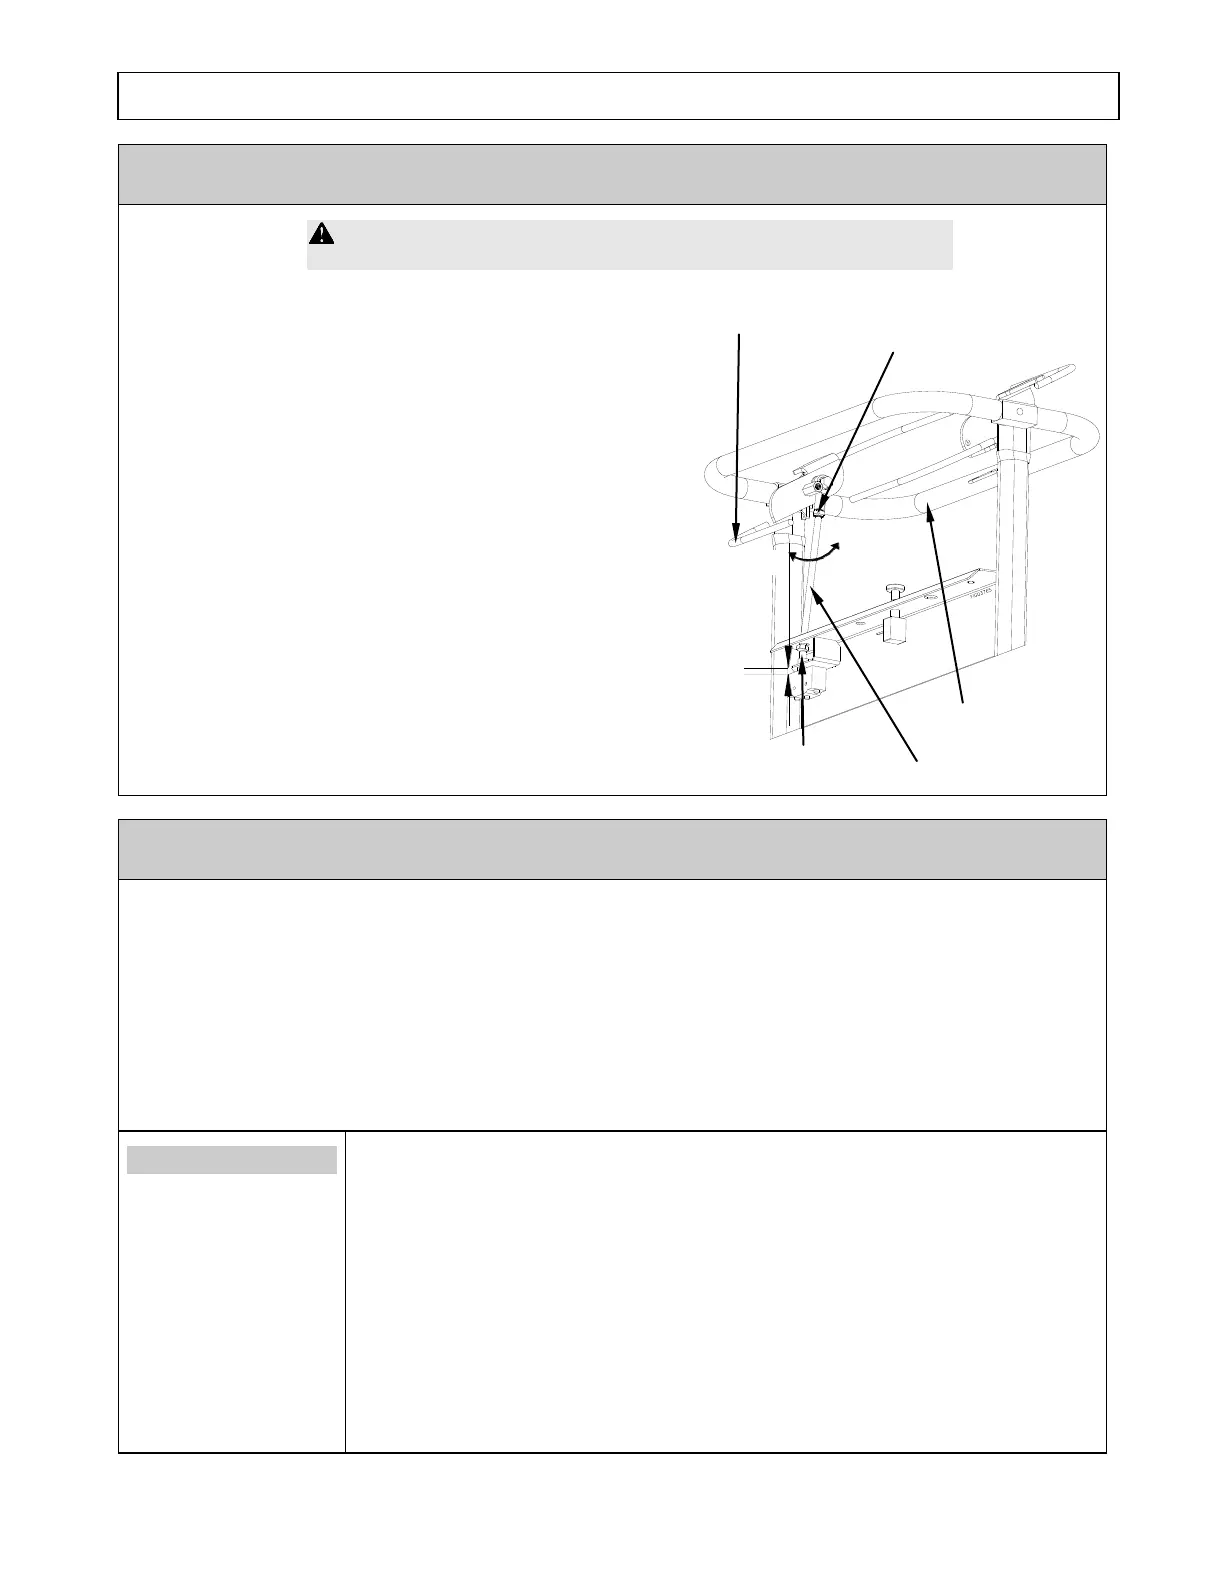
Never attempt to alter, modify or override this switch.
If Stop-switch ever needs to be replaced or adjusted follow the below directions.
1. Loosen Hex Nut.
2. Turn the Linkage Bolt clockwise to lower or
counter-clockwise to raise the point of
interaction with Stop Switch. To set the proper
interaction distance, grip the Operator
Presence Bar & Handle Bar together and
lower the Linkage Bolt onto the Switch Button
until the switch button cannot be depressed
any further. Then raise the linkage bolt one
turn (counterclockwise).
3. Tighten Hex Nut.
4. Verify operability of stop switch before
operating machine by releasing the operator
presence bar next to the handle bar. You
should hear a “CLICK”, signifying that the
Linkage Bolt has been adjusted properly.
Among the most critical elements of the stump grinder is the cutting blade. It is also the most
subject to damage and wear. In the course of grinding stumps it not only makes contact with the
wood, but also encounters numerous abrasives and objects in the stump’s environment, such as dirt,
stones, large rocks and buried scrap.
The loss and wear of cutting teeth can significantly impair the efficiency and performance of the
stump grinder. Therefore, it is important to make frequent inspections of the condition of all the
cutting teeth and to sharpen or replace any damaged or worn teeth. Sharpening the teeth before
excessive wear will result in longer lasting teeth and better performance.
Installing pockets
1. Locate the straight teeth and pockets on your wheel.
2. Remove one set of straight teeth and pockets.
3. Clean this area with a wire brush.
4. Start with a counterbored pocket. Counterbored pockets have non-threaded big
holes. They go on the right-hand side of the wheel as you face the wheel.
Install two low-pro pocket bolts into the counterbored pocket holes.
5. Apply anti-seize onto the threaded position of the low-pro pocket bolt.
6. Slide the counterbored pocket and low-pro pocket bolts through the holes in
the wheel from the right side and thread them into the threaded holes in the
threaded pocket. Firm up the low-pro pocket bolts until pockets are firm on the