US03 US04
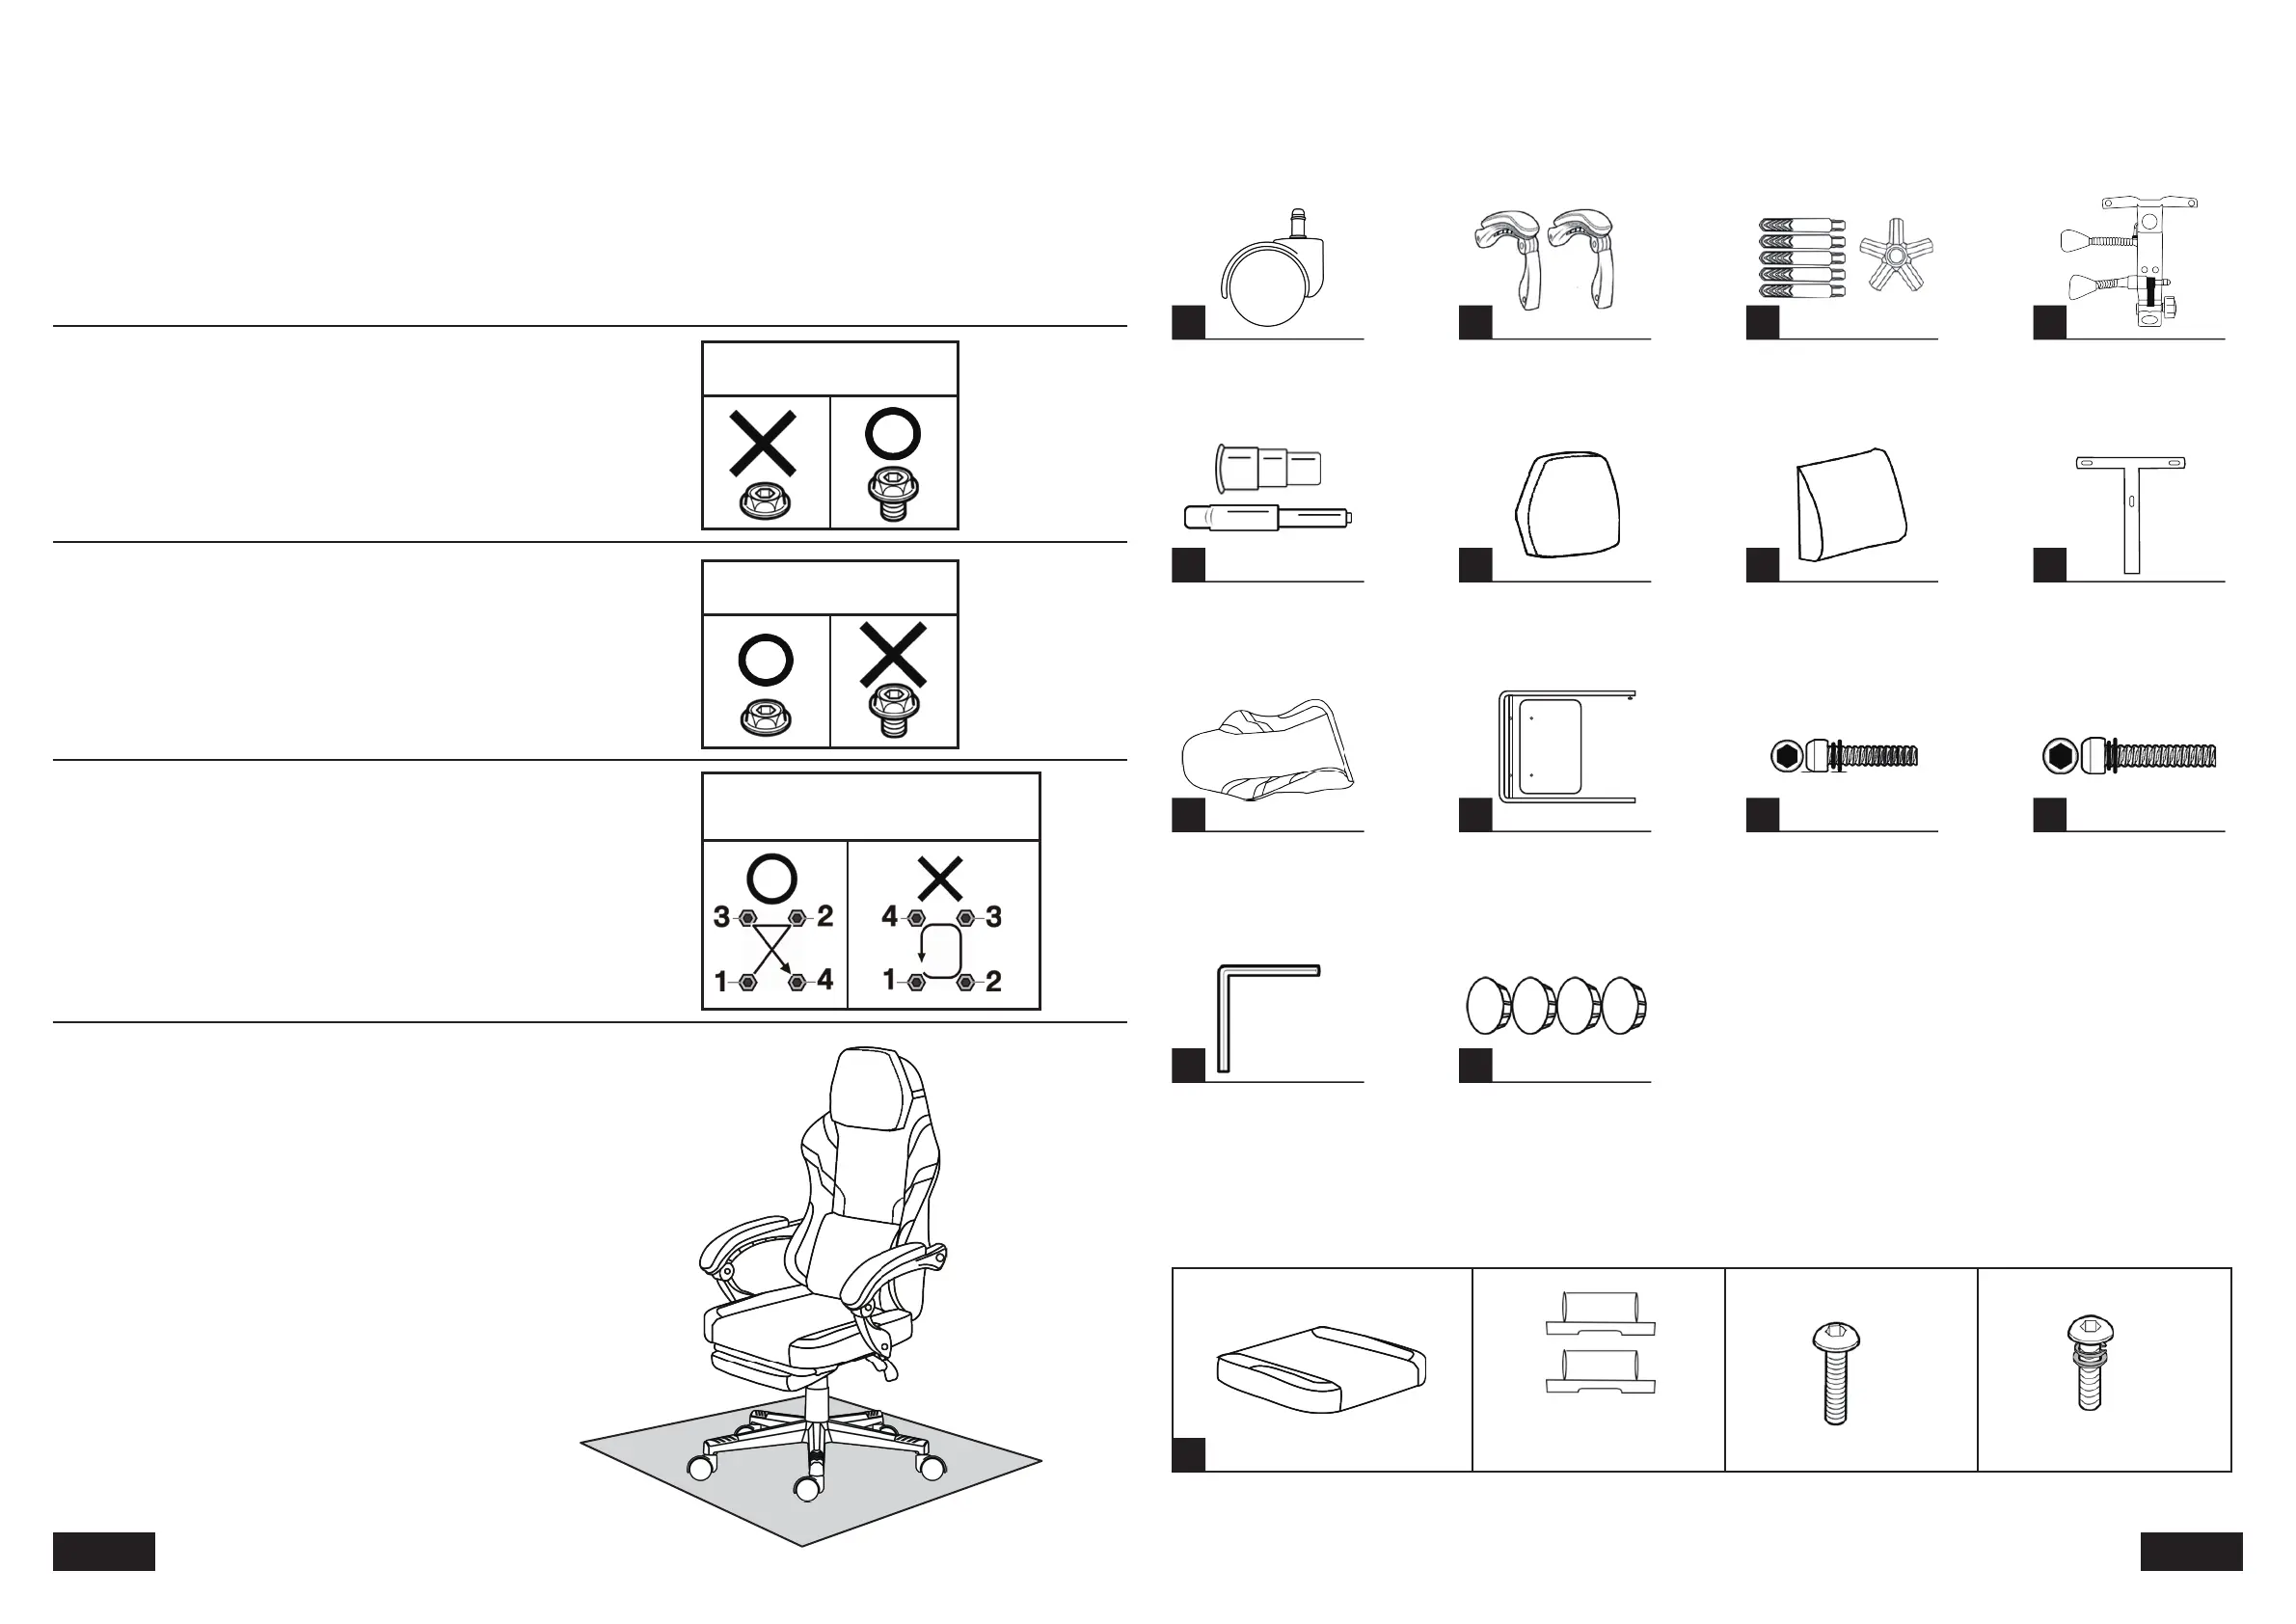
Do not tighten the screws from the beginning
● Tighten all the screws only in halfway at the beginning of the assembly, otherwise the
screws might not be aligned with the screw holes and cause further distortion of the chair.
How to tighten screws
Point of Assembly
Please lay the carpet
To protect the floor, place a rug under the unit as
shown in the illustration.
・Thick cloth
・Packing cardboard, e
tc.
1 Temporarily tighten all screws to 80%
Temporarily tighten
all screws to 80%
⚠
2 Finally, tighten all the screws firmly.
⚠
Tighten all the
screws firmly
How to tighten the diagonal screws
① Install the first screw into any hole and then install the second
screw diagonally.
② Install the remaining screws.
Refer to the following order for the
screws on the opposite angle.
Parts Checking
A
X5
Caster
B
X2
Armrest (L&R) Base(1&2)
C
X1
D
X1
Tilt Mechanism
E
X1
Cylinder & Cover
F
X1
Headrest Lumbar Pillow
G
X1
H
X1
T-shaped Metal
Rod
I
X1
Backrest
16
J
X1
Footrest Backrest Screws
M6*35
K
X3
L
X4
Armrest Screws
M8*40
M
X1
Allen Key
N
X4
Armrest Lid
P
X1
Cushion
※The cushion screws are already pre-installed so they won’t be lost in transit.J footrest
screws have been pre-installed on the footrest and steel pipe respectively
※In case of missing accessories or defective products, please contact our customer service.
②M6*25MM
X4
Tilt Mechanism Screws(Pre-installed)
①M6*30MM
Guide Rail Screws(Pre-installed)
X4
Guide Rail(Pre-installed)
 Loading...