DR
®
TRIMMER/MOWER
™
Assembly & Operating Instructions12
Using the Parallel Trimming Action (PTA
™
) Feature
The DR
®
TRIMMER/MOWER'S PTA
™
Feature allows the machine to move in a
straight line while the trimmer head is
both pivoted and tilted for better access to
fence lines and other obstacles (Figure
19). This feature allows you to trim in
difficult areas without having to pull the
machine back and forth.
The cutting cords extend beyond the wheel
base when in the PTA
™
mode, which
allows you to easily cut under obstacles.
The trimmer head and the cutting cords
also tilt slightly when in the PTA
™
mode
so you can edge and trim along gardens,
paths and driveways.
Note: Use caution when edging along
gravel paths and driveways. Flying debris
can cause serious damage.
When using your PTA
™
along garden
edges, fences, and buildings, we
recommend making your first pass with
the DR
®
TRIMMER/ MOWER
™
in the
regular mowing position, staying 4 to 8
inches from the obstacle. Then, return for
another pass with the machine cutting in
the left or right PTA
™
mode.
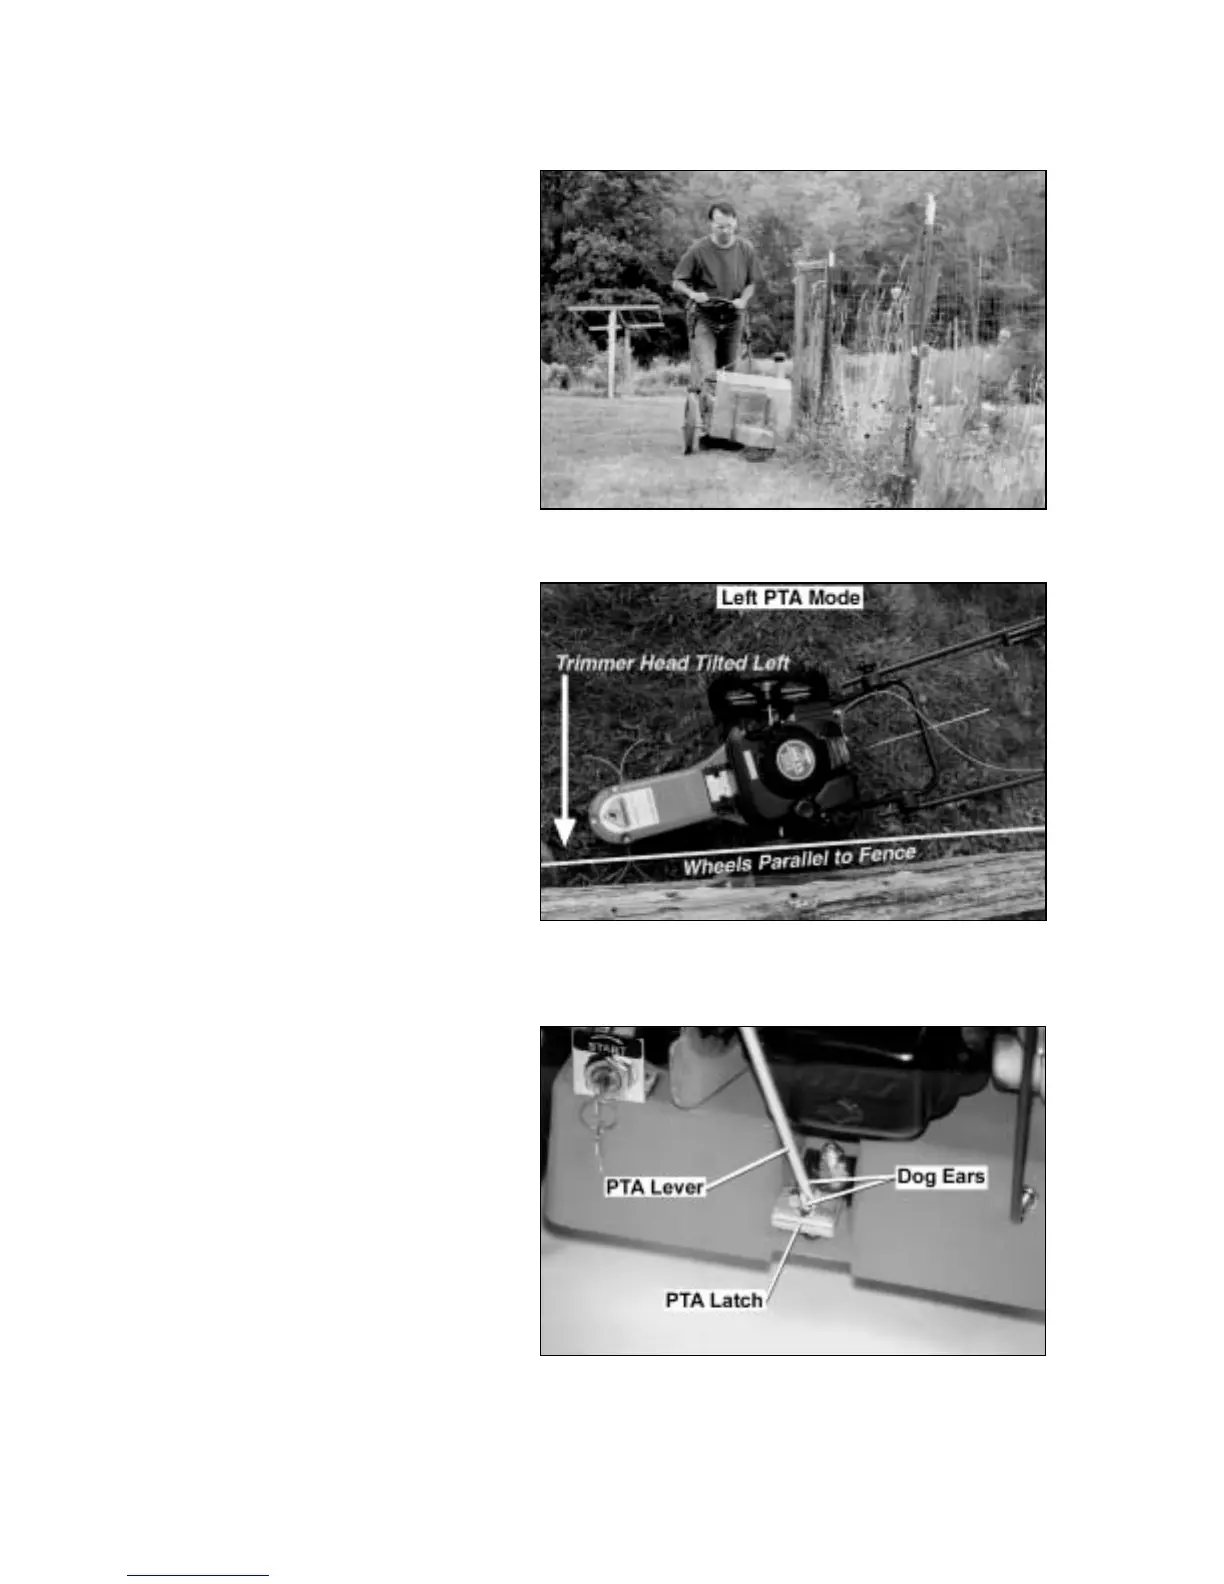
To Engage Parallel Trimming
Action
1. Pull up on the PTA
™
lever until you
see the two dog ears at the bottom of
the lever (Figure 21). You may need
to turn the lever to see them. This
unlocks the axle.
2. Turn the lever one quarter turn so the
dog ears rest on the PTA
™
latch
bracket at the base of the frame after
the lever is released (Figure 21).
3. Push down on the handlebar to tip the
nose of the machine off the ground
about six inches. By balancing the
weight of the machine on the wheels, it
is easier to pivot the front of the
trimmer to the left or right.
Figure 19
Figure 20
Figure 21