22 DR
®
SELF-FEEDING CHIPPER
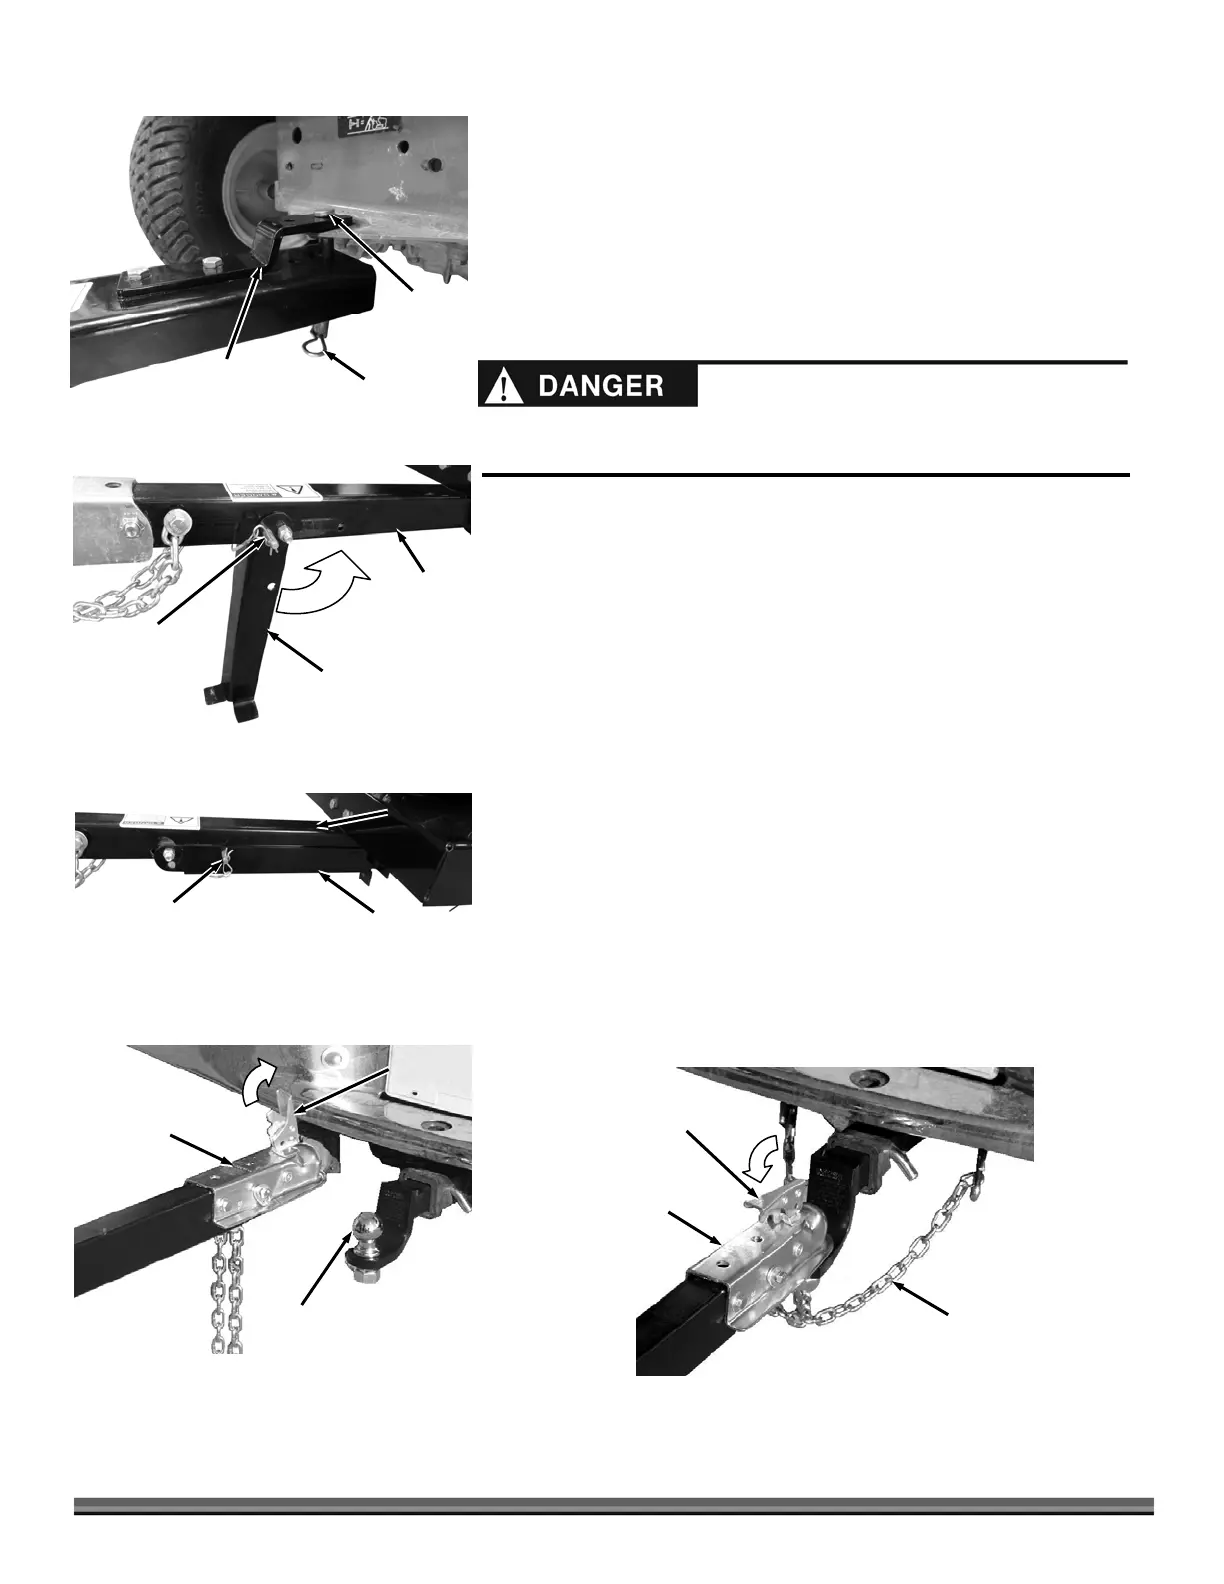
Figure 28
Tow Hitch
ssembly
Clevis Pin
Hitch Clip
Connecting the DR Chipper to your Tractor – Yard-Tow Models
1. Lift the Chipper Tow Bar onto the Tractor Hitch and install the Hitch
Pin and Hitch Clip to secure it (Figure 28).
2. Pull the Hitch Clip from the Pin and pull the Pin from the Support Leg
and Tow Bar (Figure 29).
3. Rotate the Support Leg to the up (transport) position, align the holes in
the Tow Bar and Leg, reinstall the Pin and secure with the Hitch Clip (Figure 30).
Connecting the DR Chipper to your Vehicle – Road-Tow Models
1. Pull the latch assembly on the Tow Hitch Assembly up and into the
open position. Position the hitch coupler of the Chipper over and onto the tow
vehicle’s tow ball (must be a 2" tow ball) (Figure 31).
2. Pull the Hitch Clip from the Pin and pull the Pin from the Support Leg
and Tow Bar (Figure 29).
3. Rotate the Support Leg to the up (transport) position, align the holes
in the Tow Bar and Leg, reinstall the Pin and secure with the Hitch Clip (Figure
30).
4. Close the Latch Assembly on the Tow Hitch Assembly to lock it onto
the Tow Ball (Figure 32). Attach the towing Safety Chains to the tow vehicle
ensuring there is enough slack for turning.
5. Insert the Locking Pin into the hole in the Latch Assembly.
Figure 30
Support Leg
Pin w/Hitch
Clip
Tow Bar
Tow Bar
Figure 29
Support Leg
Pin w/Hitch
Clip
Figure 32
Tow
Hitch
ssembly
Latch
ssembly
Safety
Chains
Figure 31
Tow
Hitch
ssembly
2" Tow Ball
Latch
ssembly
Avoid death or serious injury. Do not exceed 10 mph when towing the Yard-
Tow model. Never tow the Yard-Tow model over roads.
 Loading...