CONTACT US AT www.DRpower.com 13
Attaching the Hopper Assembly
Note: We recommend that you have someone help you lift the Hopper in place and
support it until it is secured to the Chipper.
Tools Needed:
Two 1/2" Wrenches
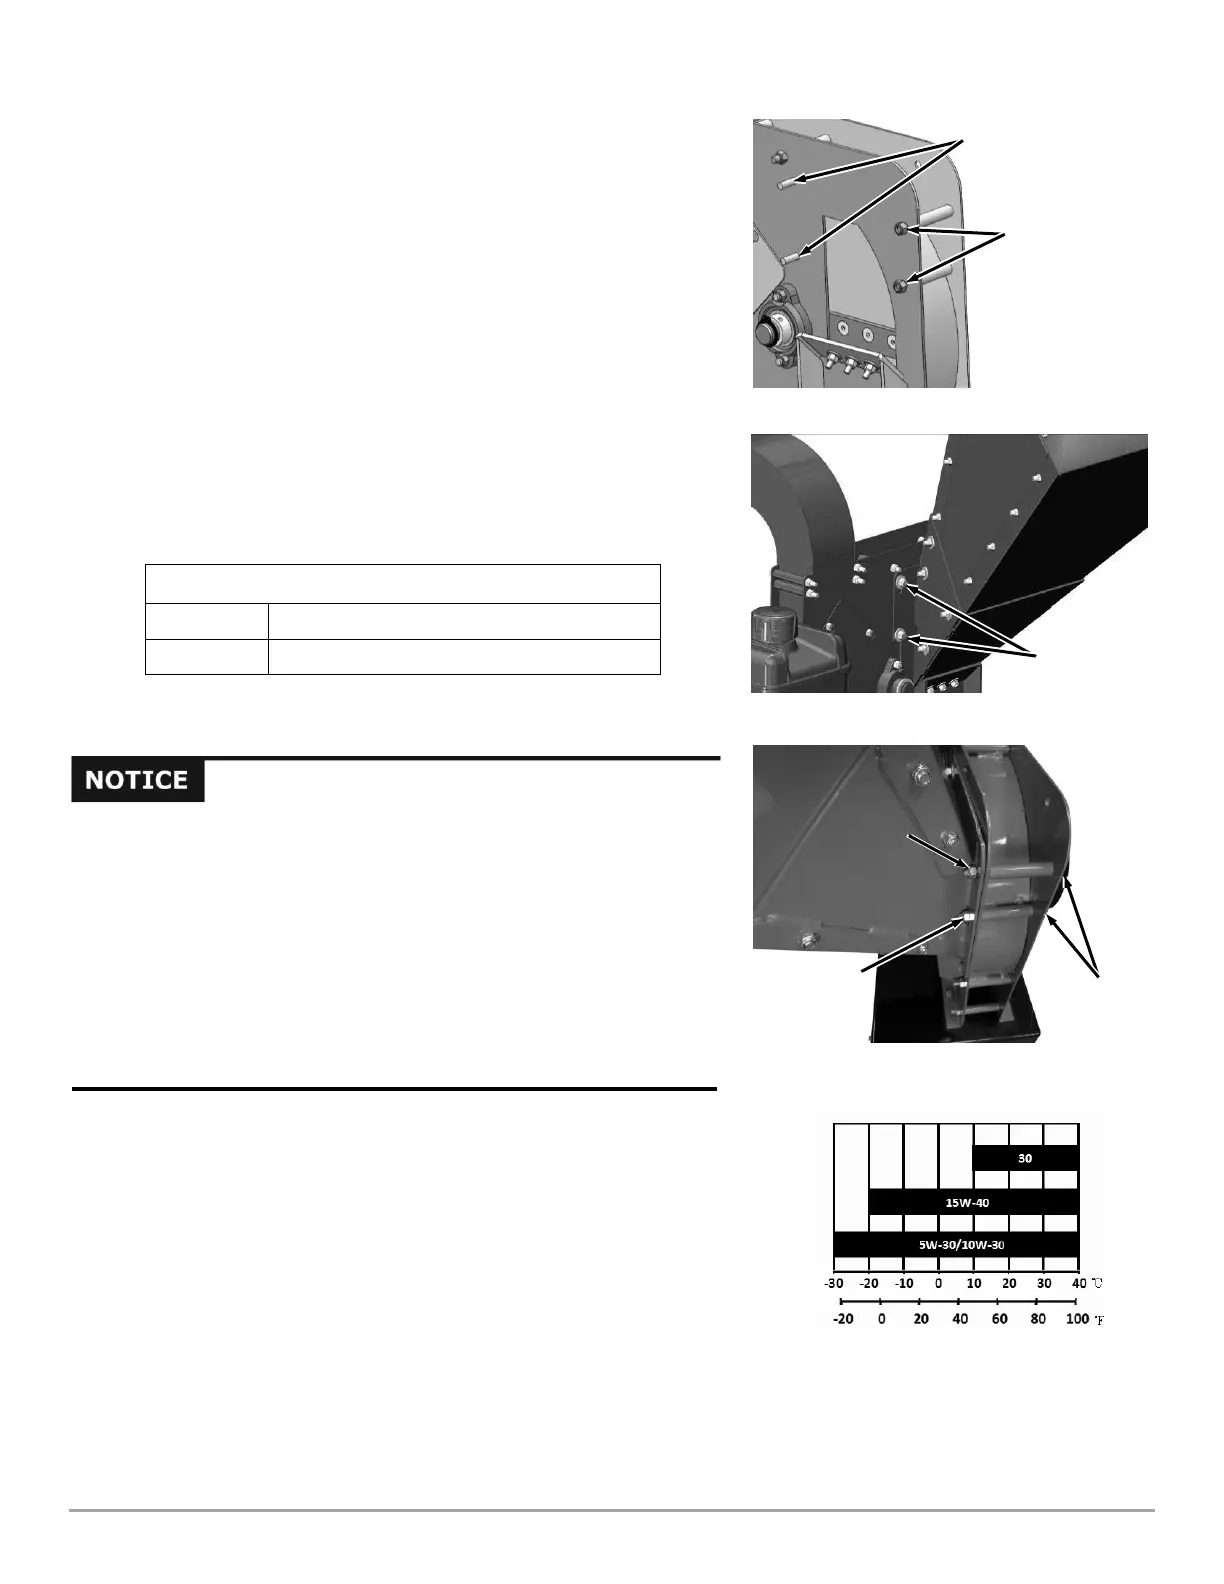
1. Remove the two shipping nuts, but leave the Housing Bolts loosely in place
(Figure 6). Discard the shipping Nuts.
2. Lift the Hopper Assembly into position and loosely attach a Washer and
Locknut to each of the two Housing Studs (Figure 7).
3. Push the two Housing Bolts through the Hopper assembly (Figure 8).
4. Loosely secure the top Bolt with a Locknut and a Washer. Loosely secure
the bottom Bolt with a Locknut.
5. Fully tighten the hardware installed in step 2 and 4.
Adding Engine Oil and Gasoline
1.2 qt. (1.1L) (see Table 1)
Unleaded gasoline, 1.4 gal (5.3 L)
Tip: To avoid confusion, we recommend leaving the caps on the gas and oil
fills until you are ready to pour either gasoline or oil into the correct fill.
Note: SAE 10W-30 is recommended for general use. Other viscosities shown in
Table 1 may be used when the average temperature in your area is within the
indicated range.
Shipping Nuts
on Housing Bolts
YOU MUST ADD OIL BEFORE STARTING THE ENGINE. This machine
is shipped without oil. Traces of oil may be in the reservoir from factory
testing, but you must add oil before starting the engine.
To get an accurate reading when checking the oil level:
- The machine should be on a level surface.
- The dipstick should be inserted but NOT SCREWED IN to ensure an
accurate oil level reading.
Use 4-stroke engine oil, API service classification SJ class or higher (such
as SL, SM or SN). Check the API service label on the oil container to be
sure it includes the letters SJ class or higher.
 Loading...


