CONTACT US AT www.DRpower.com 21
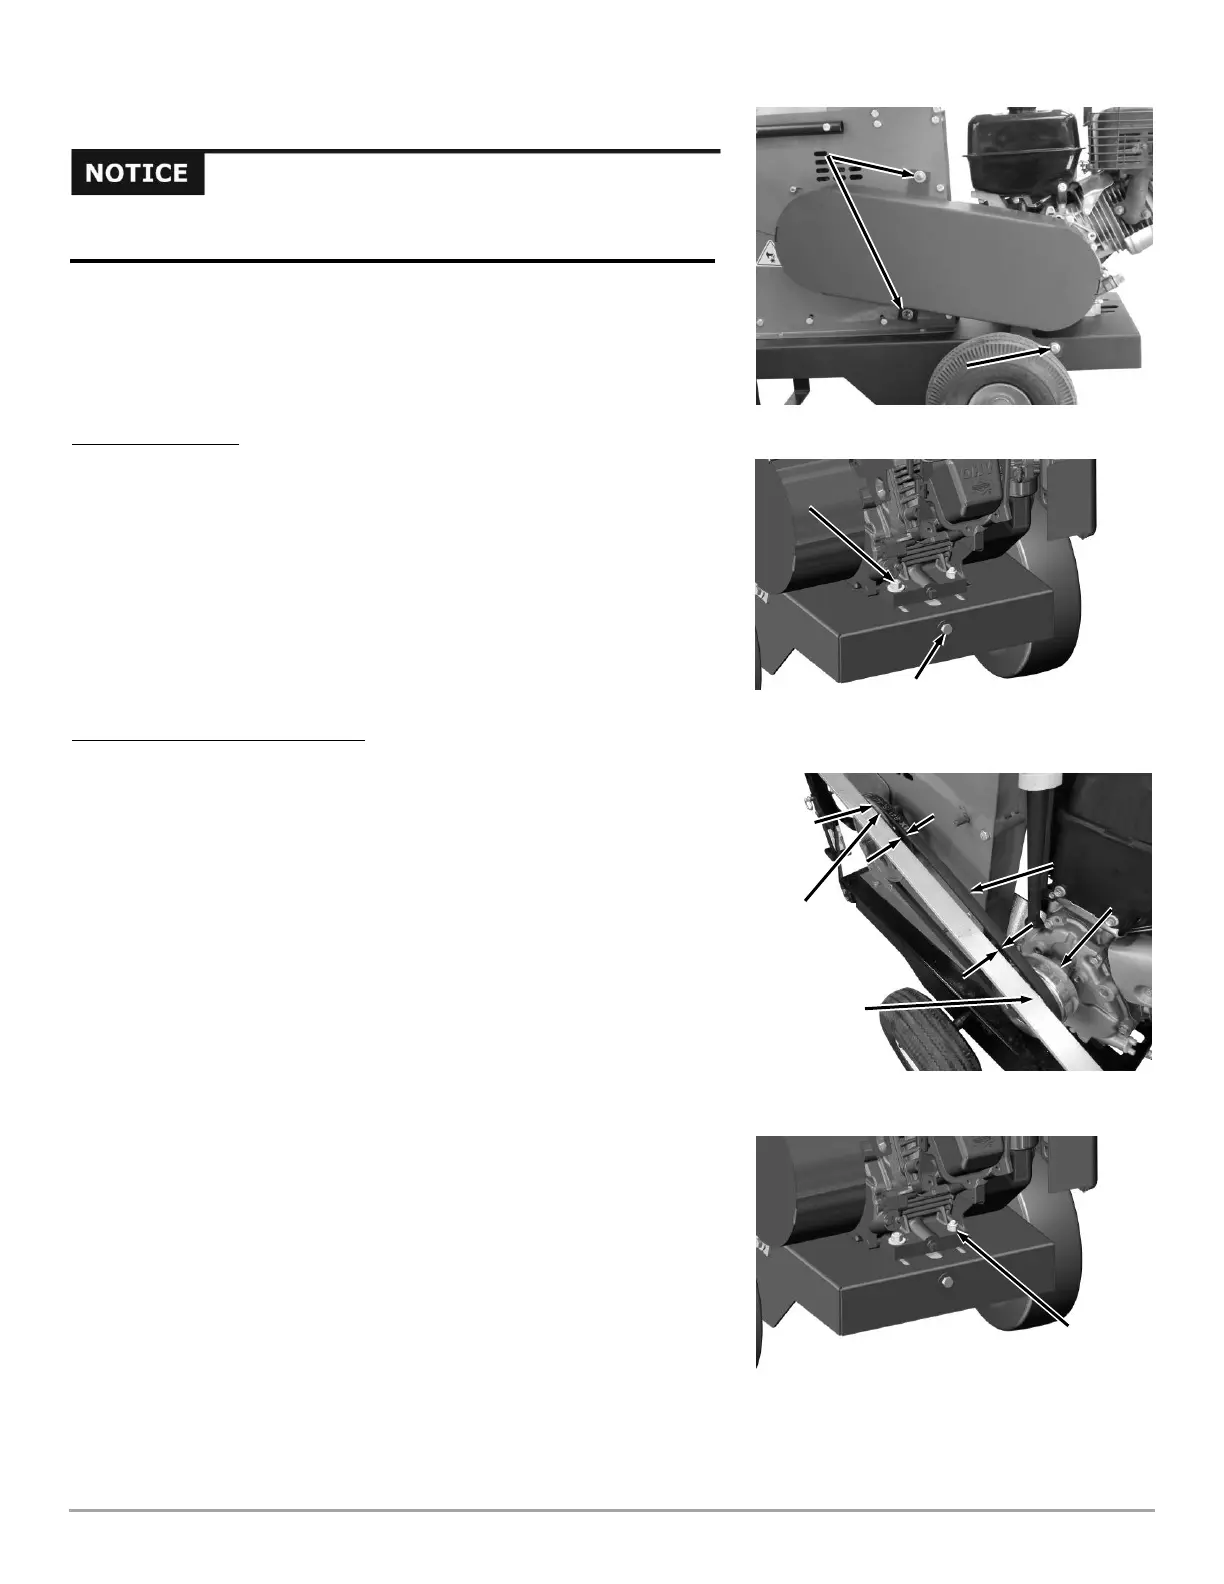
Belt Tensioner
Adjusting Bolt
Removing, Replacing and Adjusting the Drive Belt
Tools Needed:
Tape Measure
Two 1/2" Wrenches
1/8” Allen Wrench (if necessary)
Straightedge
Removing the Belt
1. Remove the Bolt, Washer and Locknut from the lower Belt Guard to Frame
mounting (Figure 23).
2. Remove the two Locknuts and Washers from the two Belt Guard to
Sideplate mounting locations.
3. Remove the Belt Guard.
4. Loosen the Engine mounting hardware (Figure 24).
5. Loosen the Adjusting Bolt on the Belt Tensioner enough to slide the Engine
forward until the belt is loose enough to remove.
6. Remove the Belt from the Clutch and Sheave.
Installing and Adjusting the Belt
Note: The Belt Tensioner Adjusting Bolt may need to be loosened up more per the
previous instructions, “Removing the Belt”, to enable you to install a new
Belt.
1. Install the Belt onto the Sheave and Clutch.
2. Tighten the Adjusting Bolt on the Belt Tensioner to take up the slack in the
Belt, but not too tight at this point (Figure 24).
3. Check the alignment of the Clutch with the Sheave by placing a Straightedge
against the Sheave outside face near, but not touching, the Clutch Pulley
(Figure 25).
4. Check the gap from the Straightedge to the Belt near the Sheave and near
the Clutch. If the gap is the same then no adjustment is needed. If the gap
is not the same then adjustment is necessary, correct the alignment as
follows:
a) Loosen the Engine hardware only at three places and leave the last
one tight so the Engine can be rotated to align the Clutch with the
Sheave (Figure 26).
b) Tighten the Engine hardware to hold it in position.
c) Recheck the alignment and perform step a) again as needed..
5. Tighten the Engine Hardware (Figure 24)
Straightedge
On side face
of Sheave
Straightedge
above Clutch
Pulley
Use only DR belts on your machine. The belts have been thoroughly tested
and proven for many hours of use.
 Loading...


