CONTACT US AT www.DRpower.com 23
Be careful and wear gloves when working near the chipper knife. The knife
edge can cut you if you come in contact with it.
3. If the Knife has visible nicks or damage it must be sharpened or replaced
(see “Removing and Replacing the Chipper Knife” in this chapter).
4. If the Knife does not appear to have any damage, replace the Access Cover
and tighten the Locknuts.
INSPECTING THE CHIPPER KNIFE AND WEAR PLATE
Tools Needed:
1/2" Wrench
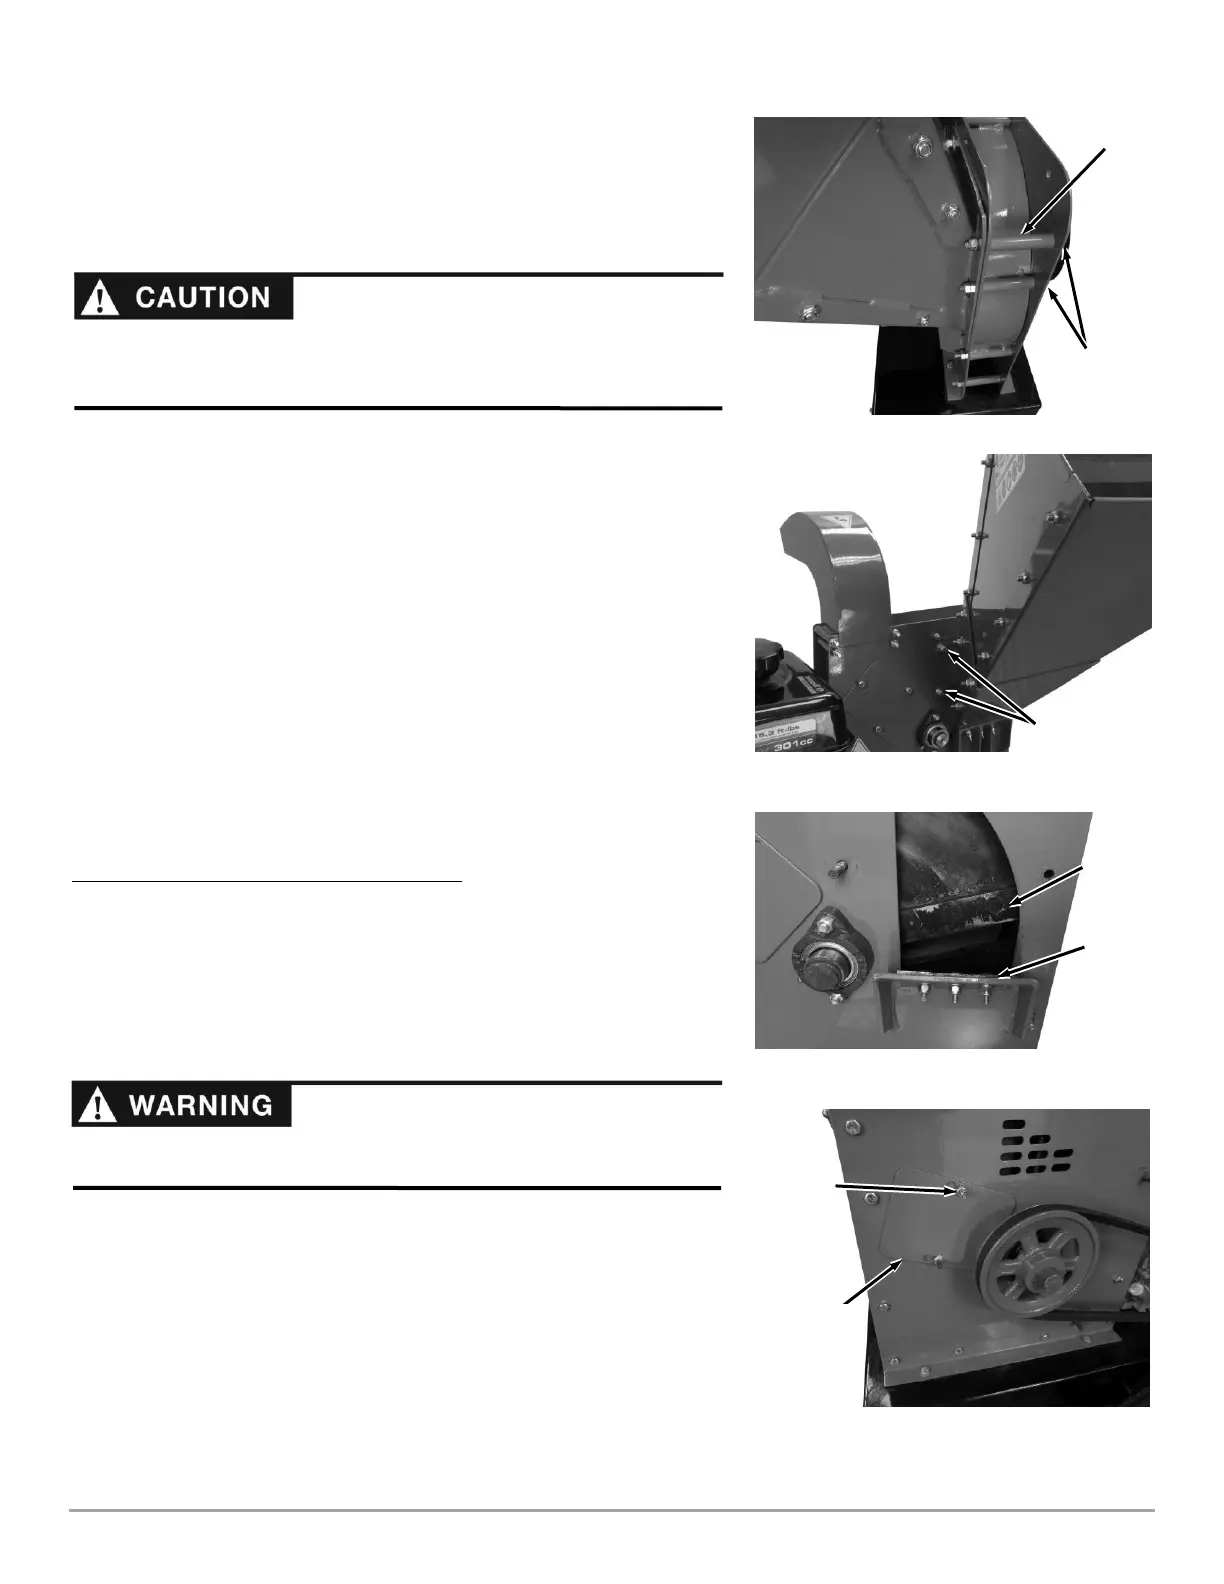
1. Remove the two front Locknuts from the Hopper Assembly but leave the
Bolts and Spacer in place (Figure 29).
2. Remove the two Locknuts and Washers at the rear side of the Hopper
(Figure 30).
3. Remove the Hopper Assembly.
4. Use a long stick to rotate the Flywheel until the Knife is next to the Wear
Plate (Figure 31).
5. Closely inspect the Chipper Knife and Wear Plate for nicks or dull (rounded)
edges.
6. If necessary, sharpen or replace the Chipper Knife and/or Wear Plate per the
procedures in the next section.
7. Reinstall the Hopper Assembly when finished.
Removing and Replacing the Chipper Knife
Tools and Supplies Needed:
7/16" Wrench
3/16” Allen wrench
Ratchet with 1/2" Socket
Awl or Sharp Tool
Gloves
1. Remove the Hopper Assembly as described in the previous section
“INSPECTING THE CHIPPER KNIFE AND WEAR PLATE”.
2. Remove the Belt Guard (see “Removing and Replacing the Drive Belt” in
this Chapter to remove the Belt Guard).
3. Loosen the Locknuts that secure the rear Access Cover, then slide the
Cover over and lift it off the Locknuts (Figure 32).
The hopper should be supported when the mounting hardware is removed.
Removal of the hopper is difficult for one person. Two people are needed for
the hopper removal process.
 Loading...


