16 DR
®
SELF-FEEDING WOOD CHIPPER
Adding Oil
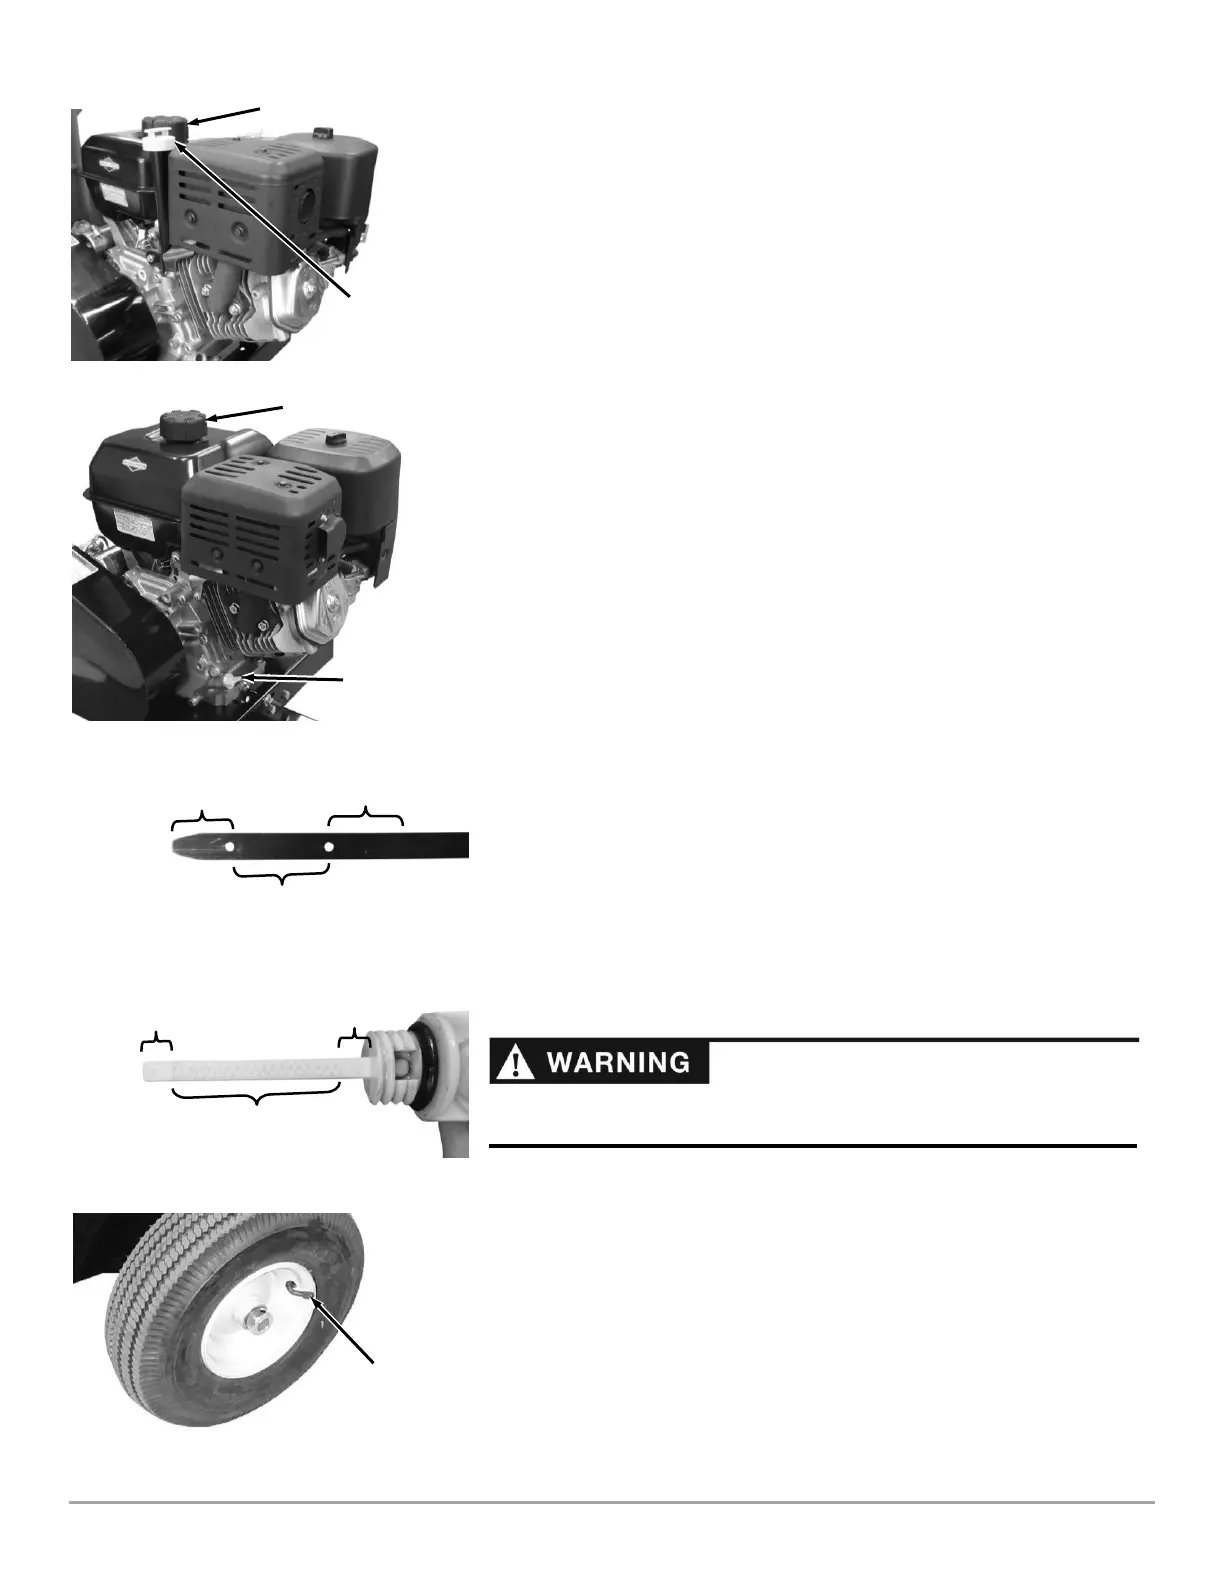
1. Place the machine on a level surface and remove the Dipstick (clean the
end of the Dipstick with a rag) (Figure 21a and 21b).
2. Machines are shipped with no oil. Add 1/2 of the SAE 30 high detergent oil
recommended by the engine manufacturer and wait one minute for the oil
to settle.
3.
Pro-475: Install the Dipstick fully and turn a quarter turn clockwise to ensure an
accurate reading and then remove it to check the oil level.
Pro XL-575: Insert the Dipstick, but do not screw in, to ensure an accurate
reading and then remove it to check the oil level.
4. If the oil level is low, continue adding a few ounces of oil at a time,
rechecking the Dipstick until the oil reaches the fill mark (Figure 22a and
22b). Be careful not to overfill.
5. Install the Dipstick completely when finished.
Adding Gas
1. Remove the Gas Fill Cap and fill the Gas Tank with fresh, unleaded gas
(with a minimum of 85 Octane) to approximately 1" to 1-1/2" below the top
of the fill neck to allow for fuel expansion (Figure 21a and 21b). Be careful
not to overfill and reinstall the Gas Fill Cap before starting the engine. See
your Engine Owner’s Manual for more detailed information.
Note: To refill the gas tank, turn the engine OFF and let the engine cool at least five
minutes before removing the gas fill cap.
Check the Tire Pressure
Tools Needed:
• Tire Pressure Gauge
• Air Compressor
1. Remove the Valve Stem Protective Cap and check the tire pressure with a
Tire Pressure Gauge (Figure 23).
2. If the pressure is too low, add air through the Valve Stem with an air hose.
3. Replace the Valve Stem Protective Cap when finished.
 Loading...


