CONTACT US AT www.DRPower.com 15
Adding Oil and Gasoline
Tip: To avoid confusion, we recommend leaving the caps on the Fuel and Oil Fills until you are ready to pour either gasoline or oil into
the correct Fill.
Note: Several different weights of Oil may be used in this Engine depending on your
operating temperatures. Please refer to your Engine Owner's Manual to view the
recommended Oil weight. The Engine Owner's Manual can be found in the Product
Pack shipped with this Machine.
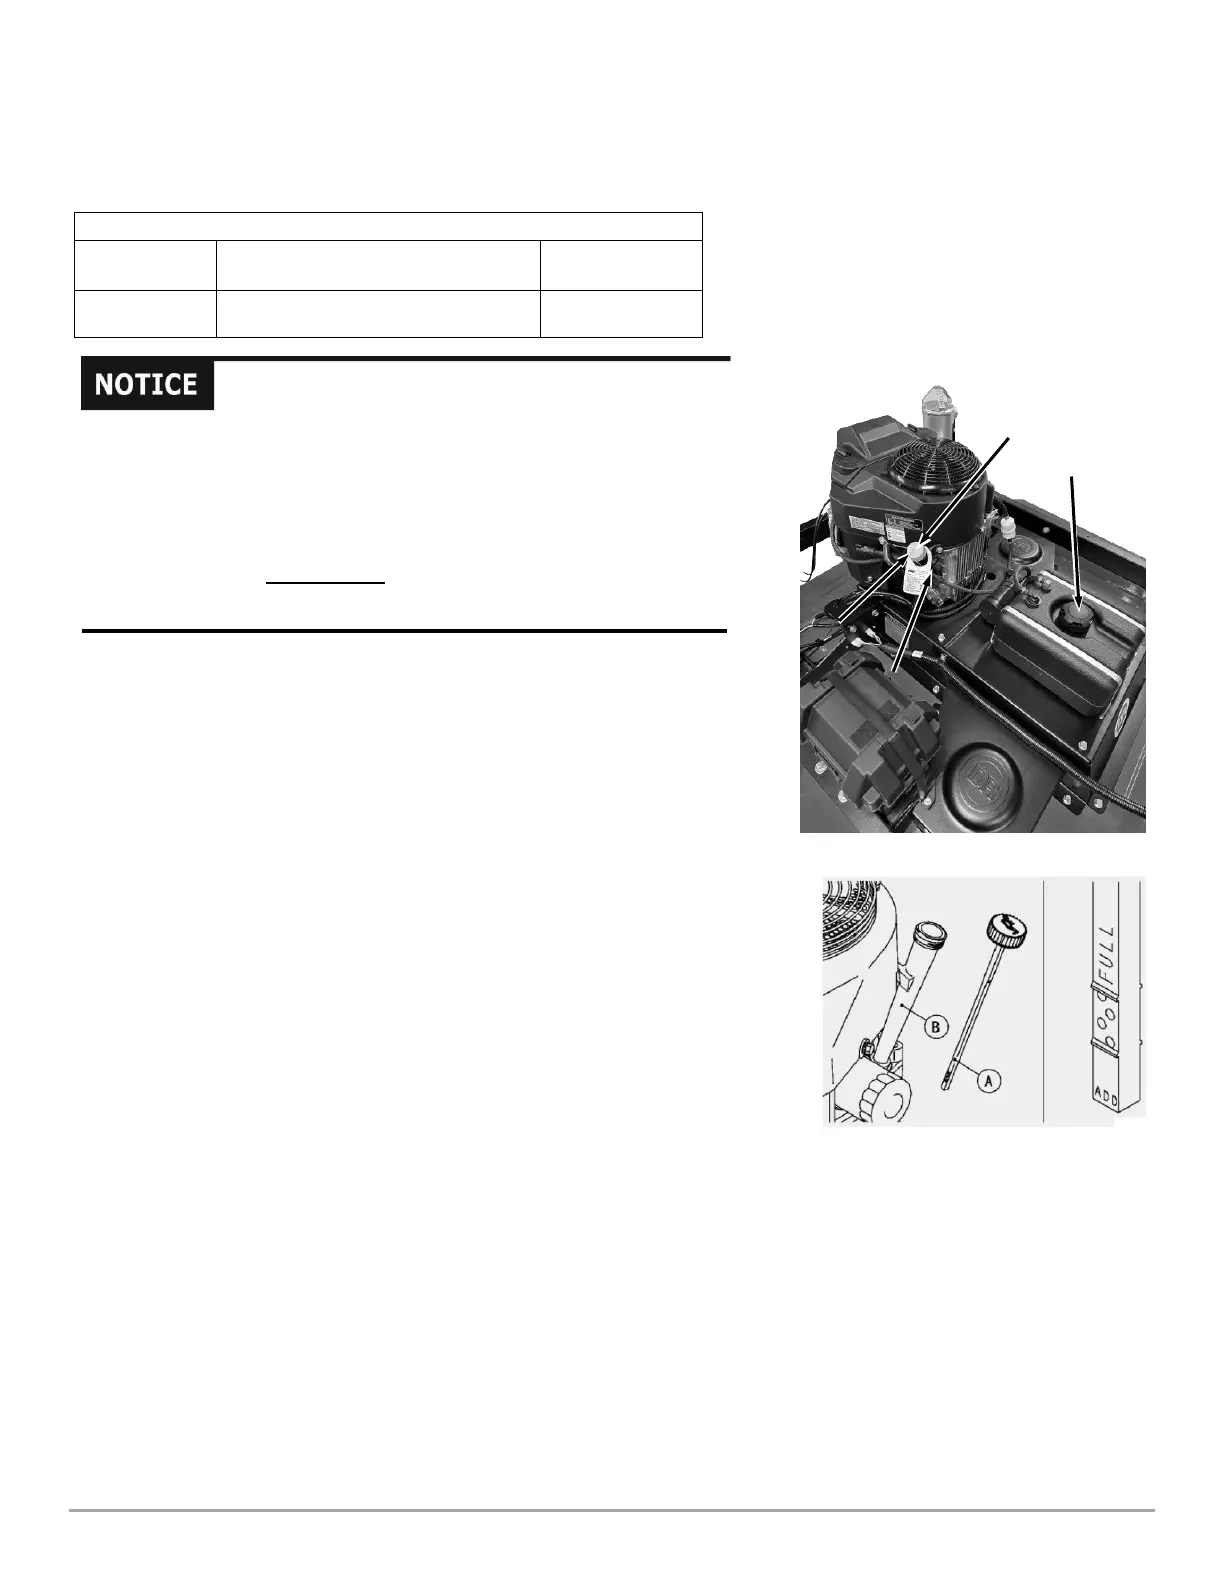
1. Place the machine on a level surface and remove the Oil Fill Cap/Dipstick
(Figure 19). Initially pour 32 oz of the Engine Manufacture's recommended Oil based
on operating temperature range (found in Engine Owner's Manual). This should be
about half the required Oil.
2. Remove the Oil Gauge (A) and wipe it with a clean cloth.
3. Continue to slowly pour an additional 32 oz of Oil, frequently checking the Oil Fill
Gauge by following the steps below.
4. Insert the Oil Gauge (A) into Tube (B), but do not screw it in.
5. Remove the oil gauge (A) to check the oil level. The level should be between “ADD”
and “FULL” marks (Figure 20). DO NOT overfill.
6. Install and tighten the oil gauge (A).
• Oil must be added oil before starting the engine. This machine is shipped
without oil. Traces of oil may be in the reservoir from factory testing, but OIL
MUST BE ADDED BEFORE STARTING THE ENGINE. Fill the reservoir
slowly, checking the level frequently to avoid overfilling.
• To get an accurate reading when checking the oil level:
- The machine should be on a level surface.
- The dipstick SHOULD NOT be screwed down during level checking
procedure below.