Plus and PSS Series - Lung Demand Valve
tm 1285.001 - August 2001
5:16
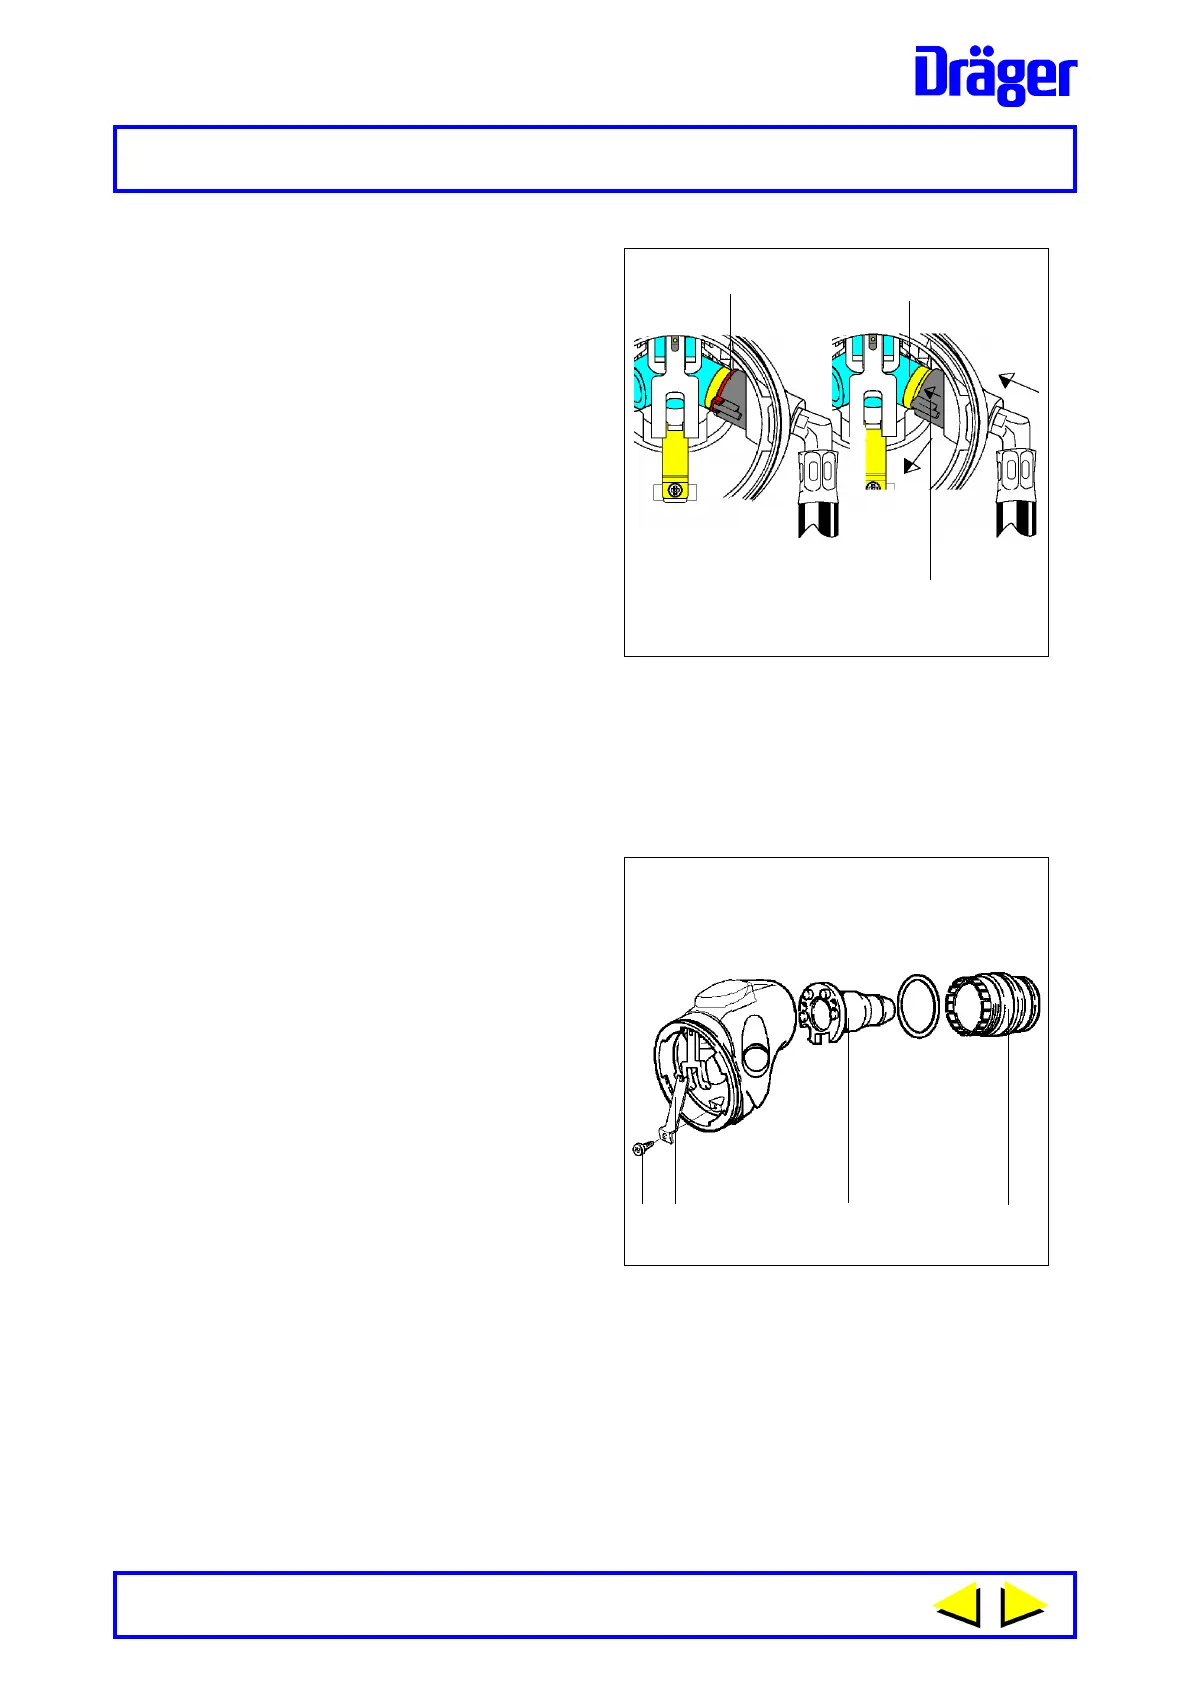
Refer to Figure 15.
Important Note: Spacer (1) must be
removed before attempting to
remove Clip (2).
4 Insert the hook end of the
retractor tool into the hole in the
side lugs of the spacer (1) - pull
and remove spacer. While
keeping the hose fully inserted
into the air transfer block (3),
slide the clip (2) towards the air
transfer block to release clip
from hole in body. Insert the
hook end of the retractor tool
under the extended pin of the
clip (2) then pull to remove the
clip from end fitting of the hose.
Grip and pull the hose to
remove the tailpiece from the
body of the demand valve.
Note:
Scrap spacer (1) and clip (2) –
Do Not
re-use
.
Refer to Fig. 16.
5 Using posi-drive screwdriver
unscrew retaining screw (1) until
the locking arm (2) is able to be
withdrawn from castellation of
connector (3).
6 Remove connector as follows.
Note: Do Not
attempt to remove push-
in or screw-in type connectors
with locking arm located in
castellation of connector.
12 34
Fig. 16
1140
Fig. 15
1134
1
2
3
Push-in Type - A
Unscrew push-in type connector (anti-clockwise) from demand valve
body then remove injector pipe (4).
Screw-in Types - AE and N
Use connector tool (3310679) - insert pins of tool into swivel connector -
rotate to align slots of fixed end of connector and insert pins - unscrew
(anti-clockwise) to remove screw type connector and handwheel
assembly from demand valve body. Remove injector pipe (4).
 Loading...