Plus and PSS Series - Lung Demand Valve
tm 1285.001 - August 2001
5:19
Screw-in Types - AE and N
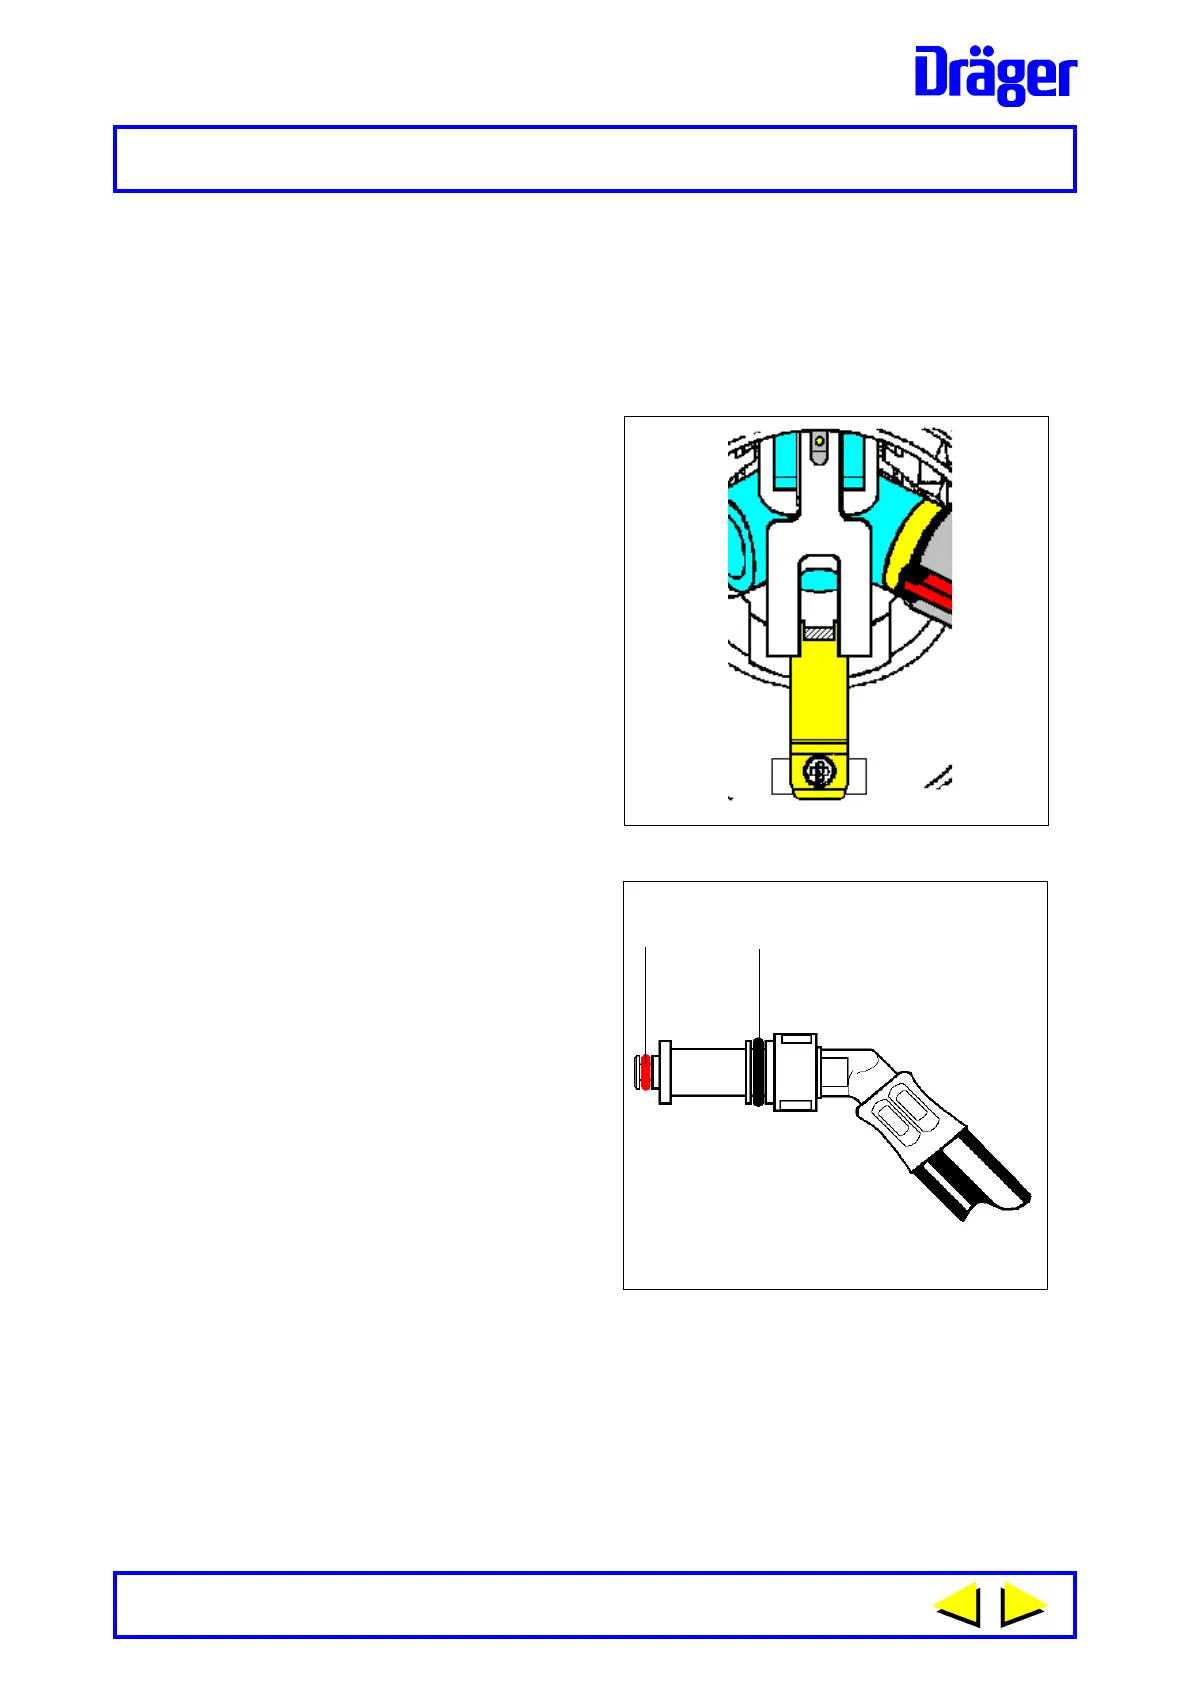
Check handwheel freely rotates on connector assembly. If necessary
use assembly tool to assemble new O-ring to connector handwheel
assembly then using tool (3310679) screw connector handwheel
assembly into demand valve body until secure. Do Not overtighten.
Refer to Figure 21.
4 When viewing inside body of the
lung demand valve - carefully
turn the connector anti-
clockwise until the first
castellation tab of the
connector is visible and centred
between the internal slot. Lift the
locking arm and locate the
fingers of the locking arm either
side of the castellation
preventing rotation of the
connector. Ensure correct
location then carefully tighten
screw to secure the locking arm.
Do Not over-tighten.
5 Check that O ring seals (1) and
(2) Fig. 22 of tailpiece are fitted
correctly and not damaged. If
necessary replace O-rings.
Apply thin coating of Molykote
111 grease around outside
diameter of the O-rings.
Fig. 21
1232
Fig. 22
1135
12
Safety Note: Read instructions on Molykote 111 container regarding the safe
handling of silicone grease.
 Loading...