Do you have a question about the Dream On Me 642 and is the answer not in the manual?
Explanation of the warning sticker's legal requirement and placement on the toddler bed.
Detailed requirements for mattress dimensions to prevent suffocation hazards.
Instructions for keeping instructions, checking screws, and avoiding string hazards.
Avoid window cords and tying items to the bed to prevent strangulation risks.
Do not use soft bedding, ensure proper mattress fit, and avoid large gaps.
Inspect for damage, do not substitute parts, and adhere to age/weight limits.
Use non-toxic finishes for refinishing and store the bed in a cool, dry place.
Lists and identifies all necessary hardware components and tools for assembly.
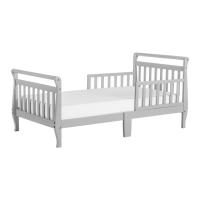
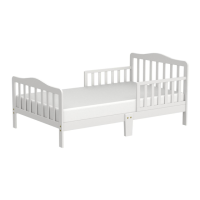
Details and labels all the major structural parts of the toddler bed.
Connect headboard slats (D) to the bottom rail (H) using stoppers (g).
Connect headboard legs (A1, A2) to top rail (G) and bottom rail (H).
Connect footboard slats (E) to the bottom rail (H) using stoppers (g).
Connect footboard legs (B1, B2) to top rail (G) and bottom rail (H).
Join side bars (J1, J2) to side bar (K) using wood dowels (j).
Attach side bars (J1, J2) to side bar (K) using L metal plates (h) and screws (f).
Insert cross bars (L, M) into left side bar (J1, K) and attach split legs (F).
Insert cross bars (H, G) into right side bar (J2, K) and attach split legs (F).
Attach headboard legs (A1, A2) to left/right side bars (J1, J2) with bolts (a) and nuts (b).
Attach footboard legs (B1, B2) to side bars (K) using bolts (a) and nuts (b).
Connect bed rails (C1, C2) to side bars (J1, J2) and headboard legs (A1, A2).
| Product Type | Crib |
|---|---|
| Material | Wood |
| Weight Limit | 50 lbs |
| Dimensions | 54.5 x 30.25 x 42 inches |
| Convertible | Yes |
| Adjustable Mattress Height | Yes |
| Full-Size Bed Rails Included | No |
| Meets ASTM Standards | Yes |
| JPMA Certified | Yes |
| Frame Material | Wood |
| Mattress Included | No |
| Foldable | No |
| Wheels | No |
| Maximum Weight Recommendation | 50 pounds |
| Convertible Types | Crib to Toddler Bed |