EasyManua.ls Logo

Dream On Me 662 User Manual

Dream On Me 662
14 pages
To Next Page IconTo Next Page
Page #1 background imageLoading...
Page #1 background image
Adult assembly required.
Small parts may present choking hazard prior to assembly.
Enclosed please find simple step-by-step instructions to help you
quickly assemble your products. Before you begin we recommend
that you following the steps below:
1. Please read the instructions thoroughly.
2. Identify all parts and hardware.
3. You will need the following tools:
Philips head screw driver
Flat head screw driver
Hammer
Do Not Use Power Drills or Drivers
To protect your parts during assembly please place them on a soft
surface.
To clean surface use only water on a damp cloth. Do not use
window cleaners or cleaning abrasives as it will scratch the surface
and could damage the protective coating.
ASSEMBLY INSTRUCTIONS
ITEM NO: 662
1
s
Follow warnings on all products in a crib .
Please note that the warning sticker is placed on the cribs to keep
parents and caregivers informed it is a requirement by law under
CPSC and ASTM.We do apologize for any inconvenience this may
cause you.
Dream On Me Inc.
1532 S WASHINGTON AVE
PISCATAWAY TWP NJ 08854
OFFICE: 732-752-7220
CUSTOMER SERVICE: 732-366-1788
Question and Answer IconNeed help?

Do you have a question about the Dream On Me 662 and is the answer not in the manual?

Dream On Me 662 Specifications

General IconGeneral
Product TypeConvertible Crib
Number of Conversions4
MaterialPine Wood
Adjustable Mattress Height Positions3
Maximum Weight Recommendation50 lbs
Assembly RequiredYes
Convertible TypesToddler Bed; Daybed
Age RangeNewborn to Toddler
Safety StandardsMeets ASTM and CPSC standards
Mattress SizeStandard Crib Mattress

Summary

Assembly Instructions

Preparation and Tools

Review instructions, identify parts, gather required tools, and prepare for assembly.

Safety and Warning Information

General Safety Precautions

Essential safety guidelines to prevent injury, choking, and ensure proper product use and maintenance.

Specific Risk Warnings

Alerts on strangulation risks from cords/strings and suffocation risks from bedding and gaps.

Mattress Requirements and Care

Specifications for crib mattress size, type, and guidance on cleaning and refinishing.

Connection Hardware

Hardware Identification

Detailed list of all hardware components required for assembly, including descriptions and quantities.

Enclosed Parts List

Furniture Components

Inventory of all included furniture parts, identified by letter and name for assembly.

Assembly - Drawer Construction

Step 1: Initial Drawer Connections

Attach dowels and cam bolts to drawer divider and side panels for initial drawer structure.

Step 2: Securing Drawer Components

Insert cams to secure bolts and slide drawer bottoms into grooves to form the drawer.

Assembly - Drawer Completion

Step 3: Finalizing Drawer Assembly

Finalize drawer structure by inserting remaining cams and completing the drawer assembly process.

Step 4: Drawer Assembly Complete

Confirms the successful completion of the drawer assembly.

Assembly - Main Body Construction

Step 5: Attaching Side Panels and Rails

Connect side panels, legs, and top rails using dowels and bolts to form the crib structure.

Step 6: Connecting Headboard and Side Panels

Attach side panels to the headboard using dowels, barrel nuts, and bolts for structural integrity.

Assembly - Final Steps

Step 7: Attaching Front Panel

Insert dowels and barrel nuts, then attach the front panel to the crib legs using bolts.

Step 8: Mattress Support Installation

Attach the mattress support frame to the crib legs using Allen head bolts for mattress placement.

Toddler Bed Conversion

Toddler Bed Usage Warnings

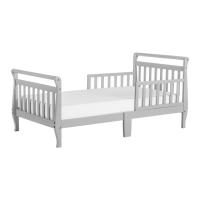
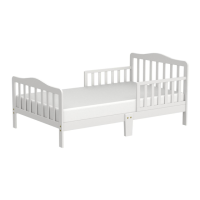
Critical warnings for toddler bed use, including safety, mattress, age, and weight limitations.

Day Bed Conversion

Day Bed Conversion Steps

Instructions for converting the crib into a day bed by removing the front panel and adjusting the mattress support.

Full Size Bed Conversion Type I

Full Size Bed Conversion Steps I

Steps to convert the crib to a full-size bed using the front and back rails as bed components.

Full Size Bed Conversion Type II

Full Size Bed Conversion Steps II

Instructions for converting the crib to a full-size bed using specific platform posts and rails.

Limited Warranty Information

Warranty Terms and Conditions

Details the warranty coverage, duration, limitations, exclusions, and customer rights.
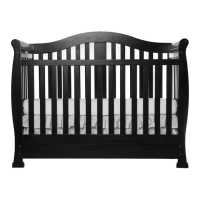
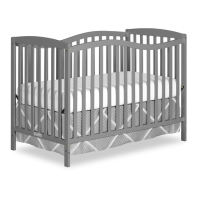
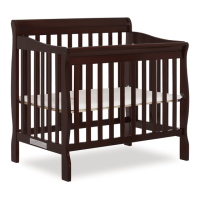
Related product manuals