6 7
ENEN
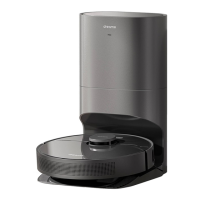
1. Place the dust-removal hub near a
power outlet and put the plug into it.
2. Place the vacuum on the dust-removal
hub (the vent of the dust cup should be
aligned with that of the dust-removal
hub).
3. Press the dust collection button.
Note:
•
The dust collection process cannot be
stopped by pressing the dust collection
button.
•
If the dust collection bag reaches
capacity or the air duct is blocked during
the dust collection process, the dust-
removal hub will stop working after the
process is completed and cannot collect
dust again.
Fig. D-5
Fig. D-6
Fig. D-7
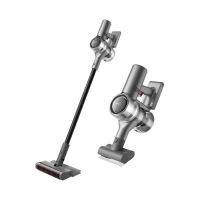
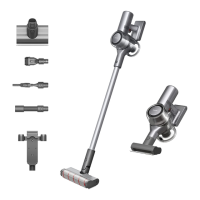
Using Different Accessories
Starting Dust Collection
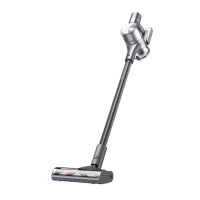
Multi-Surface Brush
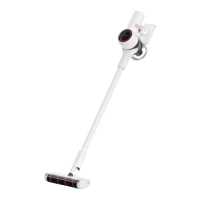
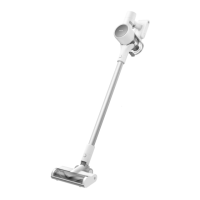
Soft Roller Brush
•
The multi-surface brush can be attached
directly to the vacuum.
•
When the appliance starts, the
lights in front of the brush roller
will automatically turn on, which is
convenient for use.
-
When using on baby play mats, carpets
or for vacuuming coffee beans, pop corn
and other pellets, turn on the switch on
the brush.
-
When vacuuming on tiles, wooden
floors or other hard surfaces, turn off the
switch.
Note:
Fig. D-9
Fig. D-10
Fig. D-11
Fig. D-8
Suitable for cleaning hard floors such as
marble and tile.
Soft Dusting Brush
Combination Tool
Accessory Mount
Suitable for vacuuming on LCDs, keyboards,
lampshades, curtains, shutters and other
surfaces of fragile objects.
Suitable for vacuuming cracks, corners of
doors and windows, stairs, and other hard-
to-reach places.
The soft dusting brush, combination tool
and motorized mini-brush can be placed
on the accessory mount when not in use.
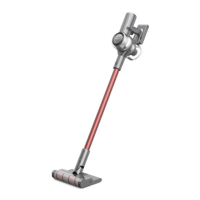
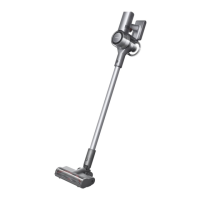
Motorized Mini-Brush
For vacuuming dirt, pet hair, and other
stubborn debris from sofas, bedding, and
other fabric surfaces.
Note: It is not recommended to vacuum
on fragile surfaces, such as silk.
Note:
•
If any rotating part becomes stuck, the
vacuum may shut off automatically.
Remove any trapped foreign objects,
then resume use.
•
When the battery becomesoverheated,
the vacuum will automatically shut
off. Wait until the battery temperature
returns to normal, then resume use.
Care & Maintenance
Tips:
•
Always use genuine parts to keep your
warranty from being void.
•
If the filter or nozzle becomes clogged,
the vacuum will stop working shortly
after being turned on. Clear the tube to
restore functionality.
•
Before cleaning the dust cup, please
Cleaning the Vacuum
Replace the dust collection bag
Installing the filter
Wipe the vacuum with a soft dry cloth.
When the dust collection status indicator
blinks orange, it means that the dust
collection bag reaches capacity and needs
to be replaced with a new one.
It is recommended to clean the filter
once every 4 to 6 months.
confirm that the plug is disconnected
and keep the vacuum's power button in
the off position.
•
If the vacuum is not used for an extended
period, fully charge it, unplug the power
cord, remove the battery, and store it
in a cool, low-humidity environment
away from direct sunlight. To avoid over-
discharging the battery, recharge the
battery at least once every three months.
Note:
Note:
•
Please clean the dust cup as needed.
•
It is recommended to clean the cyclone
system and pre-filter at least once every
3 to 4 months.
Note: Pulling outwards on the handle of
the dust collection bag will seal the bag to
prevent the dust and debris from accidentally
falling out.
Note: It is recommended to replace the
dust collection bag every two months. If the
dust collection bag reaches capacity, the
indicator blinks orange.
•
Only use clean water to wash the filter.
Do not use detergent.
•
Do not attempt to clean the filter with a
brush or finger.
1. Press the dust cup release button and
remove it from the vacuum.
2. Remove the pre-lter rst, and then
rotate the cyclone system to lift it out.
3. Rinse the cyclone assembly, pre-lter,
and dust cup until they are clean. After
washing, air dry for at least 24 hours.
1. Take o the dust-removal hub cover.
2. Pull out the dust collection bag and
discard it.
Cleaning the Dust Cup, Pre-
Filter, and Cyclone Assembly
Installing the Dust Cup, Pre-
Filter, and Cyclone Assembly
Fig. E-6-Fig. E-9
Fig. E-10-Fig. E-11
Fig. E-12-Fig. E-16
Fig. E-1-Fig. E-3
Fig. E-4-Fig. E-5
4. Allow the filter to air dry for 24 hours.
3.Rinse the lter with rotating it 360° .
Lightly tap the lter several times to
remove any debris caught in it.
2. Remove the lter from the vacuum by
pulling it down in the direction shown in
the gure.
3. When the lter is dirty, rinse it with
water. Then place it in a well-ventilated
place for at least 24 hours to make sure
it is thoroughly dry.
4. Install a new dust collection bag by
inserting the bag handle into the card
slot.
5. Install back the dust-removal hub cover.
Cleaning the Filter
1. Remove the dust cup as shown in the
gure.
1. Install the cyclone assembly and pre-
lter into the dust cup.
2. Slightly tilt the dust cup so the slot
aligns with the clip on the vacuum. Then
gently push the dust cup until it clicks
into place.
1. Insert the lter into the vacuum and
gently press down, as illustrated.
2. Reinstall the dust cup.
How to Use
 Loading...