For technical questions, please call 1-800-444-3353.
SAFETYOPERATIONMAINTENANCE SETUP
Operating Instructions
at the beginning of this manual including all text under
subheadings therein before set up or use of this product.
REVENT SERIOUS INJURYREVENT SERIOUS INJUR
Make sure that the Switch is in the off
before adjusting tool or installing accessories.
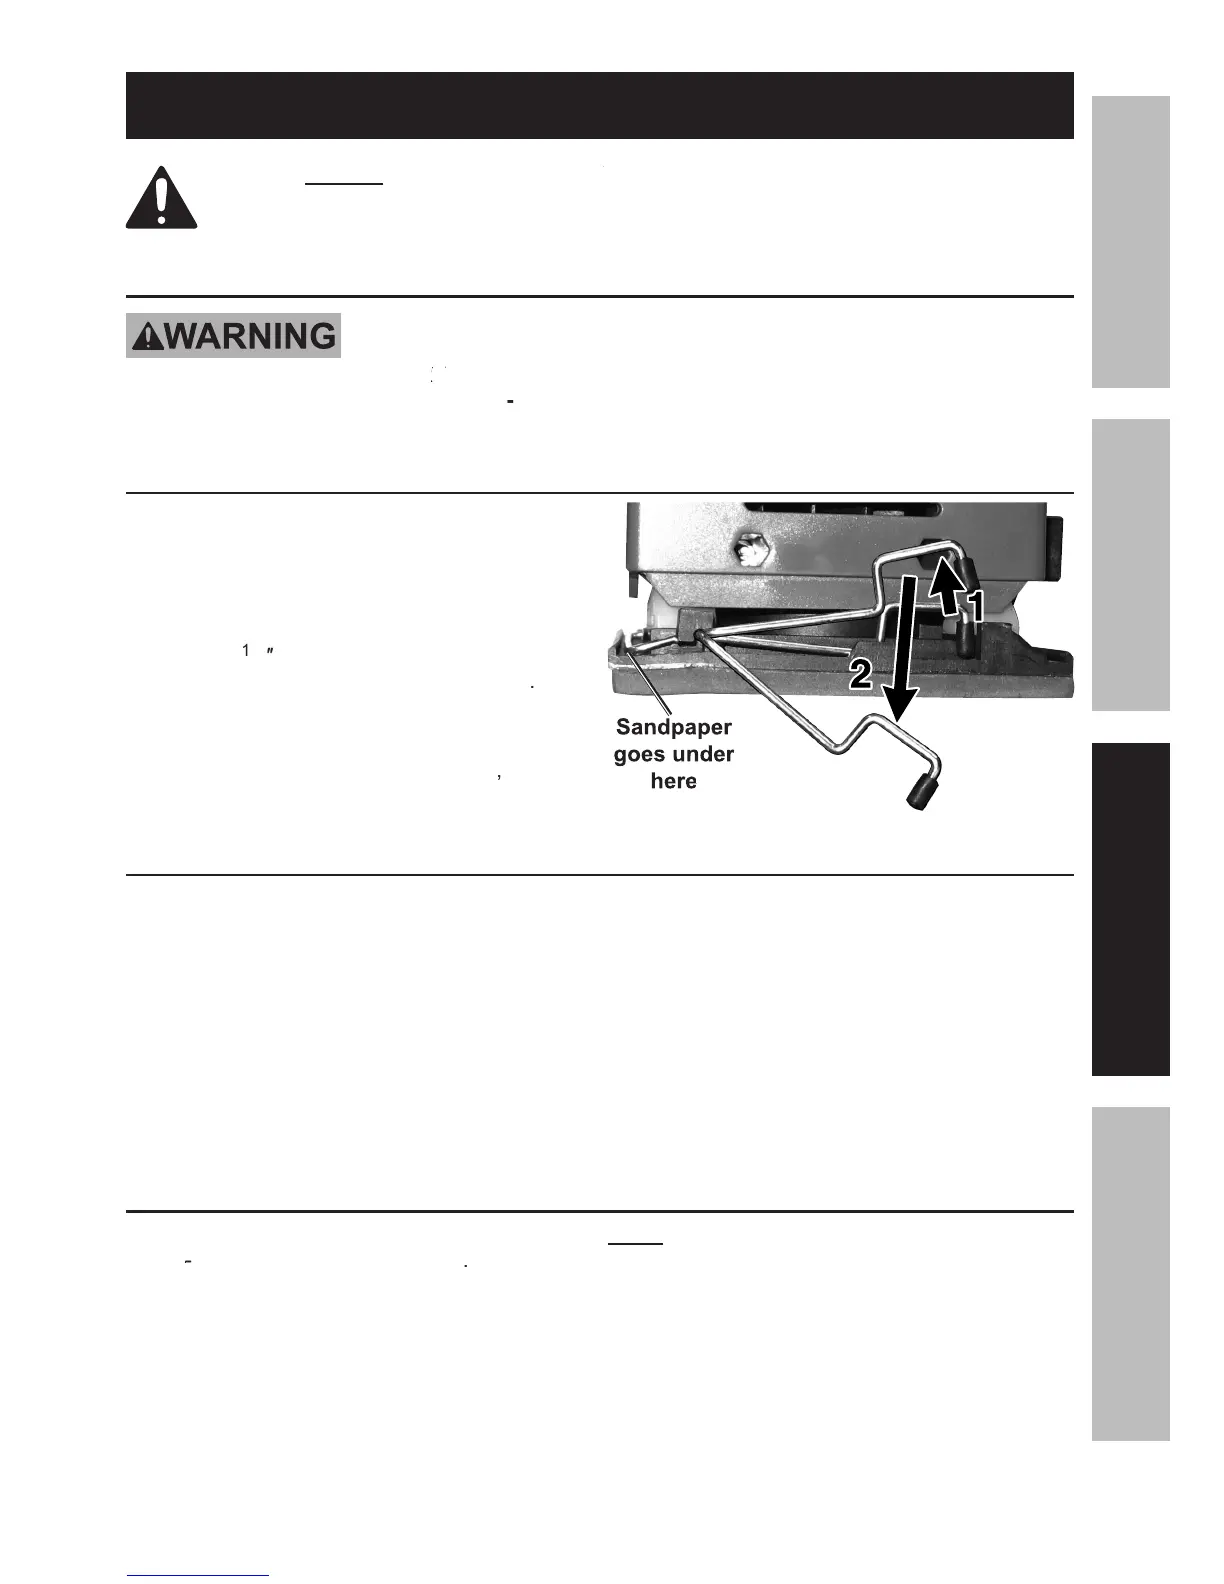
Attaching Sandpaper to the Backing
inward on both sides of the unit and
swing the clamps on both sides up,
Cut the sandpaper to fit the
to overlap and fit under the
torn or frayed sandpaper.
After wrapping the overlapped edges
Workpiece and Work Area Set Up
Designate a work area that is clean
lit. The work area must not
allow access by children or pets to
prevent distraction and injury.
Route the power cord along a safe route
to reach the work area without creating a
tripping hazard or exposing the power cord
to possible damage. The power cord must
reach the work area with enough extra length
to allow free movement while working.
Secure loose workpieces using a
vise or clamps (not included) to
prevent movement while working.
There must not be objects, such
as utility lines, nearby that will
present a hazard while working.
General Operating Instructions
Make sure that the Switch is in the
Run the Sander for a few seconds
before contacting the workpiece.
Contact the workpiece with minimal pressure.
Use sandpaper with a lower
to remove material faster.
All orbital sanders leave sanding marks
on the workpiece. To minimize sanding marks,
always try to sand with the grain of the wood.
Occasionally check the sandpaper for tears,
wear, or fraying. Replace if necessary.
To prevent accidents, turn off the tool and
after use. Clean, then store the
tool indoors out of children’s reach.