Page 10 For technical questions, please call 1-800-444-3353. Item 91062
SAFETY OPERATION MAINTENANCESETUP
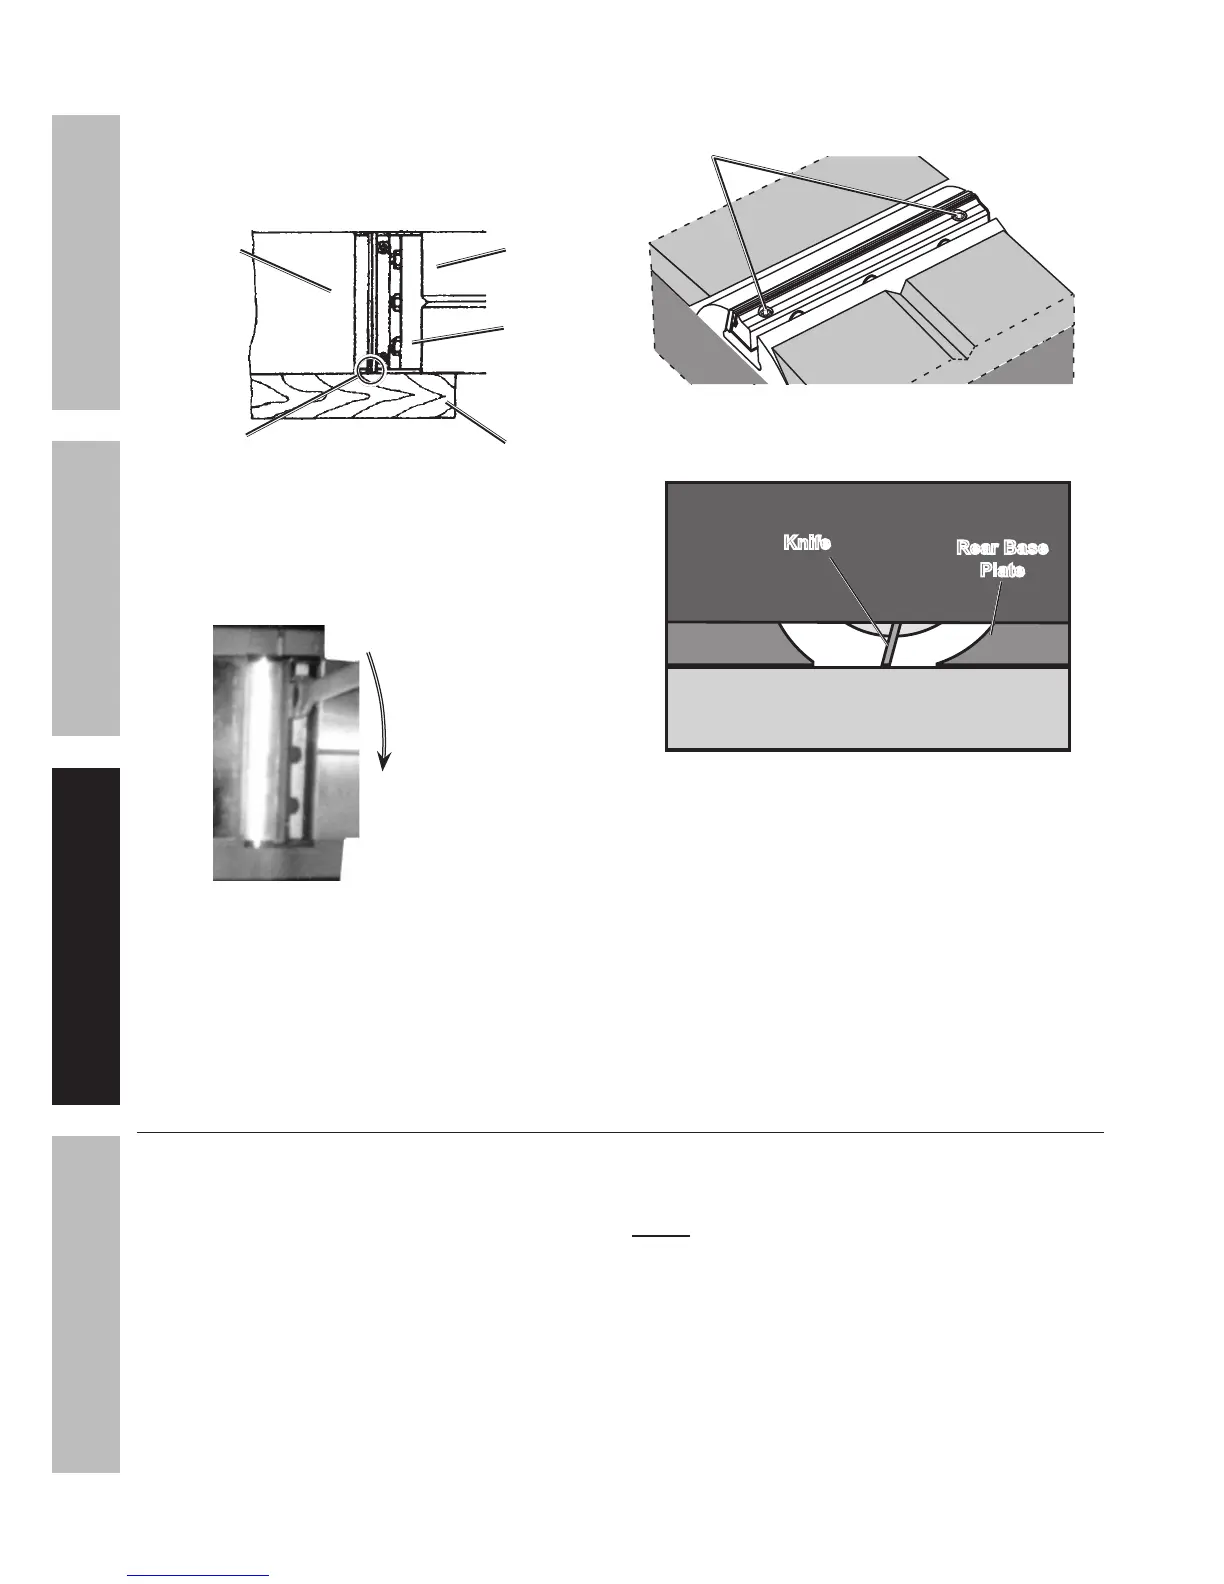
9. Place a straight edge or straight piece of wood
along the side surfaces of the Front Base Plate
and Rear Base Plate. Slide the Knife against the
straight edge or piece of wood so that it aligns
evenly with both Base Plates. See Figure D.
(Bottom view)
Straight
piece of
wood
Knife
Drum
Front Base
Plate
Rear Base
Plate
Align Knife
against
piece of
wood
Figure D
10. Turn the three Knife Holder Bolts in the direction
shown in Figure E to secure the Knife Holder
assembly in place. Only snug the Bolts for now.
Turn Bolts this
way to secure
Knife Holder.
Figure E
11. Adjust the Knife so that both ends are level:
a. Set the Depth Knob (48) to “0.”
b. Have an assistant hold a straightedge
(sold separately) against the bottom
of the Rear Base Plate.
c. Locate the Set Screws (58) on the
Knife Holder. See Figure F.
Set Screws
(58)
Figure F
d. Adjust one Set Screw until the Knife just touches
the straightedge on that side - see Figure G.
Straightedge
(sold separately)
Knife
Rear Base
Plate
Figure G
e. Adjust the other Set Screw until the Knife just
touches the straightedge on that side as well.
12. Turn the three Knife Holder Bolts firmly
in the direction shown in Figure E
to secure the Knife in place.
13. Rotate the Knife Drum 180° and change/
replace and adjust the other Knife
according to Steps 1 - 12, above.
14. IMPORTANT! Carefully double-check that
the Knives and Knife Holders are secure and
that both Knives are level before use.
Depth Adjustment
The Planer may be adjusted to cut to a depth of
up to 1/16″ per pass along the workpiece.
• To increase the depth of cut, turn
the Depth Knob clockwise.
• To decrease the depth of cut, turn the
Depth Knob counterclockwise.
• Return the Depth Knob to read “0” on
the Dial (51) when finished cutting.
NOTE: For a rough-cut workpiece use a deeper
cut, but never to exceed 1/16″. Once the
workpiece is planed smooth, make a number of
shallower cuts to acquire the desired depth.


 To Next Page