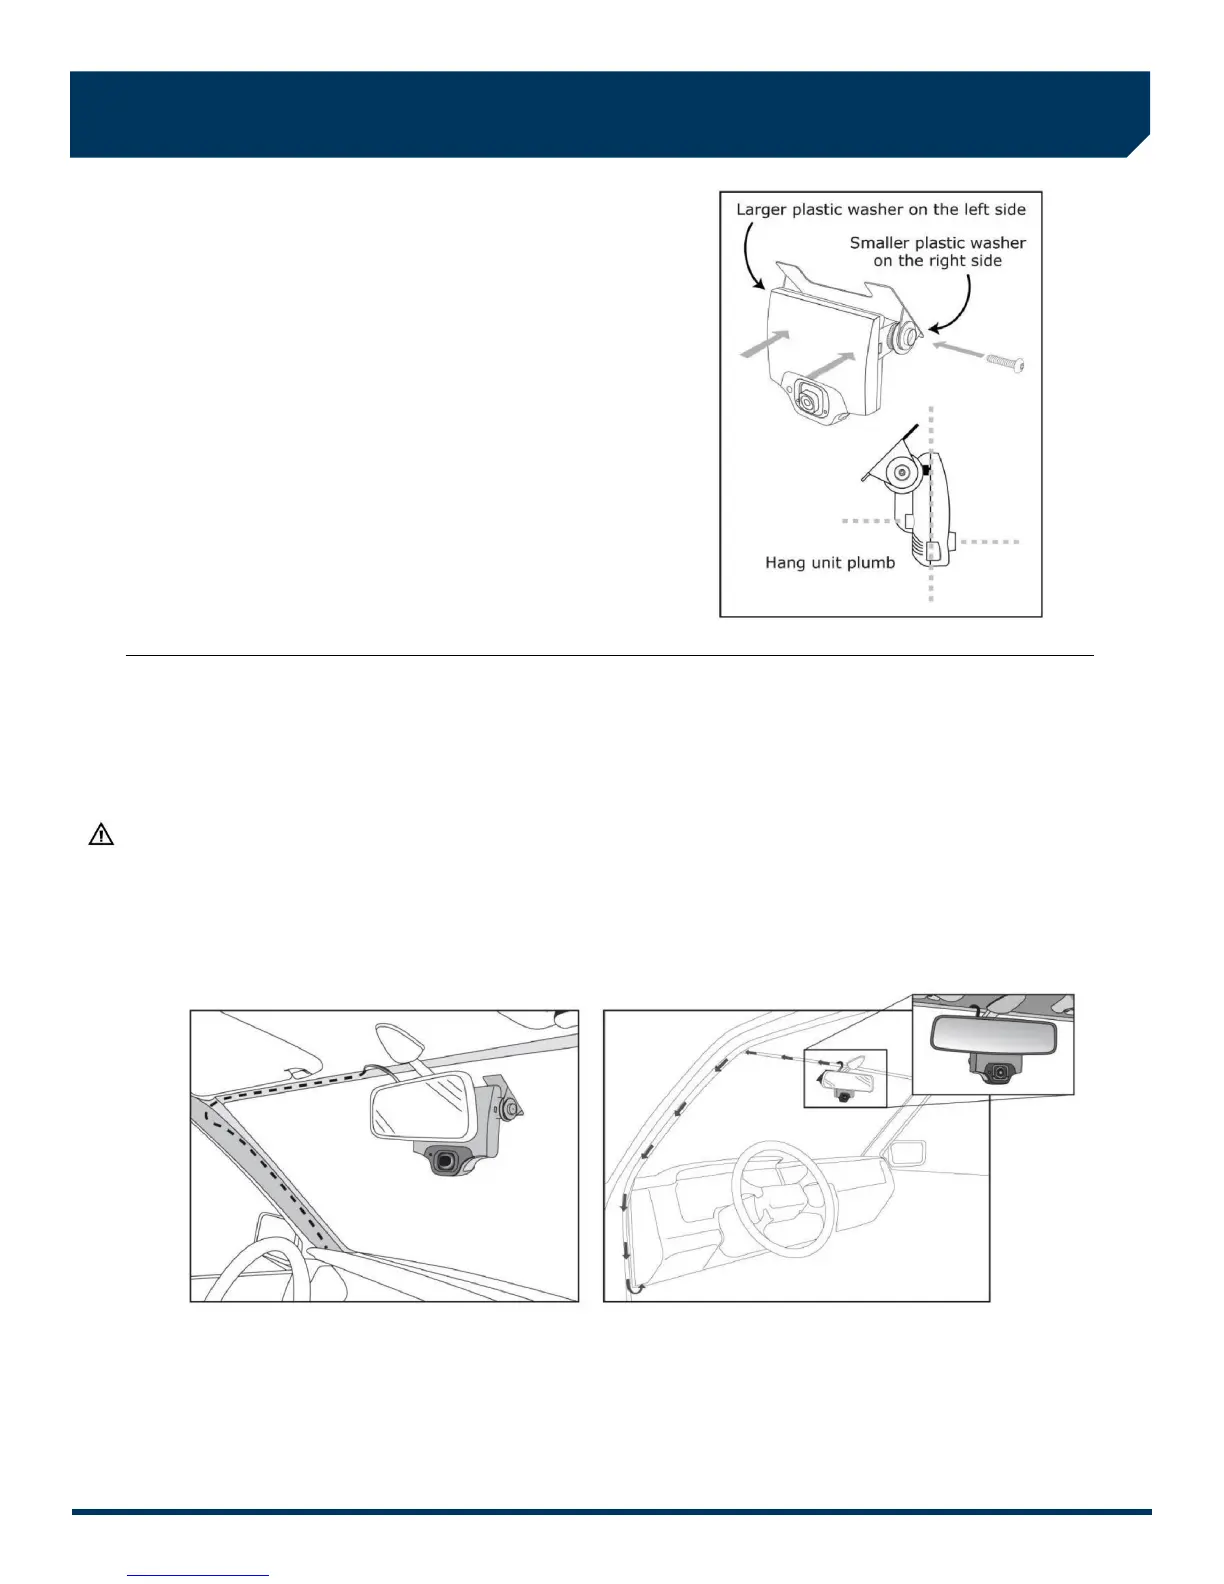
5. Mount the VER in the bracket
A) Plug the DC3/DC3P Power Cable (14 ft.) into the VER.
B) Place the VER in the bracket.
C) Adjust the VER so that it hangs vertically (plumb).
D) Secure the VER in the bracket using the two Torx
screws and Torx wrench (provided).
Washer Placement:
The large plastic washer on the left side of the bracket is designed
to partially cover the cable connector so that it cannot be
unplugged.
The plastic washers can be easily removed from the metal bracket
if you need to switch sides after mounting.
Make sure the larger of the two washers is on the left side
of the bracket.
6. Route the DC3/DC3P Power Cable
You may need to remove the window and door trim to route the cable underneath. These typically snap on and off using
special clips. In vehicles with side and curtain airbags, these clips are often one-time use and may need to be replaced after
removal. Please refer to the vehicle service manual for information.
WARNING: When installing the cable in a vehicle with SIDE OR CURTAIN AIRBAGS, be certain that neither the cable nor
your installation activities interferes with any airbag related mechanisms or otherwise risks affecting airbag deployment.
A) Starting just above the rear view mirror, route the cable under the trim or headliner across to the door pillar.
B) Route the cable down the door pillar underneath the vertical door/window trim then out under the lower part of the
dashboard to the location where the 5-Port HUB will be mounted and the electrical connections will be made.
Secure the Cable:
Make sure the cable is secured and cannot come loose. We recommend using cable ties every few inches along the route to
secure it in place. Keep the cable clear of any sharp edges, moving parts and cannot get pinched in the door jam. Be very
careful working around vehicle airbags.