8. Test the RED WIRE connection (continuous power)
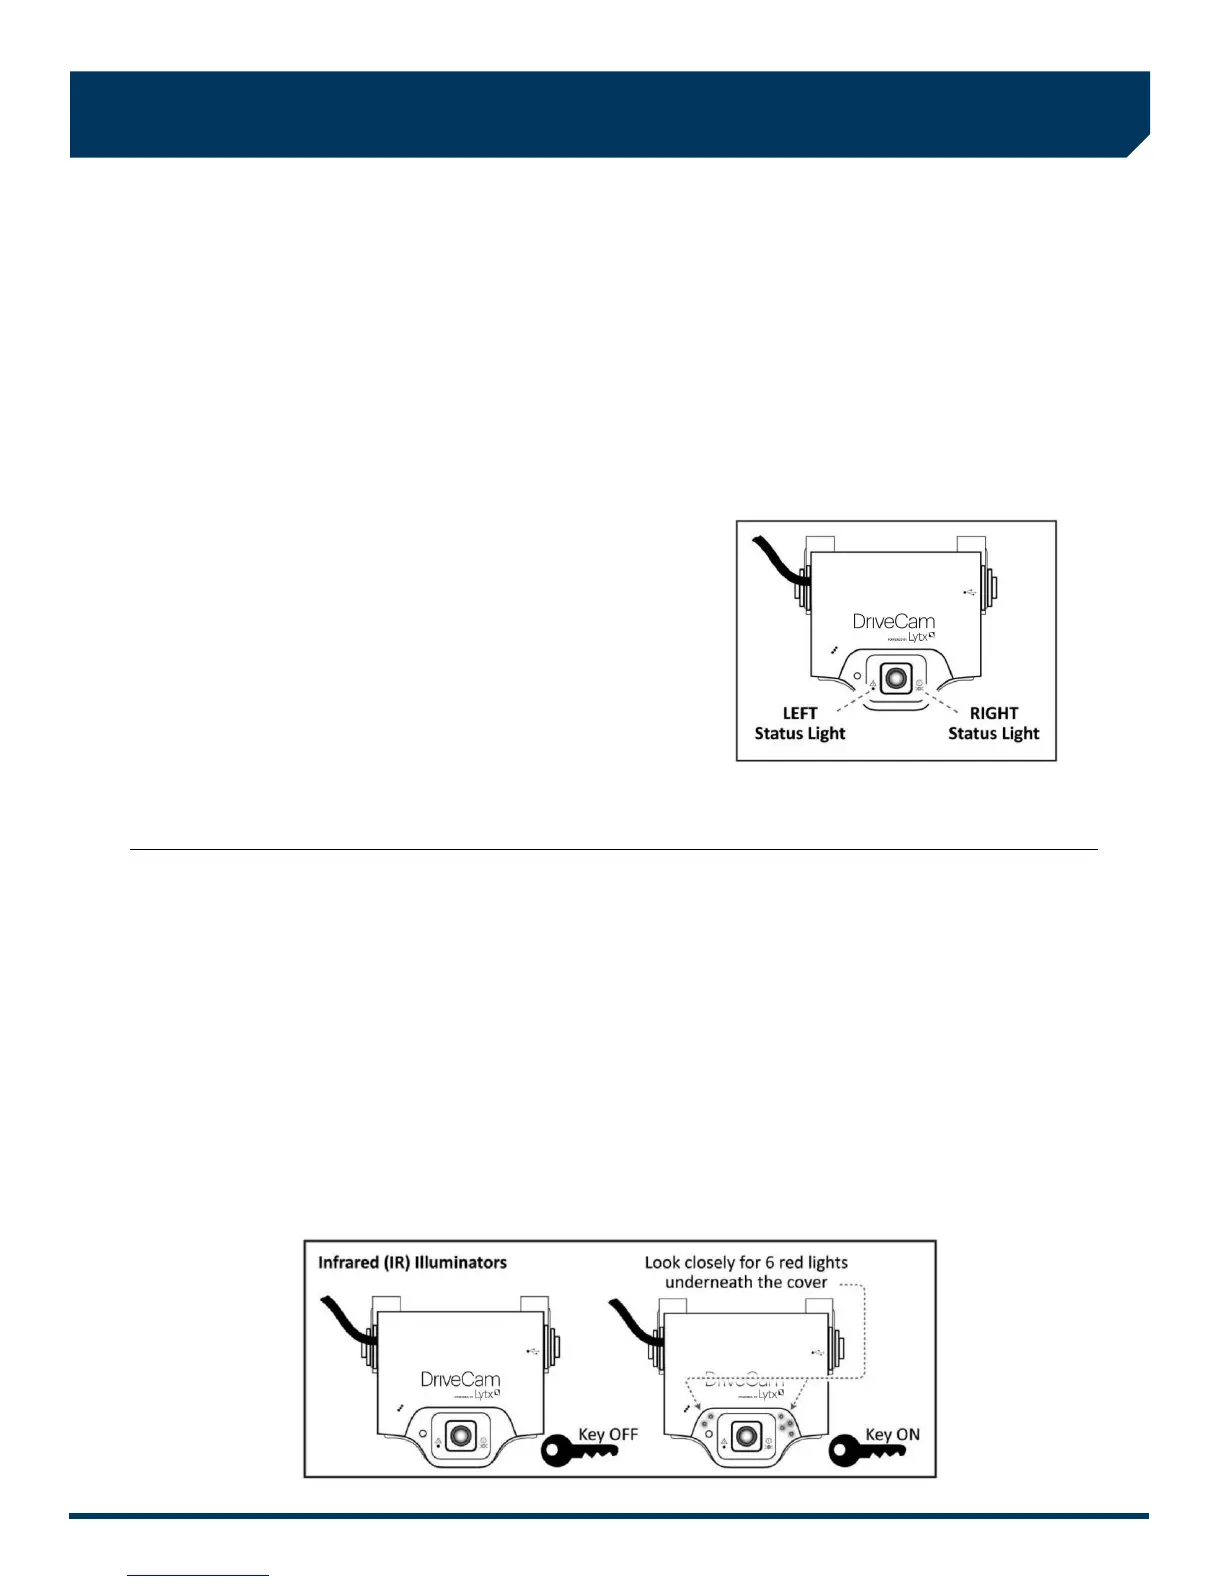
Once the power and ground connections are made and the vehicle ignition is switched on, the status light to the right of
the interior-facing lens should be lit (either a red or green light).
Note: VERs are configured for hibernation mode, meaning it will automatically switch off (status lights will go dark) after
the vehicle ignition has been off for a certain amount of time (15 minutes – several hours). Switch on the vehicle ignition
or press one of the VER buttons to “wake up” the VER from hibernation. See page 8 for more information.
A) Wait about 30 seconds after connecting power (red) and ground (black).
B) Turn the key to the Ignition / Switched-On position. The status light to the left of the lens will light solid green for
about 30 seconds after power is first applied and then switch OFF. The status light to the right of the lens should
then switch ON and stay on (see note above).
Other status light behaviors that are commonly seen:
Left light blinking green: Searching for a wireless signal.
Right light blinking red: Data transfer in progress.
Right light blinking red & green: Event recording in progress.
Both lights blinking red & green: Firmware upgrade in
progress.
C) These behaviors may continue for several minutes. All of them
indicate that the VER is properly powered. Go to step 9.
Errors: If the status lights did not light at all, check the wiring and fuses.
If you see any other status light behaviors, contact Lytx Technical Support at (866) 910-0403.
9. Test the BROWN WIRE connection (ignition-switched power)
Underneath the translucent cover surrounding the interior-facing lens are six small, infrared lights. These are the VER’s
Infrared (IR) Illuminators, providing infrared light for recording video in low light situations. These lights can only be seen
when they are lit, and they are only lit when power is being sensed through the brown wire (i.e. when the engine is
running or when the key is turned all the way forward to the ignition ON position).
A) Turn the key to the Ignition / Switched-On position.
B) Look closely for the six red lights underneath the translucent cover.
C) Turn the key to the OFF position. The six red lights should go out.
D) If the test worked as described, the brown wire has been connected properly. Go to the next page.
If the test did not work as described, try it again in a darker area or cup your hands around the cover; the lights can be
difficult to see. Next, check the wiring and fuses. It may have been connected to a modulated circuit (page 6).