1. This player can only be used by the 12V DC cathode grounding electrical
system.
2. Do not connect the terminals of the battery until the player is absolutely with
wellerection joint
3. Please make sure to connect the yellow wire to the positive of the battery (+).
4. When change the fuse. Please make sure the specifications are same.
5. Using good quality speaker with 4-8 ohm can result in the best effect of the
equipment
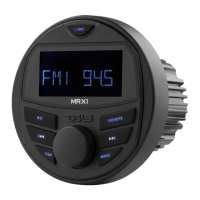
WIRING CONNECTION
1. This player should be installed by professional technician.
2. Please read the instruction and operation of equipment carefully
before installing.
3. Make sure to connect first the other wires before power connection.
4. To avoid short circuit. Please make sure all the exposed wire is
insulated.
5. Please secure all the wires after installation.
6. Please make connection to the player accordingly to this instruction
manual. Wrong connection may cause damage.
7. This player is only for 12V DC electric systems and please make sure
your vehicle or boat belongs to this kind of cathode grounding electri-
cal system.
8. Please connect the wires rightly. Wrong connection will cause
malfunction or damage the electrical system.
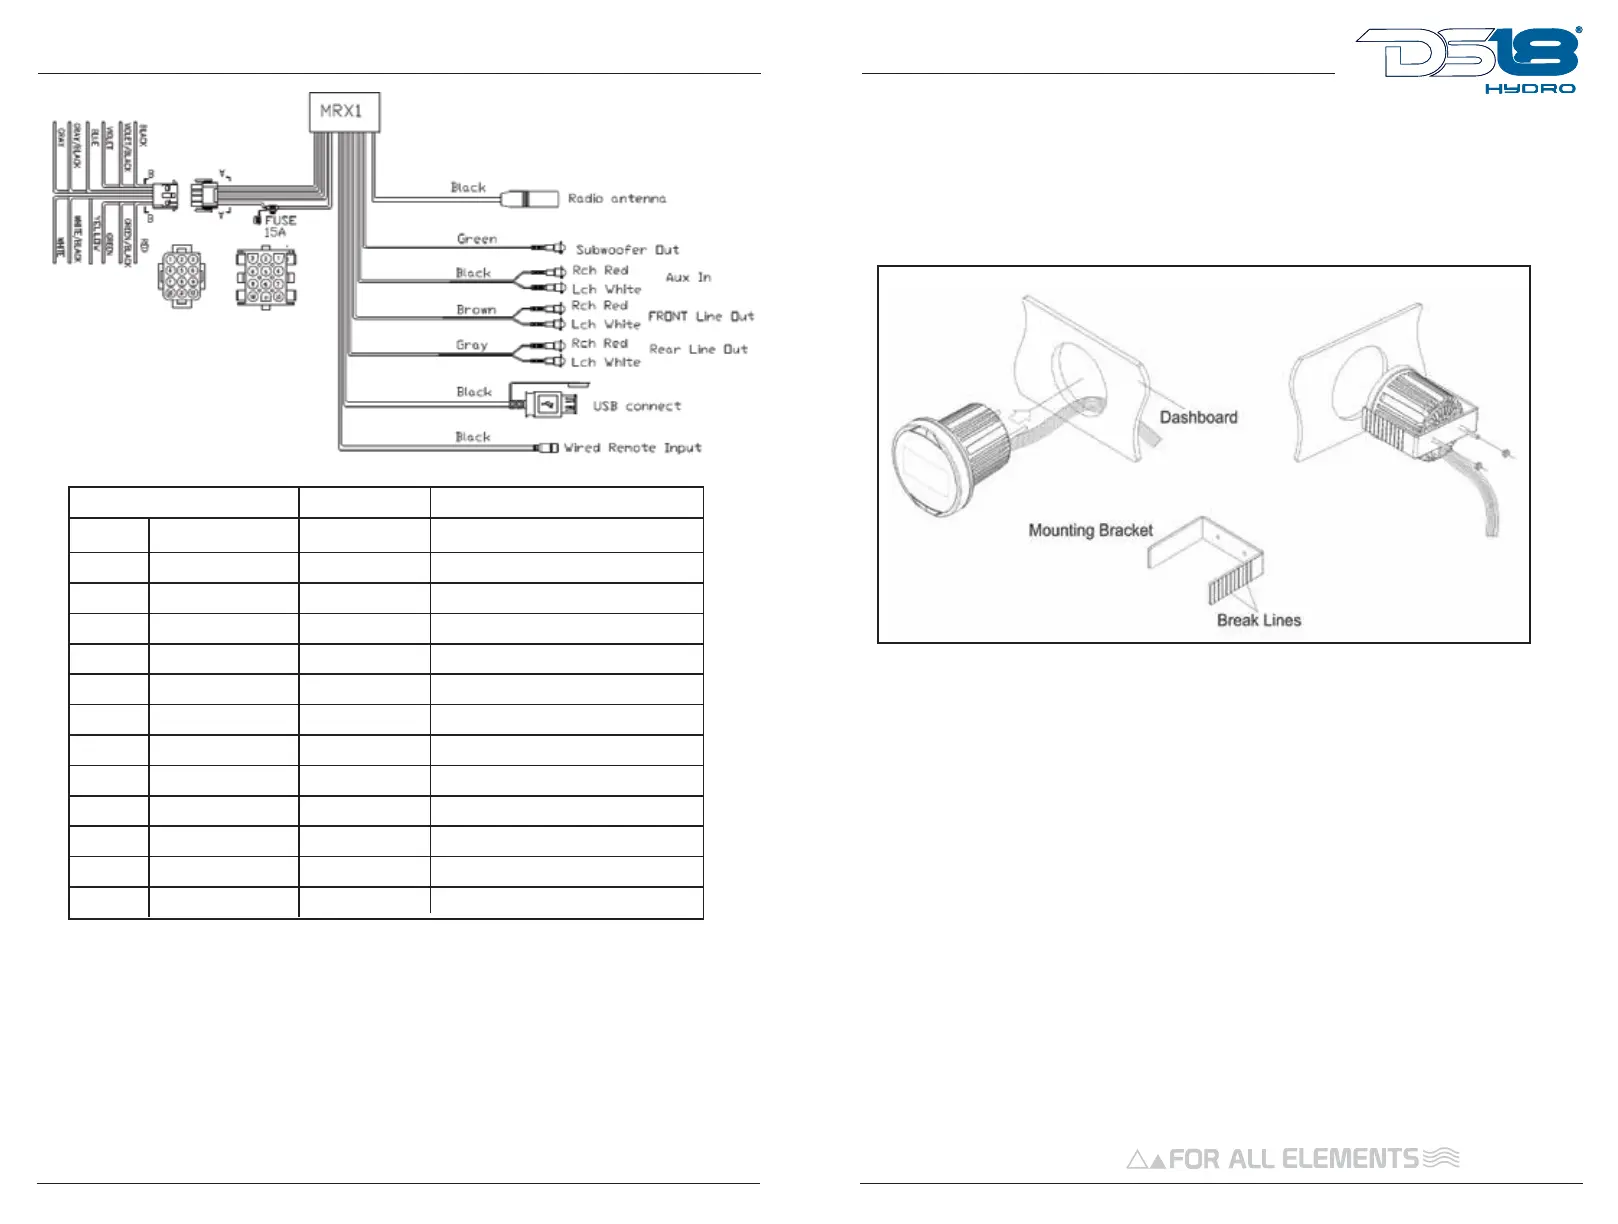
Once a suitable location has been determined, drill the hole and secure the
stereo using the metal mounting bracket. If the bracket needs to be shortened,
remove the appropiate number of breakaway segments using a pair of pliers
INSTALLATION
PIN NO.
WIRE INSERTION VIEW. SECTION A-A. SECTION B-B
WIRE COLOR. WIRE SPEC DESCRIPTION
1.
2.
3.
4.
5.
6.
7.
8.
8.
10.
11.
12.
GREEN
GREEN/BLACK
RED
WHITE
WHITE/BLACK
YELLOW
GRAY
GRAY/BLACK
BLUE
VIOLET
VIOLET/BLACK
BLACK
20# AWG
20# AWG
20# AWG
20# AWG
20# AWG
20# AWG
20# AWG
20# AWG
20# AWG
20# AWG
16# AWG UL
16# AWG UL
LEFT REAR SPEAKER (+)
LEFT REAR SPEAKER (-)
ACC (+12V)
BATTERY (+12V)
LEFT FRONT SPEAKER (+)
LEFT FRONT SPEAKER (-)
RIGHT FRONT SPEAKER (+)
RIGHT FRONT SPEAKER (-)
RIGHT REAR SPEAKER (+)
RIGHT REAR SPEAKER (-)
GROUND
POWER AMP REMOTE TUNER ON
MRX1
 Loading...