Do you have a question about the DSC 2550 and is the answer not in the manual?
Instructions for modifying or creating user codes for the alarm system.
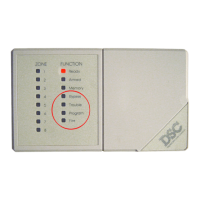
Explains the yellow trouble light and how to identify specific system issues indicated by zone lights.
Procedure to set the correct time and date on the alarm system.
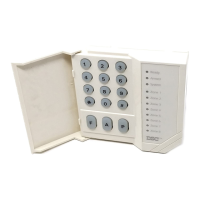
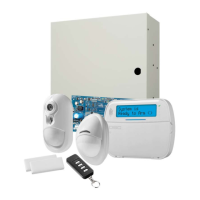
Explains the system's components like control panel, keypads, and sensors, and their basic operation.
Details specific requirements and considerations for Underwriters Laboratories (UL) certified installations.
Explains the role and usage of the 4-digit master code for system control and programming.
Covers arming the system, auto-bypass for home-away, and entry delay off arming.
Procedure for disarming the system and accessing alarm history.
Instructions on how to bypass specific zones, allowing system arming with open or faulty zones.
Explains how to interpret trouble conditions shown by zone lights on the keypad.
Procedure to reset smoke detectors and manage fire alarm transmissions.
Explains how to activate Fire, Auxiliary, and Panic transmissions using specific keys.
Describes the purpose of the [#] key for error correction and returning to the ready state.
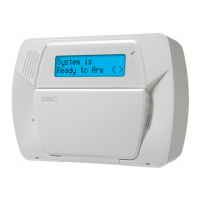
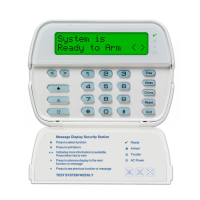
Explains the meaning of various status lights on the keypad, such as Zone, Ready, and Armed.
Guide to adding, changing, or erasing user access codes for the system.
Covers features for faster arming, controlled exiting, and door chime notifications.
Steps to perform a weekly system test, including bell and sensor checks.
Details the specific functionality of the Fire, Auxiliary, and Panic keys on the keypad.
Recommendations for basic upkeep, cleaning, and battery replacement for the system.
Comprehensive guide for performing weekly tests on the alarm system's components.
Checklist for evaluating home safety related to electrical appliances, flammable liquids, and furnaces.
Guidance on creating and rehearsing a family escape plan for fire emergencies.
Outlines the terms and conditions of the 12-month limited warranty for the product.
Emphasizes the importance of regular system testing and potential failure points.
The provided document is an instruction manual for the DSC 2550 security system.
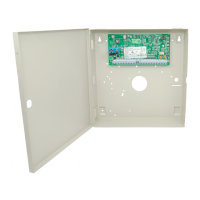
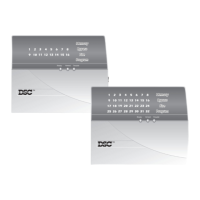
The DSC 2550 is a security system designed to provide flexible and convenient protection. It consists of a control panel, one or more keypads, and various detectors and sensors. The system monitors up to eight zones or areas of protection, with each zone potentially connected to multiple sensors such as door/window contacts, motion detectors, glassbreak detectors, and vibration/shock sensors. When a sensor is in alarm, a keypad light indicates the triggered zone.
The system supports arming and disarming using a 4-digit Master Code or additional access codes (up to 15). It includes features like Quick-Arm, Entry Delay Off Arming, Auto-Bypass (Home-Away Arming), and a Door Chime feature. The system continuously monitors for various trouble conditions and provides visual (keypad lights) and audible (keypad sounder) indications when a trouble occurs. It also supports fire alarm functionality, including a delayed transmission to the monitoring station to allow for false alarm cancellation and smoke detector reset.
For UL installations, the PC2550 is suitable for:
Arming the System:
Disarming the System:
Changing or Adding a Code:
*5.##.Silencing Keypad Beeping (Trouble Light On/Beeping):
*2#. The beeping will stop, but the trouble light will remain on until the condition is cleared.Determining Trouble Condition:
*2. A zone number will illuminate, corresponding to a specific trouble condition listed in the manual (e.g., 1 for low battery, 2 for AC power failure).Setting the Clock (Trouble 8):
*6 + [Master Code] + 1.[HH:MM] (using military time, e.g., 8:00 PM = 20:00).# to exit.Alarm Memory Display:
*3.# to return to Ready.Zone Bypassing:
*1 + [Access Code] and then the zone numbers (e.g., 1 for zone 1, 8 for zone 8).0 to remove all bypasses.9 to recall the last group of bypassed zones.# to return to Ready.Smoke Detector and Fire Alarm Reset:
#. This delays transmission for 90 seconds.*4 and hold for several seconds.F key for 2 seconds.Quick-Arm Feature:
*0 (does not disarm).*6 + [Master Code] + 4.Quick Exit Option:
*0 to allow a 2-minute exit while the system remains armed.Door Chime Feature:
*6 + [Master Code] + 6.Keypad Zones (F, A, P Keys):
F Key (Fire Zone): Hold for 2 seconds to activate a fire alarm (pulsing bell/siren).A Key (Auxiliary Zone): Hold for 2 seconds to activate an auxiliary transmission (series of beeps).P Key (Panic Zone): Hold for 2 seconds to activate a panic alarm (silent or audible, depending on programming).General Maintenance:
Battery Replacement:
System Testing (Recommended Weekly):
*6 + [Master Code] + 8. (Alarm will sound for ~2 seconds).F, A, and P keys in turn.Important Note: No security system can prevent emergencies; it is only intended to alert you. Regular testing is crucial, and system trouble conditions should be corrected by an installer.
| Brand | DSC |
|---|---|
| Model | 2550 |
| Category | Security System |
| Language | English |