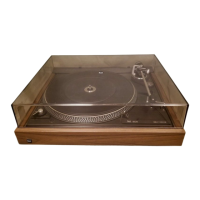
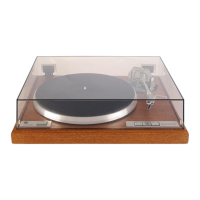
Motor
and Drive
Power
for
the turntable
platter
and
the
changing
mechanism
is
supplied
by a split
16-pole
synchronous
motor
131
The motor
is adapted
to 50
or 60
cycle
(Hz)
power
line
frequencies
by the
correct
choice of
the
motor
pulley
116
and
the locking
rail
9.
Pulley 50
Hz,
Part
No.261 938
/
60
Hz, Part
No.261
939
Locking rail
50
Hz Part
No.261
916
I
6O
Hz Part No.
264 O27
Conversion
to the
given
line
voltage
should
be
carried
out in accordance
with the
connection
diagram.
Speed
cfiangeover
The speed
switch
lever
is
brought
into
the
required
position
(33
or
45
rpm)
by means
of
the speed
lever
18,
the switch
lever and
the
spring
lever
of the switch
levers.
lf
the
machine is
switched
off,
then
the
switch
lever is
interlocked
ty
the locking
rail 9.
The speed
is
only
pre-selected
in
this way.
The locking
rail
9 is only
released
when
the
platter
5 turns.
This
then moves
the flat
belt 15
onto
the
required
steop
of the
motor
PulleY
116.
Platter
The
platter
is secured
to
the securing
disc 1
by the bayonet
catch.
When
removing
the
platter
5
press
the securing
disc lightly
downwards
and
turn it
approximately
600
to
the right until
it is
f elt to
click out of
posit
io
n.
Flat belt
As described
above,
the
platter
must
be removed in
order
to change the
flat belt 15. Remove
the
old
flat belt. Place
the
new flat belt onto
the
running
surface of
the
flywheel rotor
30-
Changing
the drive
pulley
1.
Remove
the
flat belt 15
and the toothed
belt 109.
2,
Detach tension spring
115 from
motor
plate
125.
3.
Remove
the hex nut 111,the
adiustment
cam 112 the belt
pulley
1 13 and the
counter bearing 1 14.
4.
Loosen
grub
screws
and remove
motor
pulley
1 16. Place
the replace'
ment
motor
pulley
on the motor
axle. Remove the
taper
bush. Take
care
with the interior spacing
bush.
Adiust
the motor
pulley
vertically
(see
f
ig.
1 )
and tighten the
grub
screws uniformly.
Place the
taper
bush in
the motor
pulley
116.
5. Counter
bearing 1 14,
belt
pulley
1 1 13 and adjustment
cam 1
12
should
now be
fitted
and the
hex nut
1
1 1 should now
be
tightened.
Replace
the tension sprino 115 and
the toothed belt 1O9.
Fit
the
flat
belt 15 onto
the
motor
pulley.
6.
Set the belt
pulley
1 13
to
jtscentral
position
by
turning
the regulating
knob
16.
(The
lug of the belt
pulley
should be
evident
in the middle
of
the drive
pulley).
Ser
the rated speed by
means ofthe hex nut
111.
The rated speed
may be increased by turning the
hex nut
111
in a
clockwise direction. The rated speed
may be decreased by
turning
the
screw
in an anti-clockwise direction.
Pitch control
By turning the
fine speed regulating knob 16
the belt
pulley
2 1O5
can
be moved. This rotation is
trans{erred
by
means
of the toothed belt 1O9
to the belt
pulley
1
,
thus moving the
counter bearing 1 14 and
the taper
bush
of
the drive
pulley
1 16 upwards
or downwards.
The taper bush of
the
drive
pulley
116
is designed to
vary the diameter of the
drive
pulley
thus varying the
nomlnal
speed
within the tolerance
at
+3o/o.
Tone arm
with
Bearings
To Remove the
Tone arm
Complete with
Bearings
1.
Adlust
the rotary
knob 54 to
zero. Lock
the
tone arm
40 in
place.
Remove
the weight
41.
2. Remove
the screening
plate
158. Unsolder
the tone arm
leads from
connection
plate
156.
3. Unhook
the
tension spring 226
from the bearing
stay
224. Re
move
the bearing
part
195.
Detach
the adiusting
rail 194.
4. Unhook
the tension
spring
214.
5.
Remove
lock
washer 217
and
the sliding
washer 216.
Detach
the
switch
off
bar 215
f rom the segment
211.
6.
Slacken
the
hex nuts 213
and
the screw
205. Remove
the
counter
bearinq
2O4 and
the segment
21 1 .
7.
Grip
the Frame 47 and the tonearm 40. Loosen the machine screw
48 and take
off the tonearm and frame.
To install the tone arm,
proceed
in reverse
sequence;
however, make
sure the segment 21 1 is
properly
adjusted as
described.
To Remove tho
tonearm
or the
spring
housing
1. Turn
the rotary
knob 54
to the
zero
position.
Lock
the
tonearm
4O. Remove
the weight
41.
2. Remove
the
screening
plate
158
and
solder
off
the
tonearm
con-
nections
at the
connection
plate
156.
3.
Remove
the screw
56. Femove
the
rotary
knob 54 and
the washer
53.
4. Loosen
the
nut 50 and
the
grub
screw 51.
Draw
the tonearm
40
complete
with bearing
57 from
the
bearing frame
52.
The spring
housing
58 or the tonearm
40 may
now be
changed'
Reassembly
involves
the reverse
procedure.
To Adjust the
Tone arm
Bearings
Exactly
balance
the tone arm.
Both
bearings should
have a smäll,
iust
perceptible
backlash.
Proper
ad.iustrnent
of the
horizontal bearing is
achieved if
the tone arm
can freely
slide
from
the record
inside to out-
side
while the anti-skating
adjustment
is
O.5. Proper adiustment of the
vertical
bearing is achieved
when the
carefully kicked
tone
arm
swings
into balanced
posit
ion.
Adjust the
backlash
by
grub
screws
46/51 for
the
horizontal
and
vertica I bearing, respect
ivel
y.
Tone Arm
Lift
To Replace the Lift Plate
''l
.
Detach the
tension
spring
226
from
the bearing stay
224. Rolate
bearing
part
195 through
90o
degrees
and remove
jt.
Remove
the
setting rail
194.
2.
Detach
the tension spring 214.
3. Remove lock washer
217
and
sliding washer 216. Detach
switch-off
bar
215
from
segment 21 1
.
4.
Slacken
hex. nuts
213 and screw 206. Remove
counter bearing
204
and
segment 21 1. Remove lock washer
188 and
disc l87,disengage
pawl
186.
5.
Remove
screw 183, and the spring washer
63. Remove lift
plate
assy. 182,
To replace the
lift
plate
182,
proveed-in
reversed sequence, but
look
for
proper
Adjustments
{described
below) when
you
fix
the segment
211.
Starting
and Shutting
Off
Swinging-in
of the
tone arm
4O causes rotation
of segment
211.
As a
result,
pawl
186
and
switch arm 142
wtll operate the
switch 152
causing
the
motor 131
and turntable
5 to rotate.
After
the record
has
been
played,
the
dog M of the turntable
will
operate the shut{ff lever.
During
play-back,
the switch-off
bar 215 is
dragged
in
proportion
to the
motion
of
segment
211.For records
116
to 122
mm in
diameter, the shut-off
lever
is
gradually
pushed
to dog
M
by
the switch-oIf
bar 215
in the shutoff range.
When the dog M
con-
tacts the shut-off
lever
A, the carrier 94
will move
the shift arm 142
to
its
zero
position
and
the
power
switch will
interrupt the
supply.
At
the same time
the lifting rail
218 coupled to the switch
arm 142
will
operate
the tone arm
lift and the
tone
arm
40 will be lifted.
Adiustments
1.
a)
Segment
Lock
the tone arm
40 in
place.
Moreover, a
play
of
0.3 to
0.5 mm
should
be
provided
between the
pawl
186
and the
stop
A of segment
211,
adjustable by slackening
the
hex. nuts 213 and shifting the
segment
211.
The
excenter
S
on segment 211
can be
used
to vary the
shut{ff
point
for
records 116
to 122
mm
in
diameter.
Pawl
With
the
excentric
bolt
adjust
the
switch-way
of the
lever
142.
To adjust
the
switch-way
so
that
a) the
power
switch must be switched
safety
b)
the
segment
211
comes free
from the
pawl
186.
Tonearm lift
Slightly
rotate
the
adjusting sleeve
181. The
stylus should
be iifted
fromrecordby3-5mm.
1r
-
b)
 Loading...