ENGLISH
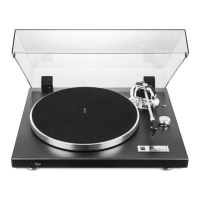
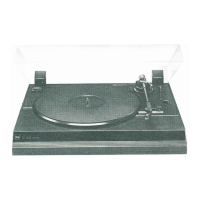
Unpacking and setting up
Please
also observe
the
information
contained
in the pack ing
instructions.
After opening the box place aside the
poly^styrene
insert with
the
complete
accessories. Remove the console with the inserted
record player from the box and put the unit in the place inten-
ded for it. First of all read the instructions slips on the unit
and then remove these afterwards with the packing films. We
recommend
you keep the original packaging in case you need
this
låter
on for further transport.
To release the transport locking screws (Fig. 1)
turn
these in
clockwisedirection until theyslidedownapproximately 15
mm
and then tighten these by turning
them
further in clockwise
direction.
In
this way, the record player is spring
mounted
in
playing position (B).
j%
iJL"
A
^F
B
^P
Now place the platter directly onto the motor axis. Remove
the tonearm counterbalance from the polystyrene insert and
place the
stem
of the counterbalance, after releasing the locking
screw
(2),
into the opening intended for this at the back end
of the tonearm. At the same time, the
triangulär
recess on the
stem should point downwards (Fig. 4). Balancing as
well
as
setting of
stylus
pressure and anti-skating which is now neces-
sary are described in
more
detail on page 18.
Please refer to the separate data sheet for the stylus pressure of
the cartridge
al
ready inserted in the unit.
Now connect to the reproducing amplifier and place the
mains
lead
into the socket. Please pay attention to the separate infor-
mation in these instructions.
Subsequent transport
The platter lies on the motor axis of the
electronic
central drive
without additional locking and must be removed before each
transport. In addition, the transport locking screws must be
loosened in
anti-clockwise
direction, pulled upwards and
secured by further turning (A). The tonearm counterbalance
should be removed.
Make sure that the tonearm is locked and that the stylus pro-
tection is
swivelled
downwards.
If
you intend to dispatch your unit, make sure that the packaging
is
impeccable
and, if possible, use the original packaging.
Connection
to the AC mains
The unit can be connected to
alternating
current 50 or 60 Hz,
110
- 125 V or 220 - 240 V and is
normally
set to 230 V.
Your record player can be run on mains frequencies of 50 or
60 Hz without conversion of the motor.
Conversion of the mains voltage should always be carried out
by specialist dealers or authorized
Dual
service workshops.
Connection to the
amplifier
Connect the cartridge lead equipped with RCA (cynch)
plugs
to the
phono-magnet
input of the amplifier (black = rightchan-
nel,
white= left
channel). Connect the one wire equipped with
the
cable
bracket or screw it under the
damp
marked "GND"
on the rear of the amplifier.
So that your receiver or reproducing amplifier be designed for
DIN jacks, have your specialist dealer adapt this by replacing
the complete cartridge
lead.
16
Cartridge lead with DIN jack
1.10
m
long.
Order
number
207 303.
Dual cartridge
leads
can also be equipped for
plug-in
into the
turntable.
Please do not forget to connect the chassis
lines
of the right
hand (green) and left hand
(blue)
tonearm lines to the chassis
of the unit when converting this from cynch (RCA) to DIN
jacks.
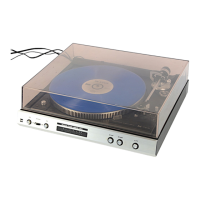
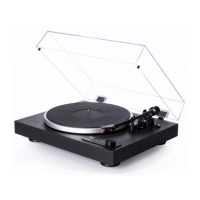
Dust
cover
In
order to
place the dust
cover in position, turn the unit round
so that the special hinges are in front of you and are easily ac-
cessible. First of all make sure that the insert brackets on the
hinges, into which the cover
will
be placed, are in correct
posi-
tion before you place the dust cover in position parallel to the
brackets and push this in
fully.
In this position (opening
angle
approx. 60°) the cover can also
be removed at all
times.
Should it be necessary to correct the balancing moment (elastic
force which keeps the cover above the console), this can be
carried out by turning both knurled screws. Please adjust both
screws equally.
In most
cases, correction by
half
a screw turn
each will be
sufficient.
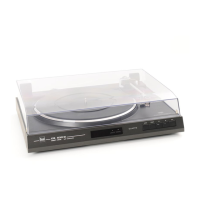
Setting up and operation
Before playing the first record, please adjust the pickup arm
return
mechanism
follows:
1.
Release the pickup arm and raise it with the arm lift lever.
2.
Swing the arm to the center of the turntable. (The arm is
returned
automatically).
Select platter speed, 33 1/3 or 45
rpm,
then unlock tonearm,
move
stylus tip protector upwards.
Now remove tonearm from post and swing it
över
the record.
After the tonearm has been swung
över
the record the turntable
platter automatically starts to rotate. When the tonearm
islifted
from its post and placed beside the tonearm rest, the platter
will rotate. The record on the platter can be cleaned (with an
antistatic
cloth
etc.) when the tonearm is in this position.
During this operation, at the record diameter of 30 cm or
17
cm
an index
hole
is perceptible, this indicates the correct
set-down
point for the
diamond
to the
lead-in
groove of the record.
This aid for the correct setting of the tonearm
may beswitched
off if the tonearm should be lowered when a 30 cm record is
used at another position, for ex. in the area of a 17 cm record.
In
order to
lower
the tonearm to a specific position of the
record
only
a
light
touch of the guide lever (8) or by pressing
the LIFT button (10) is necessary.
The cueing lift now operates and the diamond is placed care-
fully
on the record.
After playing the record the tonearm will return to the rest
and shut-off the unit automatically. The cue control lever will
return to its original position.
It
is
recommended
to lock the
tonearm and to
flap
down the stylus protection after
play.
If
the arm is not returned automatically due, for
example,
to
an
anormality
in the last groove of a record, we recommend
that you lift
the
arm with the lift lever or by pressing the LIFT
button,
and swing it inwards by hand.
Interruption
of Play (Pause)
Place the cueing control in
I
position. When this is lowered the
record continues to ptay. The last few notes played before the
pause are repeated.
 Loading...