20
Dualtron Thunder User Manual Dualtron Thunder User Manual
21
Important notice
* Metal vibration may occur due to motor vibration, vibration of the brake disc and pad
during the load section that accelerates during driving. (About 15 ~ 30Km, different for
each product)
This is a phenomenon in which all revolutions (fans, automobiles, ships, etc.) are
vibrating at a specific rotational frequency (rpm) rather than the product. However, if
the continuous noise or metal noise is large, there is a possibility that the disk is bent
and deformed.
* Please note that after running, there is a risk of burns due to the heat on the motor
and brake (especially disk rotor) side.
* Be careful that the bolts of the motor, rim and motor shaft due to the ABS function
may be loosened.
Important notice
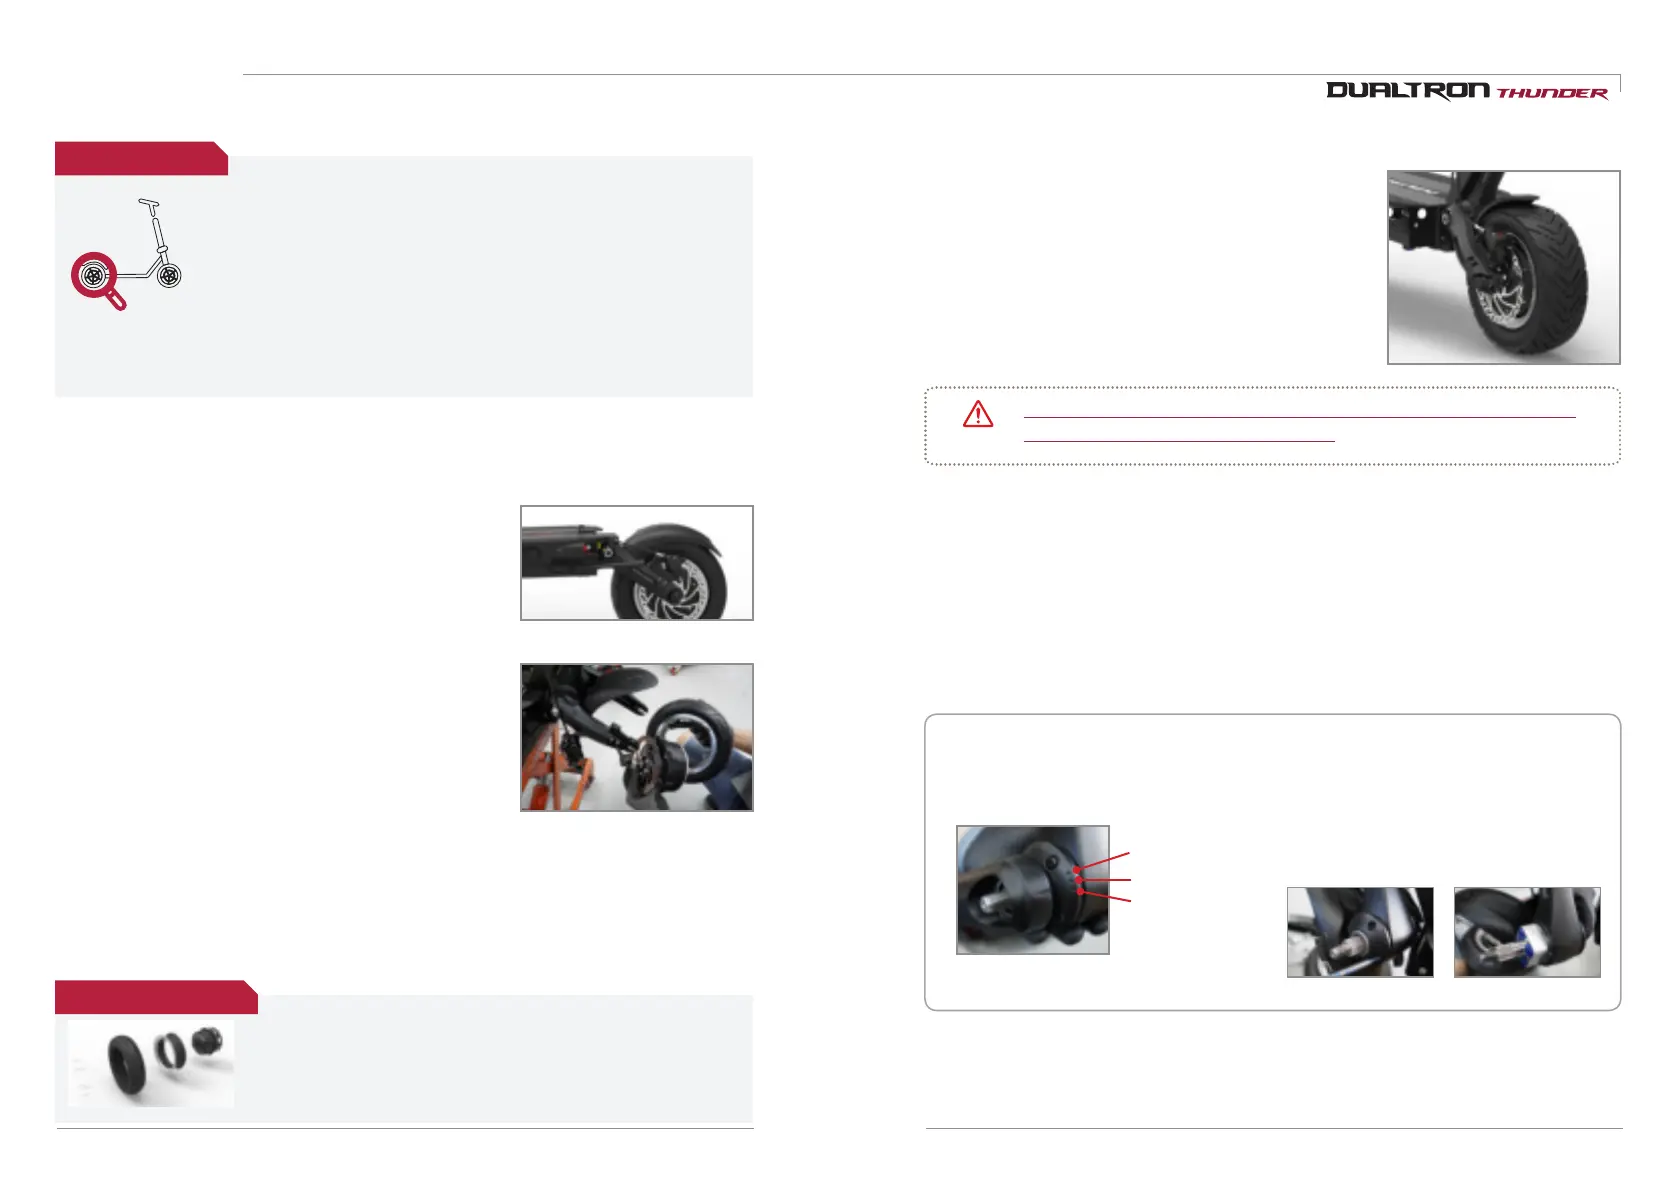
3. Causes and countermeasures of disc brake noise
The disc braking method uses a disc brake method with many
electric kickboards because braking power is good. However,
if you get a sharp hissing sound when you hold the disc brake,
dust or sand particles on the ground will spill out on the surface
of the disc, causing foreign substances to be on the brake pads
or disc surface, or bending due to heat or external impact. At
this time, clean the inner surface of the disc by turning the
wheels with a clean, dry cloth, or straightening the bent discs.
If the above measures are not taken, please visit the nearest branch and take a
safety check. There may be another problem.
Caution
3) Maintenance by self-maintenance
1. Brake adjustment method
If the braking force decreases due to overheating of the oil,
damage of the oil hose, loosening of the brake lever, oil
leakage, etc. after using the brake for a long time on the
downhill road, stop using and use after checking it.
2. Tire replacement method
1. After removing the calipers, remove the motor using 18mm
spanner and disassemble the wheel and motor fastening bolts.
2. Remove the wind from the tires and press the tires off the wheel.
3. Replace the tires and complete the assembly of the tires in
reverse order. Tighten the assembled tire to fit the body, then
tighten the screws and bolts.
*caution
●
After completing the tire replacement, try a simple test run with the appropriate air pressure (45 to 50
psi).
●
When puncture is occurred, it is possible to use repair by using patch seal. Please use the tire while
checking and checking continuously.
* Completely separable hub motor design By designing the rim and hub
motor to be completely separable
it is possible to replace only the rim
without replacing the entire motor when the rim breaks, thus improving the
maintenance and maintenance of the product. (Patent pending)
Easy-wheel system
4. Variable rubber suspension system (patent pending) adjustment
Designed by MINI Motors, the world's largest 45-step adjustable (3x3x5) rubber suspension system
allows you to adjust the suspension strength with motor shaft distance (3 steps), arm angle (3 steps),
and rubber cartridge replacement (5 steps).
1. Remove the front fender with a 3mm hex wrench, loosen the 18mm (motor side), 19mm (swing arm
side) nut, and then loosen the nut to remove the suspension arm.
2. Adjust the motor shaft distance, rubber cartridge replacement, and arm length to the desired
suspension strength.
Garage height
Intermediate stage
Garage lowered
■
Motor shaft distance (3 steps): Height
adjustent (by weight)
You can adjust the height from the center.
■
Rubber Replacement (5th Stage): Replace
Cartridge (Adjust height by weight)
Loosen both nuts with a wrench, loosen 3mm
bolts and remove. Replace the cartridge when it
is missing.
(It can be changed depending on weight and taste)
3. Align both suspension arms to the desired angle and reassemble using Loctite (screw lock).