45
a specialist dealer. If you do not have the necessary expertise
or auxiliary equipment, please always contact a specialist
dealer.
We recommend: Have maintenance work and repairs comple-
ted by specialist dealers only.
The ride-on mower and all attachments should be in-spected
once annually by a specialist dealer.
Always keep warning and information stickers clean and reada-
ble. Damaged or missing stickers must be replaced by new, ori-
ginal plates. If a component is replaced with a new component,
ensure that the new component is provided with the same
stickers.
For safety reasons, fuel-carrying components (fuel line, fuel
cock, fuel tank, tank cap, connections, etc.) must be checked
regularly for damage and leaks and replaced by a technician if
necessary.
The machine is equipped with numerous safety de-vices. These
devices must not be removed or modi-fied (bypassed, etc.) and
must be checked at regular intervals. Operations on the safety
devices must only be carried out by a technician.
Ensure that all nuts, pins and screws, especially the blade fas-
tening screw, are securely tightened, so that the machine is in
a safe operating condition.
For safety reasons, worn or damaged parts must be replaced
immediately.
Check the grass catcher unit (e.g. grass catcher box, discharge
chute) regularly for wear, damage or loss of functionality.
Particular care is required when working under the machine,
due to the weight of the ride-on mower.
Check the secure fastening of the front and rear wheels.
Always maintain the ride-on mower and the attachments in per-
fect operating condition. All safety devices must be present and
be in perfect operating condition.
Ensure that the tyres have the correct tyre pressures. The tyre
pressures speci ed in the instruction manual must not be excee-
ded.
Only perform work on the cutting unit when wearing thick work
gloves and exercising extreme care.
Check the function of the brakes at regular, short in-tervals and,
if necessary, have the required adjust-ments or maintenance
operations performed by a technician.
WARNING
Never work on or touch conducting parts on the ignition unit
with the engine running. Always pull the spark plug boot from
the spark plug before starting any work of care or mainte-
nance. Never perform any work on the machine while it is run-
ning. Any work not described in these Operating Instructions
must be performed by an authorized service workshop only.
Wheel axles and wheel hubs
These should be lightly greased once a season.
Blade
For safety reasons you should only ever have your blade
sharpened, balanced and mounted by an au-thorized ser-
vice workshop. For optimum results it is recommended that
the blade should be inspected once a year.
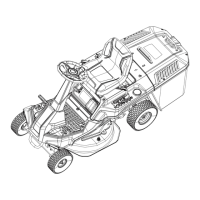
Change the blade
When changing the cutting tool, only use original replacement
parts.
Wear gloves to avoid cut injuries while changing the blade. Ne-
ver install another blade.
• Remove the ignition key.
• Remove the screw to replace the blade.
• Install everything as described in fig. Fasten the screw cor-
rectly. The fastening torque in 65 Nm. Replace the screw and
washer, as well, if you replace the knife.
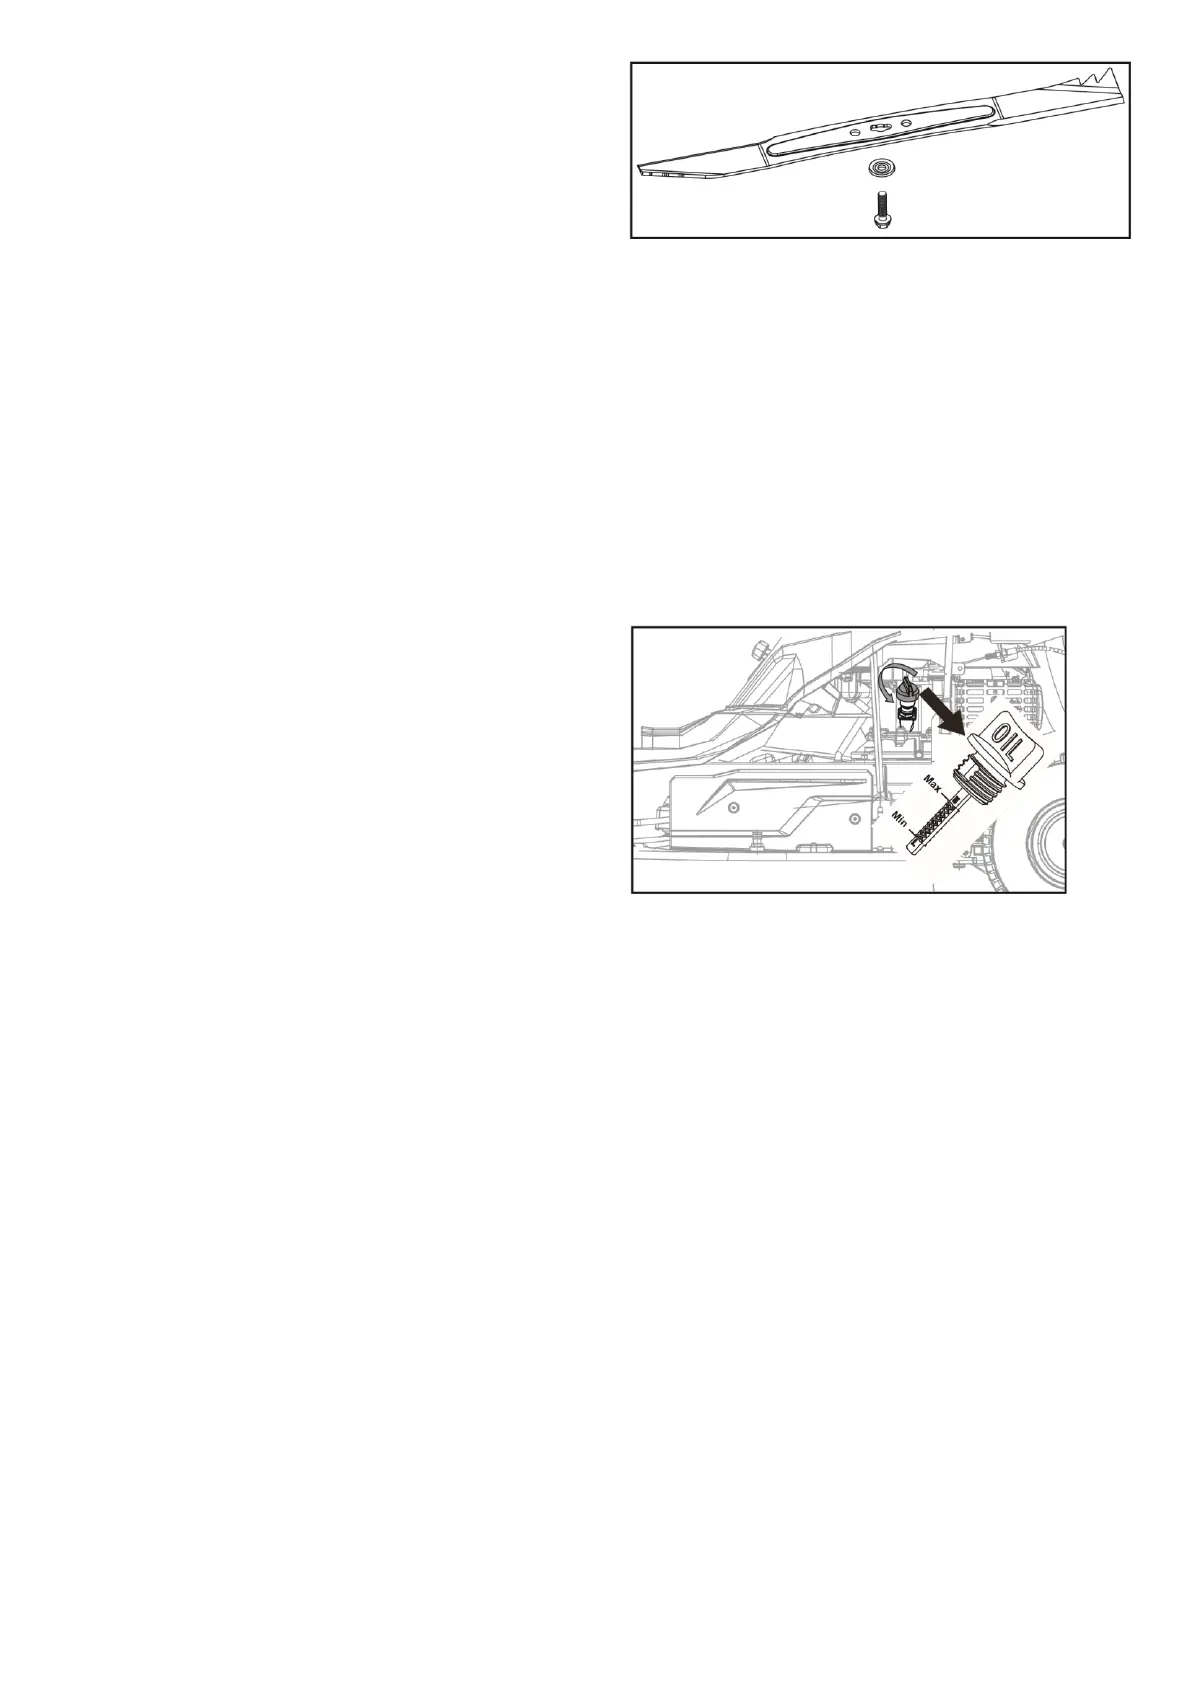
Checking the oil level
CAUTION! Never run the engine with no or too little oil. This
could cause severe damage to the engine. Use only SAE30 en-
gine oil.
Check the oil level
• Position the lawnmower on a straight, level surface.
• Remove the ignition key (12)
• Remove the oil dipstick (20) by turning it to the left, thenwipe
off he dipstick.
• Screw in the dipstick up to the limit stop again in the lling
nozzle.
• Pull out the dipstick and read the oil level horizon-tally.The oil
level must be positioned between the max and min of the oil
dipstick (20).
Oil change
• The motor oil change should be completed annu-allybefore
the start of the season while the motor is at operating tempe-
rature and shut off.
• Only use motor oil (SAE 30).
• Position the lawnmower on a straight, level surface.
• Remove the ignition key (10)
• Clean the area around the oil dipstick.
• Slowly unscrew and remove the oil dipstick.
• Place an oil pan (or suitable container) under the oil drainbolt.
• Remove the oil drain bolt and allow the oil to drain.
• After the oil has drained completely, replace the oil drainbolt.
• Refill the oil as described .
• Replace the oil dipstick and hand-tighten.
• Clean up any spilled oil.
• Dispose of the used oil in accordance with applicable regula-
tions.
 Loading...