29
ENGLISH
G) Programming the board
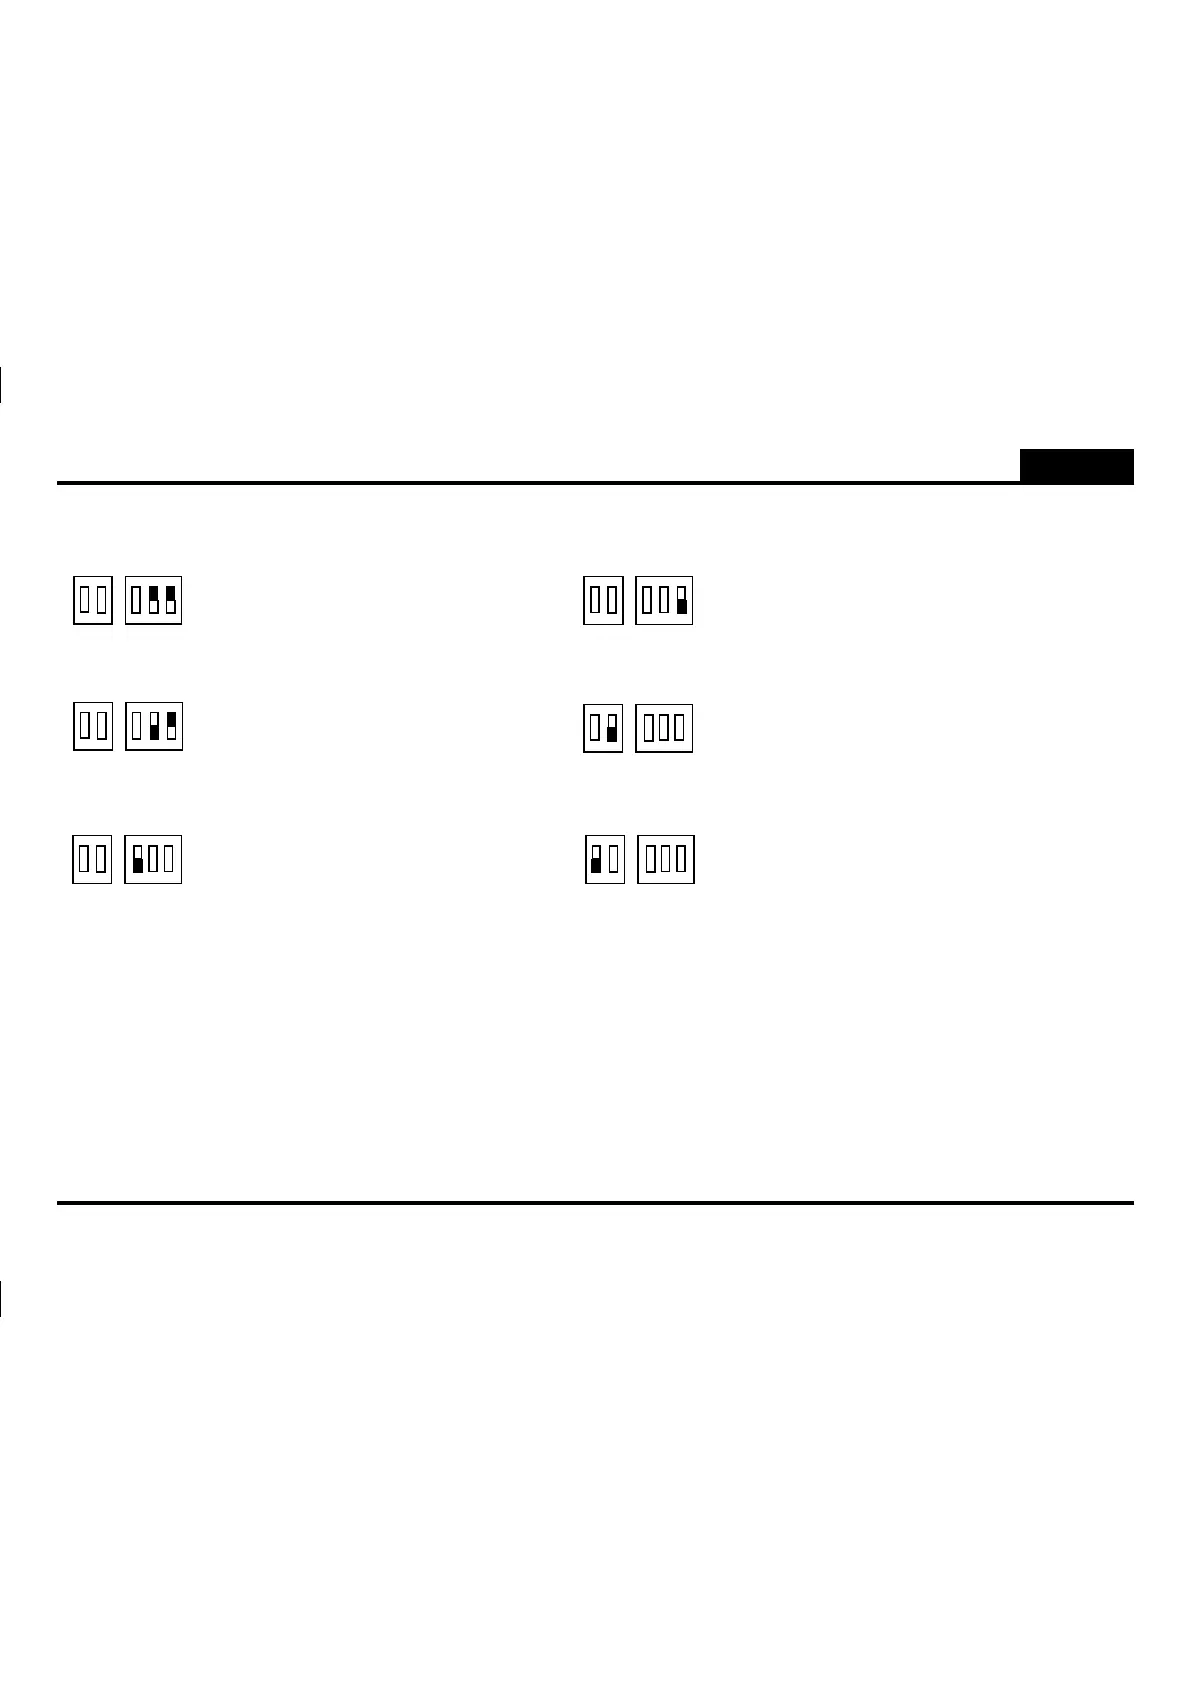
Step-by-step logic Condominium logic
Automatic logic
Kickback / extra-push logic
Single wing logic
Set the dip switch 1 to OFF.
Set the dip switch 2 to ON.
The state of the other dip switches
has no effect.
Set the dip switches 1 e 2 to OFF.
The state of the other dip switches
has no effect.
Set the dip switch 1 to ON.
The state of the other dip switches
has no effect.
Set the dip switch 4 to ON.
The state of the other dip switches
has no effect.
Set the dip switch 3 to ON.
The state of the other dip switches
has no effect.
Set the dip switch 5 to ON.
The state of the other dip switches
has no effect.
2nd wing delay reset (zero delay)
Radio-command codes self-learning: Press the P1 key once to insert a “Start” code; press the P1 push-button twice to insert a “Pedestrian Start”
code. Each time the push-button is pressed, the led DL1 flashes in acknowledgement. Subsequent pressures of the P1 key must be spaced by 1 sec.
minimum periods. When the led is lit with a fixed light transmit the code to be learn by means of the radio-command.
Erasing all stored codes: Press push-button P1 until the led DL1 goes off (about 10 seconds).
Setting the work time: Make sure the gate is completely closed. If not, position it manually. Press push-button P2 for about 3 seconds (the led DL1
will light with a fixed light) until the gate starts opening at a reduced speed. During this phase adjust the speed by means of the trimmer RV1 to obtain
the desired slow-down. When the gate is completely open press push-button P2 again and wait for the led DL1 and the blinker to go on with a fixed
light. You adjust the RV1 trimmer to half of run and then press push-button P2 repeatedly (6 times) to program the following operations :
1) motor M1 start
2) motor M2 start (delayed)
3) motor M1 slow-down start
4) motor M2 slow-down start
5) motor M1 stop (end of travel)
6) motor M2 stop (end of travel and end of programming)
Setting the pause time:
Press push-button
P3
until the led DL1 lights. Let the desired pause time pass, then press push-button
P3
again.
3 2 1 5 4
ON ON
OFF OFF
3 2 1 5 4
ON ON
OFF OFF
3 2 1 5 4
ON ON
OFF OFF
3 2 1 5 4
ON ON
OFF OFF
3 2 1 5 4
ON ON
OFF OFF
3 2 1 5 4
ON ON
OFF OFF