EasyManua.ls Logo

Dukane iQ Series - User Manual

Dukane iQ Series
178 pages
Print Icon
To Next Page IconTo Next Page
Loading...
Intelligent Assembly Solutions
www.dukane.com/us
ISO 9001:2008
Dukane products are manufactured
in ISO registered facilities
Dukane Intelligent Assembly Solutions • 2900 Dukane Drive • St. Charles, Illinois 60174 USA • TEL (630) 797–4900 • FAX (630) 797–4949
Dukane Part No. 403–586-02
iQ Series
ULTRASONIC PRESS SYSTEM
LE
User's Manual
AUTOMATED HAND PROBE PRESS

Table of Contents

Other manuals for Dukane iQ Series

Questions and Answers

  • L
    Lauren FieldsDec 1, 2025
    Why are parts marking when using Dukane iQ?
    • P
      Peter HunterDec 1, 2025
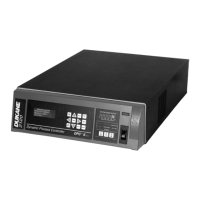
      Parts marking during welding with a Dukane system can occur due to several reasons. It may be caused by insufficient force during welding. Increase trigger force and weld speed. If using Match Detect, decrease the value of the parameter After Force Decreases By. If the horn heats up, check for a loose stud and tighten if necessary, or loosen and retighten the horn tip. Ensure the horn and booster are coupling well, and visually check the horn for cracks. Reduce the weld duration. High spots in the part, use of raised lettering, or improper fit of the part to the fixture can also cause marking. Check the part dimensions, the fit of the horn to the part, and the fixture for proper support. If oxide from the horn is being transferred, place polyethylene film between the horn and the part or u...
  • N
    Nathan EvansAug 23, 2025
    What to do if internal components are damaged during Dukane welding?
    • M
      Malik EvansAug 23, 2025
      If internal components of your workpiece are damaged during welding with the Dukane system, it may be due to excessive horn amplitude or exposure to ultrasound, or too much energy transmitted into the part, or components are improperly mounted. Try reducing the horn amplitude by decreasing the amplitude setting or changing to a lower gain booster, and dampen the excess horn amplitude. Also, reduce the primary weld duration and increase the horn amplitude and/or weld speed. Ensure that internal components are mounted properly and isolated from the part. Move the internal components away from areas of high energy and use an external device to dampen energy locally.
  • W
    wfischerAug 25, 2025
    Why is my Dukane iQ Welding System melting the part outside the joint area?
    • M
      meghan14Aug 25, 2025
      Melting or fracturing outside the joint area with your Dukane Welding System can occur due to sharp internal corners or thin sections. Radius all sharp corners and dampen motion for any damaged area, if possible. Excessive horn amplitude can also be a factor, so reduce the horn amplitude by decreasing the amplitude setting or changing to a lower gain booster. A long weld duration may also cause this issue; decrease the weld duration and increase the horn amplitude and/or the weld speed. Lastly, inherent part stress can contribute, so check the molding conditions, check the part design, and reduce the horn amplitude.
  • C
    Carl LiAug 26, 2025
    How to fix misalignment of welded assembly in Dukane iQ Welding System?
    • C
      Cynthia CantuAug 27, 2025
      To fix misalignment in your Dukane Welding System, consider these points: If parts are not self-aligning, design a means of alignment into the tooling or add a means of alignment to the mating part halves. If there's improper support in the fixture, redesign the fixture for proper support. For wall flexure, add ribs or gussets to the part, or add a rigid backup to a resilient fixture if large sections of urethane are deflecting. If the joint design is not properly dimensioned, re-dimension the parts. For incorrect part tolerance or poor molding, tighten the part tolerance and check the molding conditions.
  • M
    Michael WheelerAug 27, 2025
    How to troubleshoot uneven welding with Dukane system?
    • R
      Richard WilliamsAug 27, 2025
      To troubleshoot uneven welding with your Dukane system, check the following: If the part is warped, check part dimensions and molding conditions. Use a higher trigger force, increase dynamic hold distance, and increase static hold time. If the energy director varies in height, redesign it to ensure uniform height or use an interrupted energy director. Ensure parallelism between the horn, fixture, and part, and check part dimensions. If wall flexure is occurring, add ribs to the part or modify the fixture. If the knockout pin location is in the joint area, redesign the part. If there's insufficient support in the fixture, redesign it to improve support or change to a rigid fixture.
  • D
    david95Sep 23, 2025
    What to do if the Dukane Welding System generator fault does not reset?
    • M
      Megan MaloneSep 23, 2025
      The generator needs servicing.
  • K
    kennethhessSep 16, 2025
    What does 'Generator Fault Peak Overload' mean on Dukane Welding System?
    • C
      Carl LowerySep 16, 2025
      The 'Generator Fault Peak Overload' error indicates that the peak IGBT transistor current has been exceeded, typically due to a severe frequency mismatch. The fault will reset when the next weld cycle starts.
  • A
    anthonybrownSep 18, 2025
    What happens when Dukane Welding System shows overtemperature?
    • R
      Robert PageSep 18, 2025
      When the system cools down, the overtemperature fault will automatically reset.
  • R
    Rhonda SpencerSep 8, 2025
    How to fix weak welds with Dukane Welding System?
    • K
      Keith MckinneySep 8, 2025
      Weak welds are often caused by insufficient energy being transmitted to the part. To address this, you can increase the weld pressure, increase the weld duration (either by adjusting the Time or Energy settings), or switch to a higher gain booster. This will increase the amplitude and, consequently, the energy delivered to the weld.
  • J
    Jerry CookSep 5, 2025
    Why is Dukane Welding System process not in control?
    • K
      Kimberly JonesSep 5, 2025
      If your Dukane Welding System process is not in control, leading to inconsistent weld results, it may be due to a mold release agent being used. Clean the mating surfaces; if a mold release agent is necessary, use a paintable/printable grade. Incorrect part tolerances can also cause this; tighten the part tolerances and check the part dimensions and molding dimensions. Additionally, cavity-to-cavity variations can contribute; check the part dimensions and tolerances, check for cavity wear, and check the molding conditions.

Summary

Section 2 Health and Safety

General Considerations

Essential recommendations for safe, efficient, and injury-free operation of the equipment.

Health Notices

Addresses potential health hazards from plastic fumes and electrical safety precautions.

Section 3 Installation

Before Installation

Key considerations and preparatory steps before proceeding with system installation.

Lockout;Tagout Procedures

Detailed procedures for applying and removing lockout/tagout devices for safety.

Section 4 Controls

Generator Front Panel Controls

Overview of the generator's front panel display and control keys.

Section 5 Operation

Overview and Start-up

General overview of the generator and the sequence for starting up the system.

Stopping the Weld Cycle

Methods for stopping the welding cycle in normal and emergency conditions.

Menu Navigation and Usage

Guide to navigating menus, using hot keys, INFO menus, and parameter settings.

Parameter Configuration

Setting weld parameters like AMP, PRE-WELD, WELD, POST-WELD, LIMITS, and SETUPS.

System Status and Alarms

Displaying system status (OPERATE, LIVE) and understanding alarm messages.

Section 6 Options

Section 7 Acoustic Stack;Fixture Setup

Section 8 Stack Maintenance

Section 9 Troubleshooting

Troubleshooting Overview

Introduction to troubleshooting, weld characteristics, and limit switch functions.

Welding Issues

Troubleshooting common problems related to the welding process.

Insertion Issues

Addresses problems and solutions for insert installation into plastic parts.

Staking Issues

Troubleshooting common problems encountered during staking operations.

Continuous Welding Issues

Troubleshooting issues related to maintaining consistent welds in continuous operation.

Section 10 System Maintenance

Section 12 Specifications

Dukane iQ Series Specifications

General IconGeneral
BrandDukane
ModeliQ Series
CategoryWelding System
LanguageEnglish

Related product manuals