3. Operating Instructions
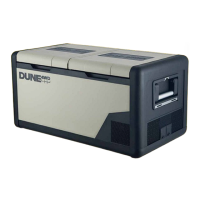
Dune 4WD Fridge/Freezer Dune 4WD Fridge/Freezer
6 7
3. Operating Instructions3. Operating Instructions
NOTE:
•
The temperature displayed on the control panel at start-up is the current internal
temperature of your Dune 4WD Fridge/Freezer unit. This will appear as a
continuous, non-flashing icon. Enter the settings mode (see below ‘Settings Mode’)
to set compartment temperatures. In this mode, the set temperature for a given
compartment will appear as a flashing icon.
Your control panel settings are stored in the control panel system memory. If you
suddenly lose power or disconnect your fridge from the power source, your
temperature and other settings will automatically restore.
The voltage display is used to monitor the DC voltage at the device input. This can
be used to aid selection of an appropriate battery protection level when the device
is powered by a battery. When the unit is powered by 220-240V AC, the voltage
display on the control panel will disappear.
Powering on/o the unit
• Plug in either the AC or DC power cable supplied with your unit.
• Hold the
button for 3 seconds to turn the unit on.
• Hold the
button for 3 seconds to turn the unit off.
Settings Mode
•
•
•
Press the button to enter the settings mode.
• Cycle through the different setting options by pressing the
button.
•
-
ed.
•
anything – after 3 seconds, the control panel will exit the settings mode
and return to its regular display state.
Set the temperature
• For the single zone: press the
button to enter the settings mode.
•
• Press the or button to increase or decrease the compartment
temperature respectively.
• NOTE: For the dual zone, press the
button again to adjust the com-
pressor compartment temperature.
• NOTE: Temperature range is -22°C to +10°C.
• NOTE: Temperature setting in step of 1°C.
Control Panel – Dual Zone
Control Panel – Single Zone