Version1.0(2016)Page
4
The default setting for temperature is ºF.To change the setting from ºFto ºC (or ºC to ºF), first press and hold the “+”and
“-” buttons on the transmitter simultaneously(Fig. 7).The highest settemperature is 99º Fahrenheit = 32º Celsius.
Explanatory notes for TIMER, THERMO, Thermostat, & Modes:
*1: TIMER mode is NOT available / included in model TR1002-TH.
*2: THERMO mode & Thermostatare NOT available / included in modelTR1002-T
*3: Mode sticker, located under the flip cover of transmitter, varies with different models.
REMOTERECEIVER BOX
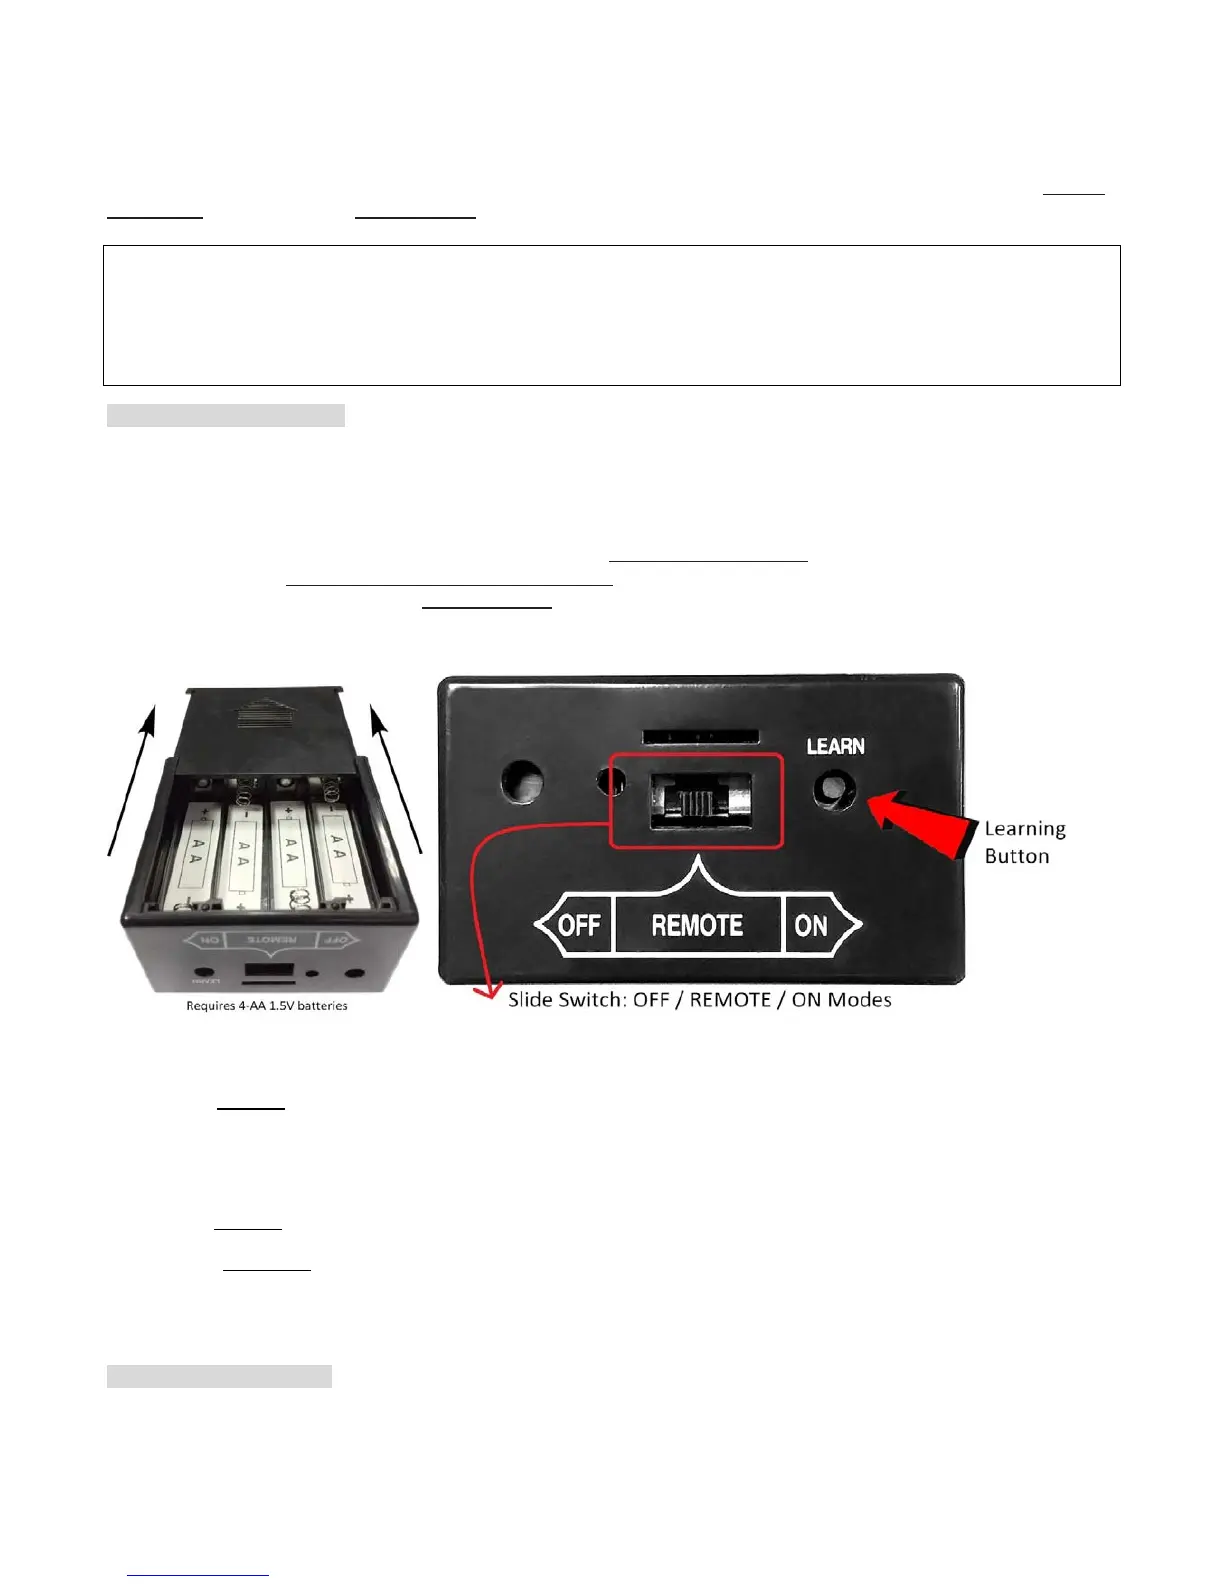
The remote receiver box requiresfourAA-size 1.5V batteries (Fig. 8). When LOW battery icon appears on the screen, please
replace batteries.
The remote receiver box equips the microprocessor that receives thesignals / commands from the transmitter in order
tocontrol systemoperations / functions. Itmakes sounds of quick BEEP X 2 (♫, ♫)
when it receives an ON command,
andmakes sounds of continuous BEEP for one second (♫~~)
when it receives an OFF command manually (or when Timer
ends automatically).But no beep when cycling ON/OFF
automatically inTHERMO
*2
mode.
The remote receiver box has a 3-position slide switch (ON/REMOTE/OFF) and a LEARN button on the front panel (Fig. 8).
Fig. 8 Fig. 9
ON mode: Slide the switch to the ON position (toward the LEARN button), the system will remain ON all the time. Remote
transmitter is disabled
.
REMOTE mode: Slide the switch to the REMOTE position (middle), the system will ONLY operate with receiving commands
from the remote transmitter.
OFF mode: Slide the switch to the OFF position, the system will remain OFF all the time. Remote transmitter and Receiver
box are both disabled
.
★NOTE: The OFF mode
is strongly recommended if house is unattended for a long time. For safety, placing the slide switch
in the OFF position also functions as a safety “LOCK-OUT” by both turning the system off and disable the remote receiver.
W
ARNING& REMINDER
ThissystemMUST be installed exactly as complied with these instructions.Read all instructions before installation,