4
OVERVIEW
1
2
3
4
5
6
7
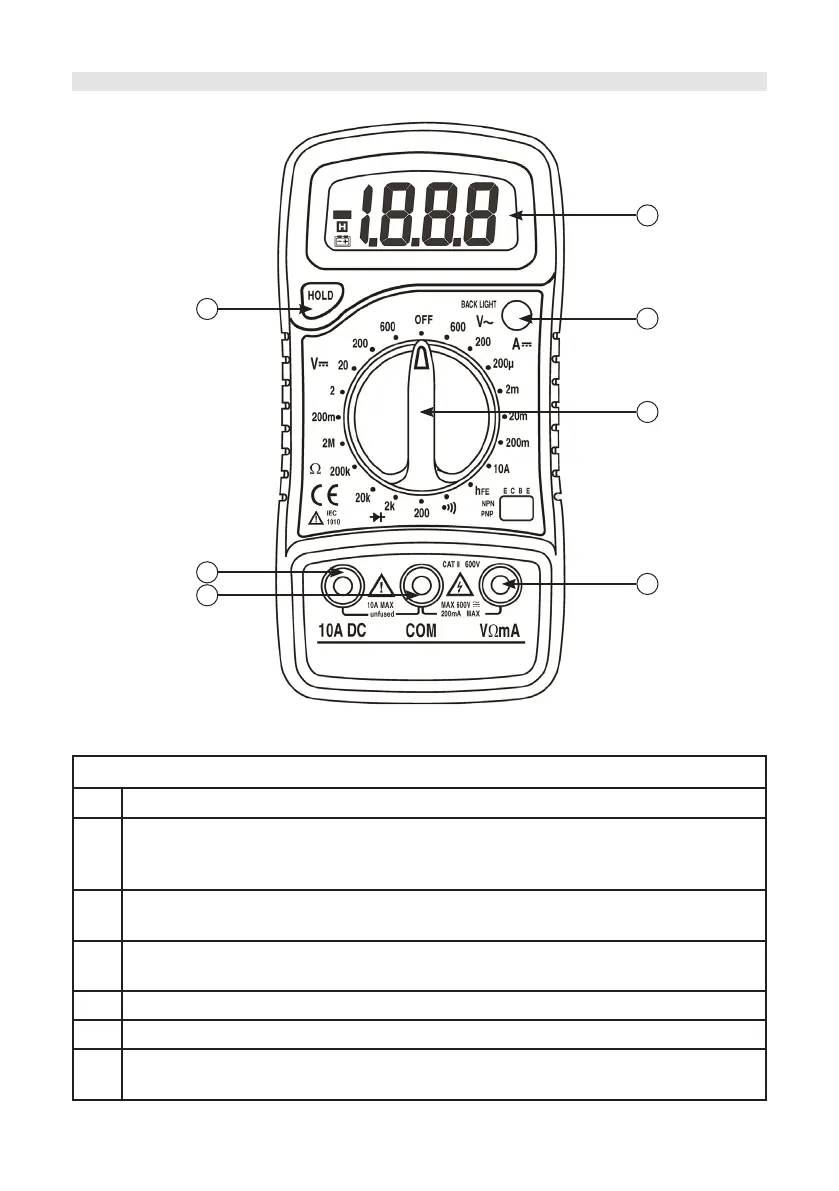
Front Panel Description
1 Display - 3½ digit, 7 segment, 15mm high LCD
2
Backlight - once pushed the backlight of the display will turn on. It will self-
turnoff after about ve seconds. To turn the backlight on again, just push the
button.
3
Rotary switch - used to select functions and desired ranges as well as turn
the meter on or off.
4
“VΩmA” jack - plug in the connector for red (positive) test lead for voltage,
resistance and current (except 10A) measurements.
5 “COM” jack - plug in the connector for the black (negative) test leads.
6 “10A” jack - plug in the connector for the red test lead for 10A measurement.
7
Hold button - once pushed, the display will keep the last reading and “H”
symbol will appear on the LCD until the button is pushed again.