Do you have a question about the DURAVIT Happy D.2 H2 6365 and is the answer not in the manual?
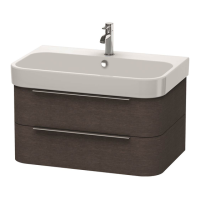
Provides overall dimensions (A, B, C) in mm and inches for the Happy D.2 washbasin and vanity.
Illustrates the various hardware and parts included with the Happy D.2 installation kit.
Offers basic instructions for using the bathroom furniture, emphasizing avoiding direct water contact.
Details drilling anchor holes for wall mounting, specifying drill bit sizes and anchor types for different walls.
Guides on securely attaching the washbasin to the wall, including bracing and using mounting bolts and nuts.
Explains how to check and adjust the vanity's levelness and position using specific screws.
Covers the process of inserting the vanity drawer and securing it to the wall with anchors and screws.
Reiterates checking vanity levelness and making final adjustments with screws after drawer installation.
Details how to adjust the vanity drawers for proper alignment and gap consistency.
Provides instructions for fine-tuning drawer adjustments for front, back, left, and right alignment.
Instructs on checking all gaps and applying a silicon bead between the washbasin and the wall for sealing.
Lists critical safety precautions for using the furnishing, including electrical shock and general warnings.
Specifies the requirement for connecting the product to a grounded metal wiring system.
Describes the product's intended use, electrical connection, and notes on technical improvements.
| Collection | Happy D.2 |
|---|---|
| Model number | H2 6365 |
| Material | Ceramic |
| Width | 370 mm |
| Mounting Type | Wall-mounted |
| Color | White |
| Finish | Glossy |
| Installation Type | Wall-mounted |
| Seat | Not included |