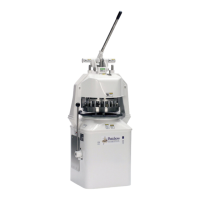
1. Remove front and rear canopies
(Fig. 7, No. 5 & No. 6) by lifting up, and out.
2. Pull handle (Fig. 7, No. 1), down until ring (No. 2) is
resting on pallet (No. 3).
WARNING!
Do not release the handle from your hand, until the
handle is returned to its uppermost position.
3. Hold handle in this position, grasp outer edges of the
ring (Fig. 8, No. 1) keep fingers out of the divider/plug
area. Rotate ring ¼ turn until slots are in line with the
arms (Fig. 8, No. 2).
4. Slowly raise the handle and watch arms (No. 2) for
interference. If interference occurs, lower handle and
reposition the ring (No. 1). Raise handle, with no
interference to its uppermost position.
5. Remove ring (Fig. 8, No. 1) from machine, set ring
aside on work bench. Do not drop or bump ring as
this can cause nicks or other damage to ring.
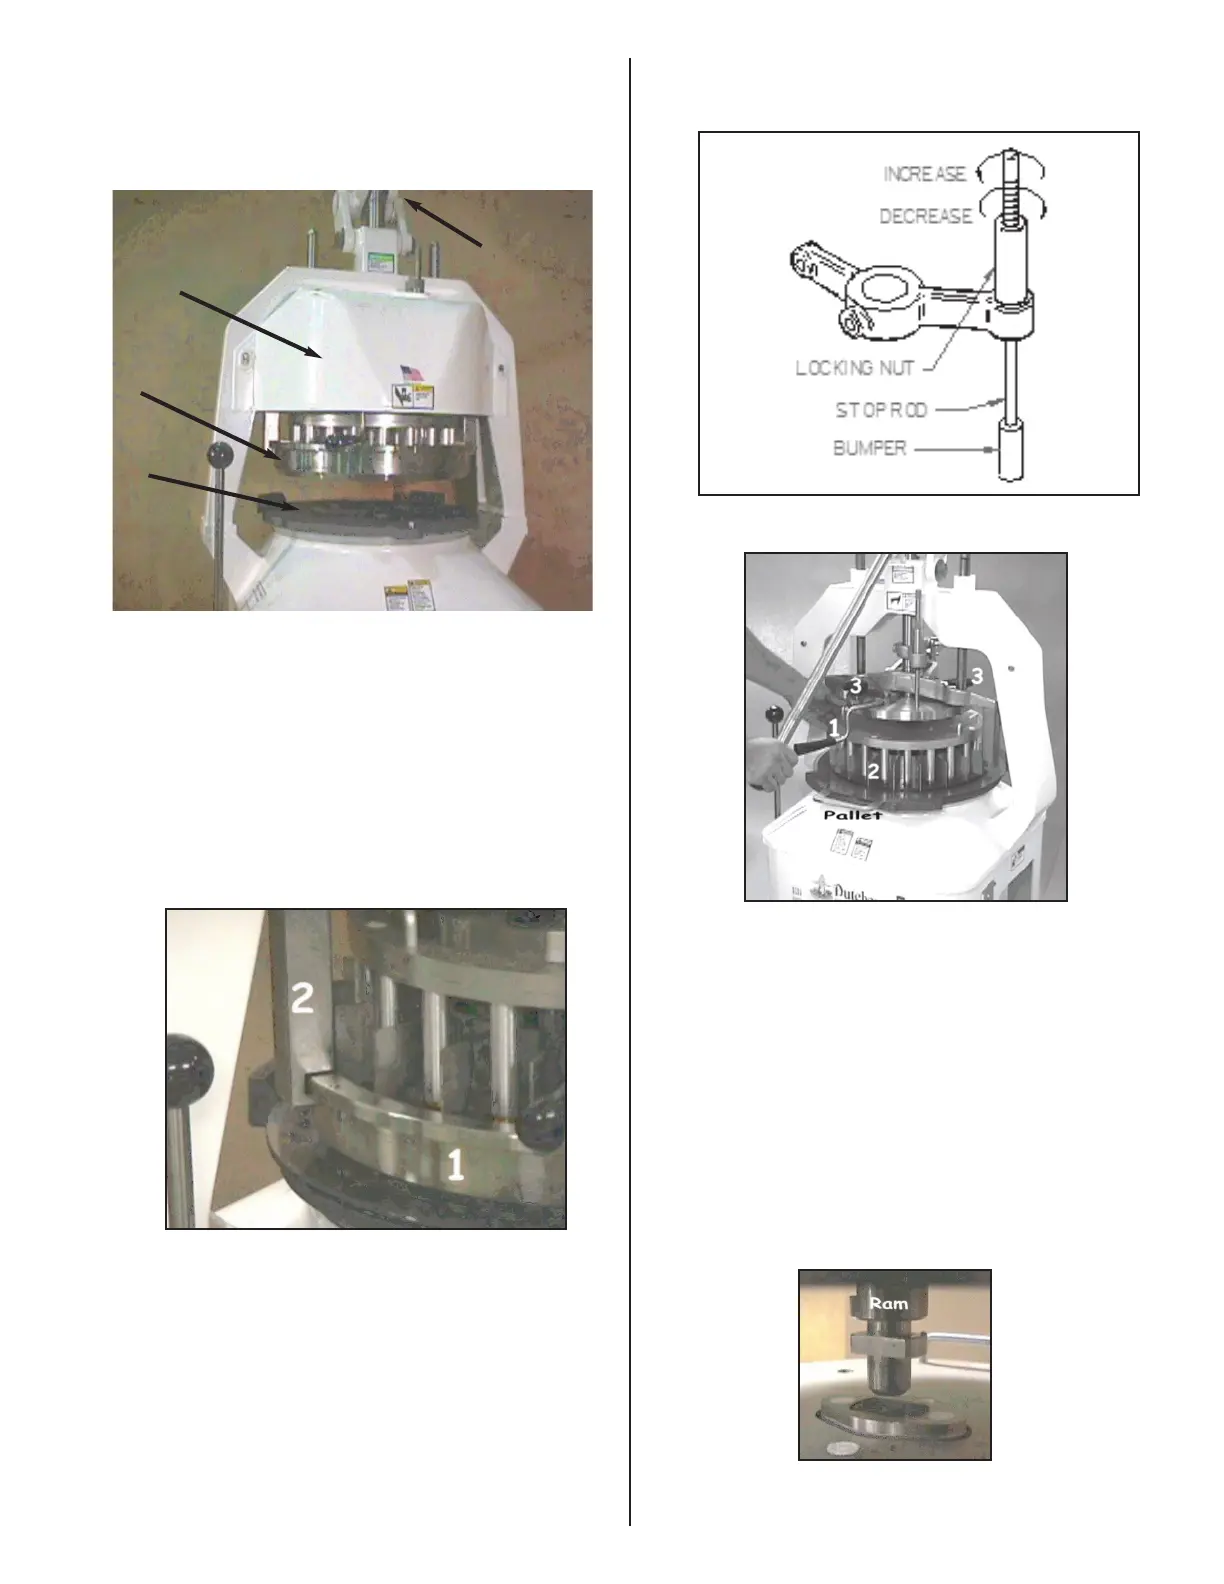
6. Loosen the two hand knobs (Fig. 10, No. 3) fully.
Figure 10
WARNING!
Do not release the handle from your hand, until the
handle is raised to its uppermost position.
8. Pull handle down until head rests on pallet (Fig. 10).
9. Rotate head assembly (Fig. 10, No 2) ¼ turn clock
wise.
10.Raise handle slowly, watch ram (Fig. 11) making
sure it causes no interference. Continue to raise
handle to uppermost position. Head assembly
should be resting on the pallet.
Figure 11
6
Figure 9
7. Set pocket height on the stop rod, Fig. 9, at least 1" off
the trip plate. Release he trip lever (Fig 10, No. 1).
5 & 6
2
3
1
Figure 7
Figure 8