66
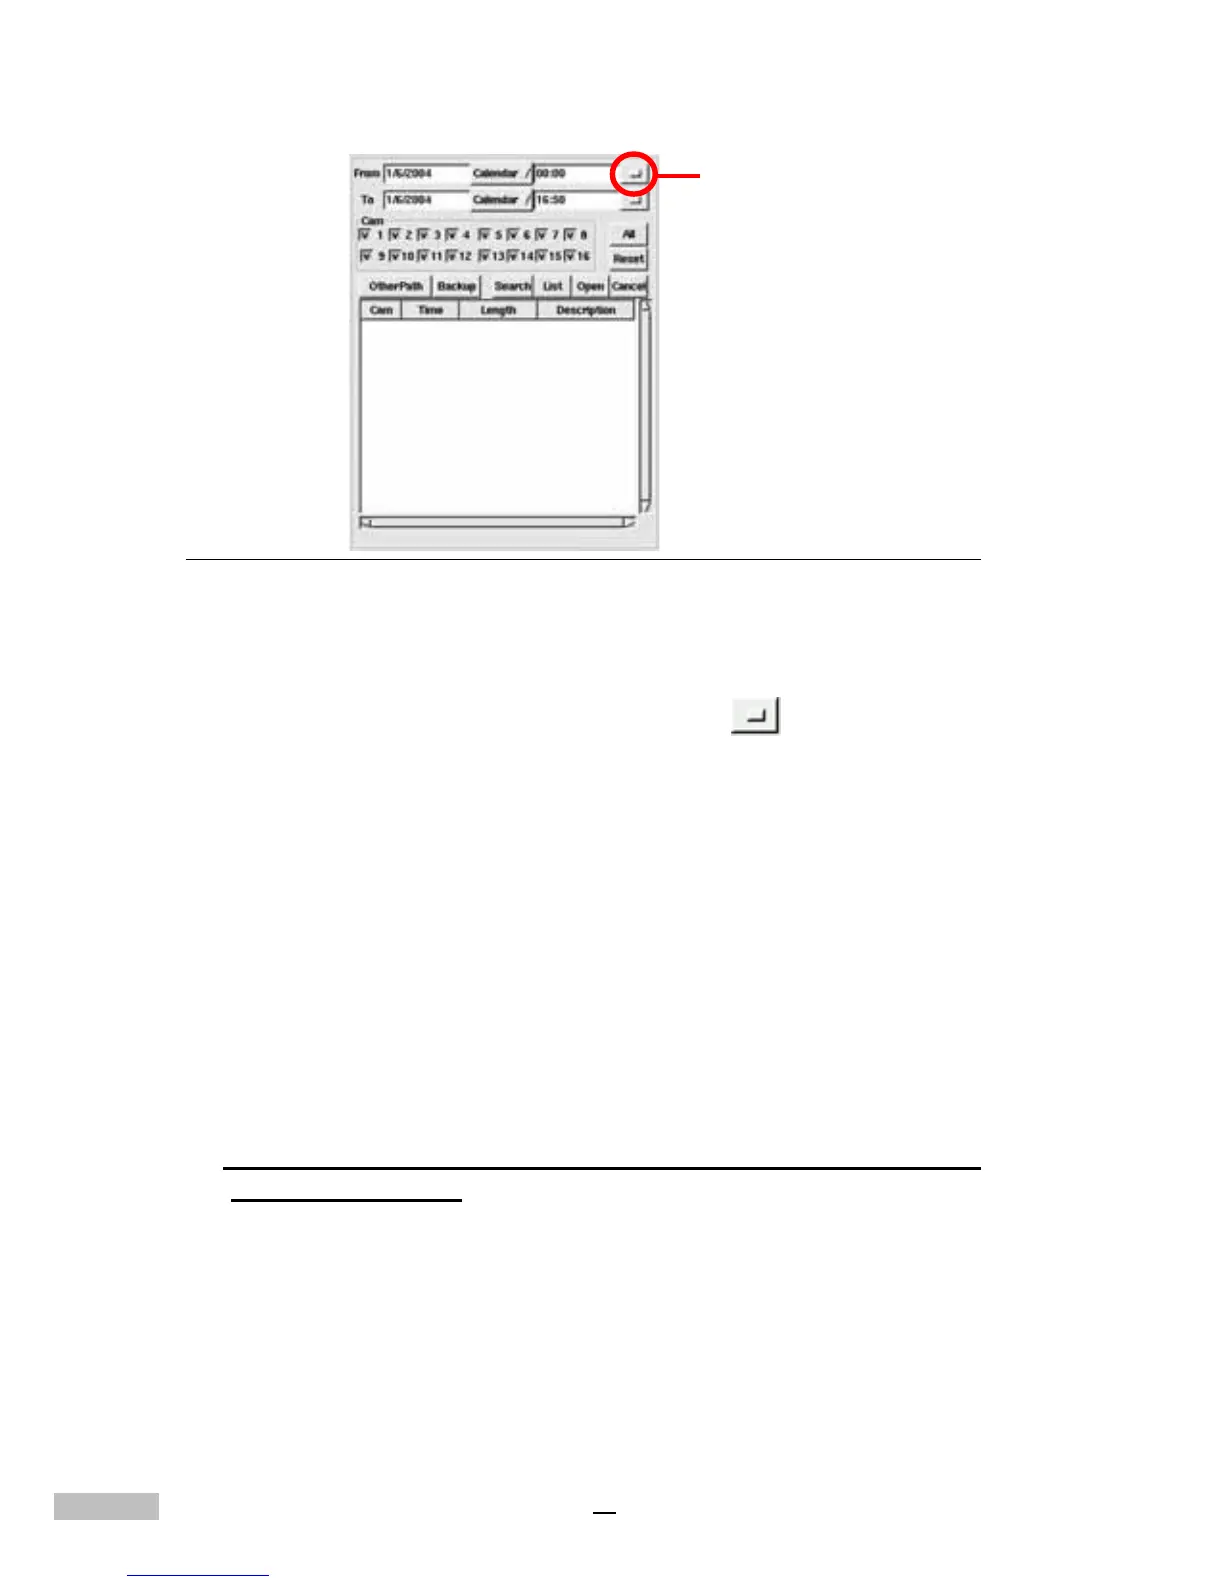
Figure 13-2: Pop-up Database Screen
1.Calendar Search: Clicking the “Calendar” button, users are able
to search the desired record files depending on the selected date.
2.Time Search: Clicking the “Time Search”
button allows
users to select a specific time in which they would like to view the
files.
3.Camera Search: Select the camera whose recording files you want
to playback; you could choose more than one camera if desired.
4.Select All: click “ALL” to choose all cameras.
5.Reset: click “reset” to clear the current data, and reset the new files
you choose.
6.Other path: click “other path” to choose the recording files under
“other path”.
7.Back up: choose the file you need to back up and click “Backup” to
back up files.
NOTE: Press <Shift> and mouse's left button at the same time, you can
choose multipe files.
8.Search Button: Click the “Search” button to list all recorded files
in accordance with the selected Date, Time and Camera.
9.List Button: Click this button to display a list of all the recorded
database.
10.Open: Click this button to view a selected file.
11.Cancel Button: Cancel all actions.
time search