Operation
Starting the ECE Flood Lamp
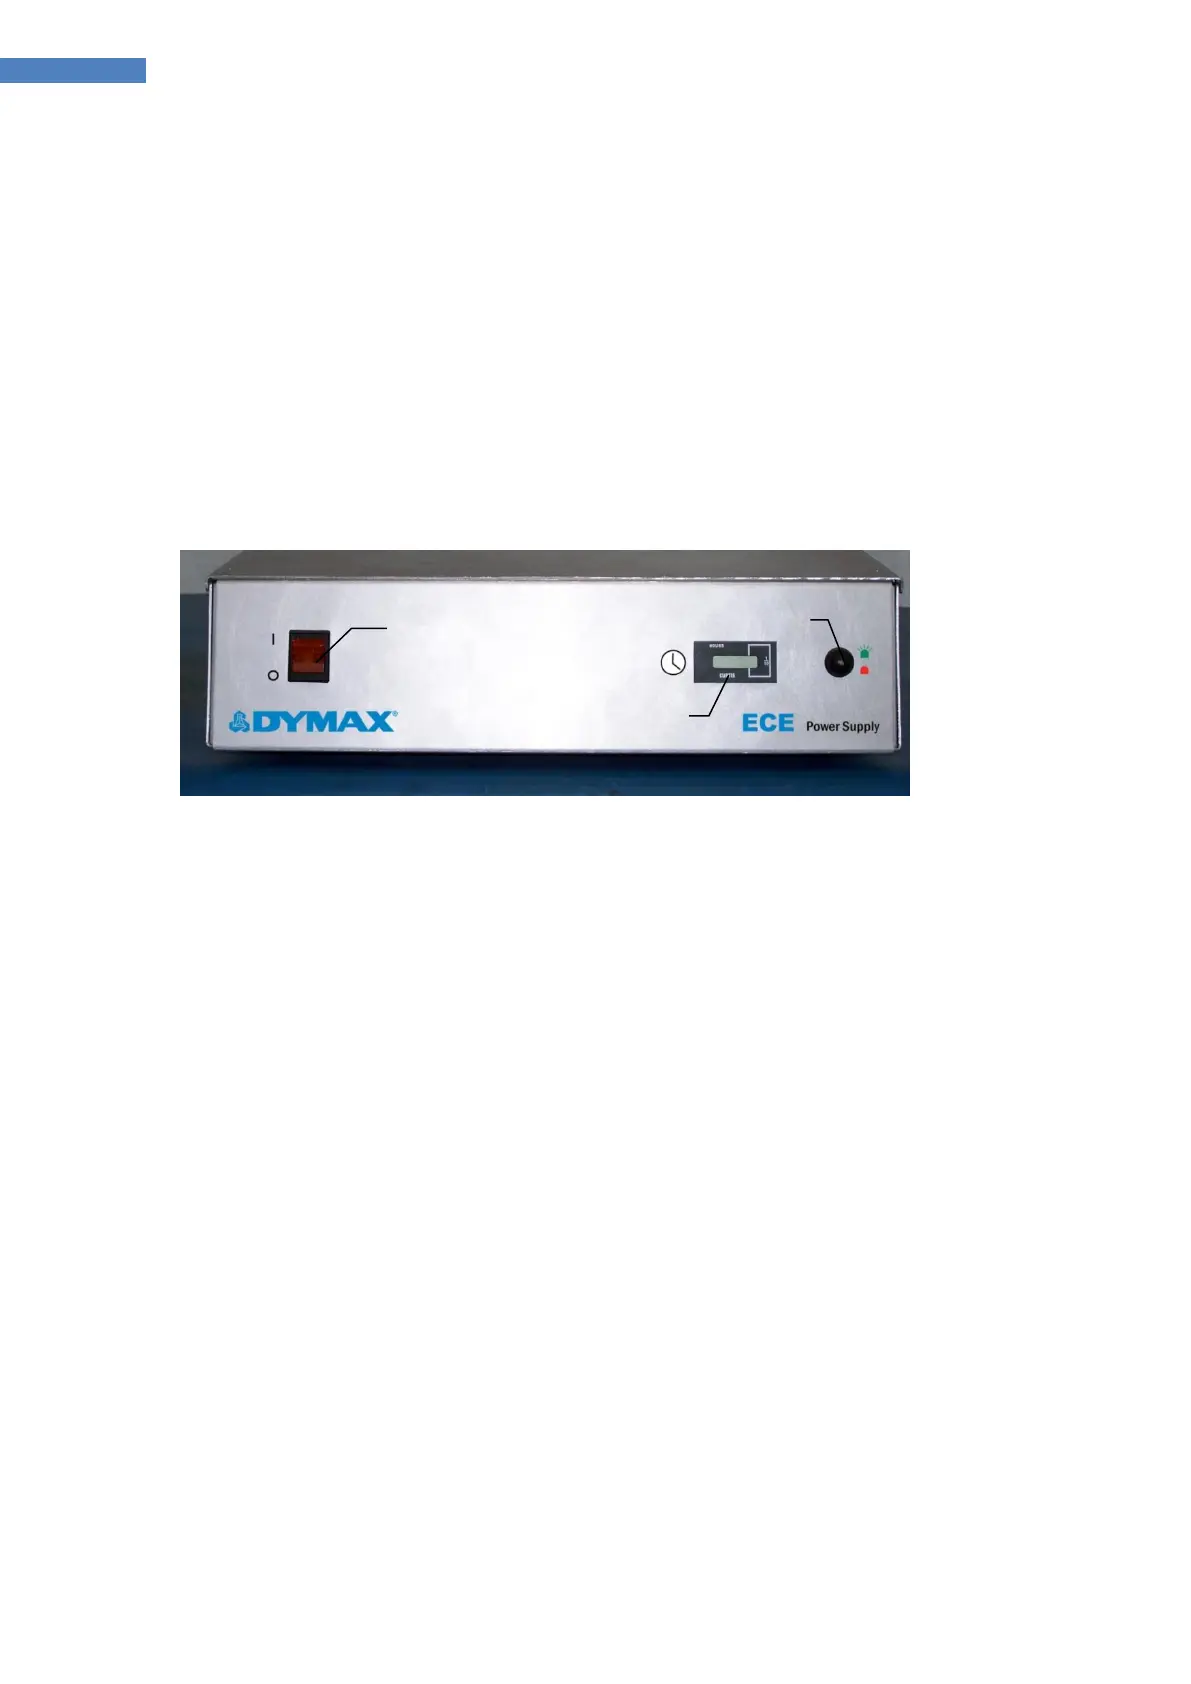
Turn the unit on by pressing on the Power Switch (Figure 14) on the Power Supply. The Power Switch will
light up to indicate that the power is on, the Fans will run, but the Flood Lamp will remain off. To light the
Lamp, press the Lamp Igniter/Fault Indicator Button (Figure 14) on the right side of the front panel. The
center of the button will illuminate green.
NOTE: While most lamps typically require less than 30 seconds to ignite, a new lamp may require extra
time.
Figure 14. Power Supply Front Panel
After the lamp has ignited, allow five minutes for the lamp to reach its maximum output intensity.
These UV flood lamps are designed for continuous operation.
Lamp life is reduced approximately one hour each time it is started. To avoid premature lamp
deterioration, leave the unit on through breaks, short shutdowns, and lunch hours.
NOTE: If the power is momentarily lost or the lamp is inadvertently shut off, or is shut off due to an over-
temperature condition, it must cool down before restarting. This may take 5-10 minutes depending on
ambient conditions. The Power Supply may be left energized while the lamp is cooling. An operator will
need to press the Igniter/Fault Indicator Button (Figure 14) to re-light the lamp when it has cooled
sufficiently.
Each time the lamp is turned on, it should operate for at least five minutes to allow complete ionization of
elements inside the lamp. Failure to do this may result in failure of the lamp to restart. Refer to the
troubleshooting section of this manual for more information.
Loading Materials in the Light Shield
1. Once the ECE lamp is ready, check that the ECE ZIP Shutter is in the closed position, and load parts to
be cured on the Light Shield work surface (preferably in line with the center of the shutter).
NOTE: The ECE ZIP Shutter will close automatically and the lamp will shut off when the access door is
opened.
2. Estimate the height of the curing part in respect to its base, or to the base of the part holder (if the
object to be cured is not free standing), and then adjust the position of the work surface at a proper
distance from the curing part. Use a ruler for setting accuracy.