Setting Up the DYMO LabelWriter 400 Printer with Terminal Services
Setting Up the DYMO LabelWriter 400 Printer with Terminal Services 5
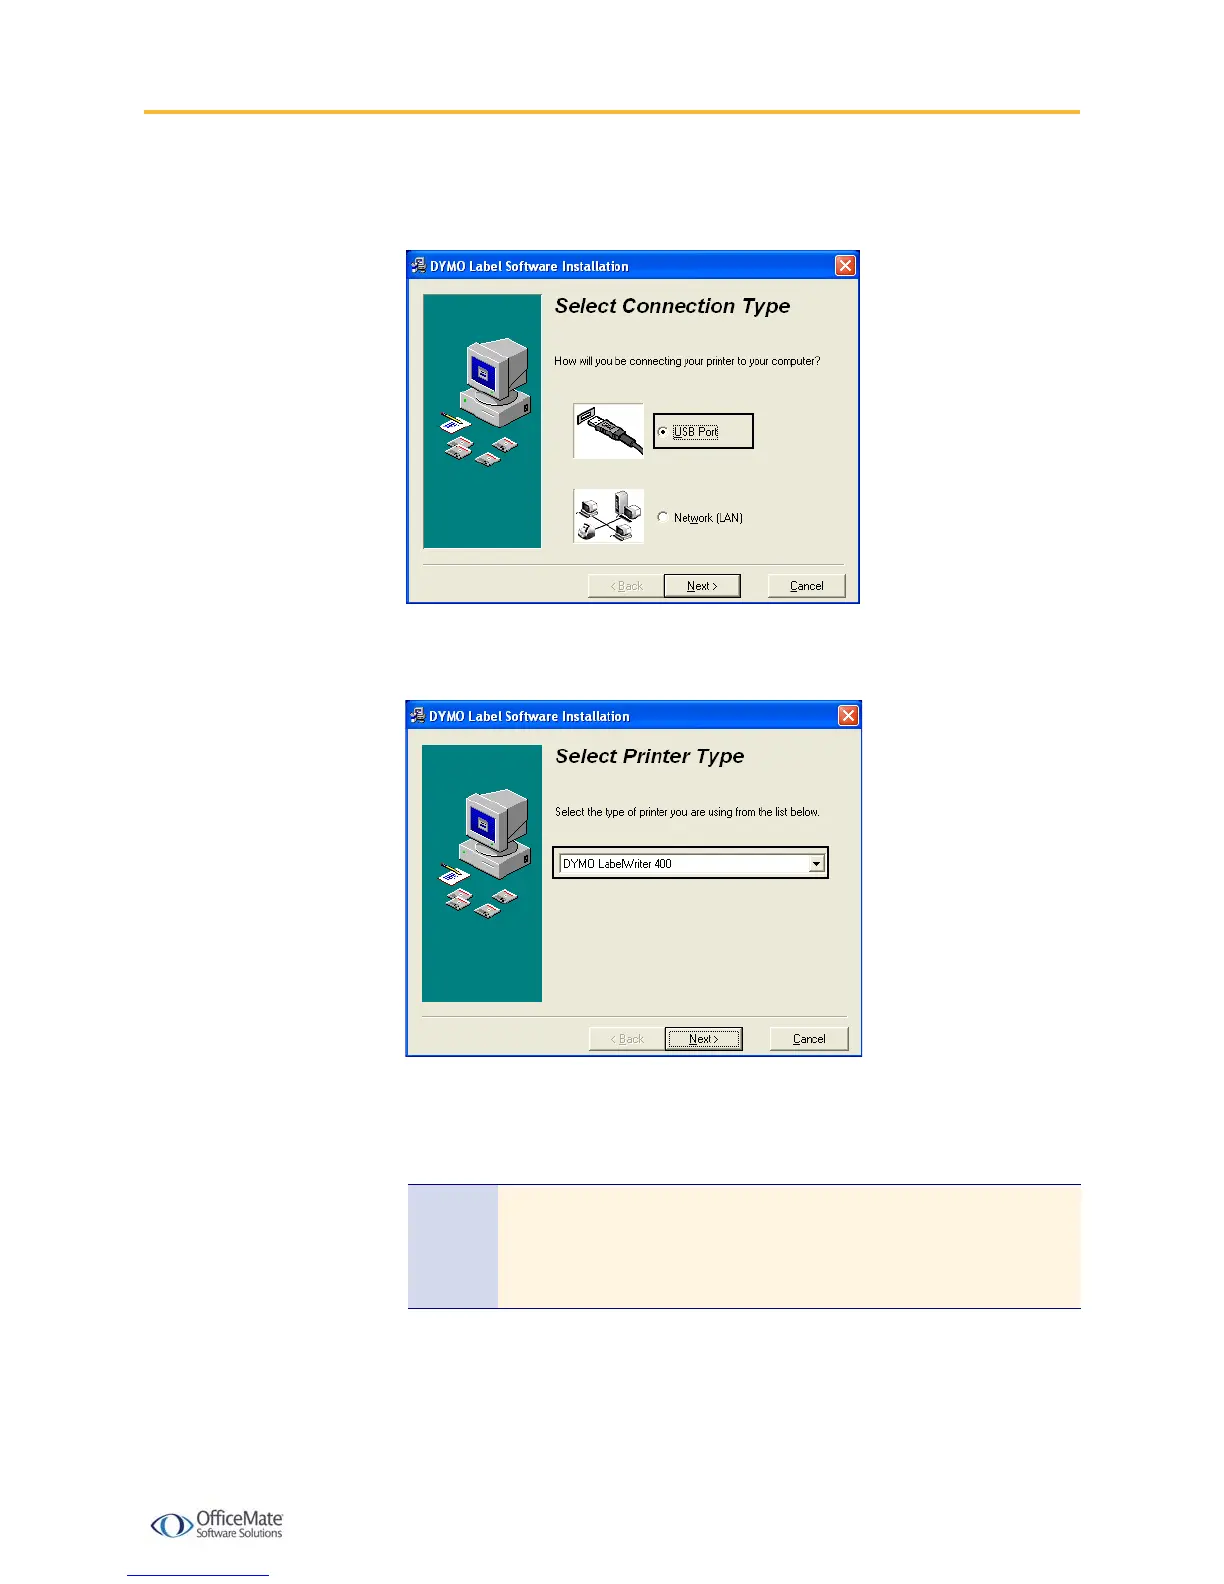
7 When asked to select a connection method, select the USB Port radio button
and click Next.
8 When asked to select the type of printer, select DYMO LabelWriter 400 from
the drop-down menu.
9 Click Next to continue until the installation is complete.
10 Test the printer by following the instructions listed under the “Printing Your
First Label” section of the DYMO LabelWriter Quick Start Guide.
X To allow your local USB port to be available during a terminal
server session
1 On the local computer attached to the DYMO LabelWriter 400, click Start.
2 Select Programs or All Programs.
Note If you do not have the DYMO LabelWriter Quick Start Guide and the
DYMO Label Software User Guide, download these documents from
the DYMO Web site at
http://global.dymo.com/enUS/TechSupport/.

 Loading...