Exerferi busapellab ius assin conserchil est, temperibus nihi-
caboris et autem volupta eturecto excerem repe volupta peliquis
mi, quasi optae. Lia cum ulpa verorro conem rectotatur assimu-
sae. Itatio. Quaspedi dellorum vendaer spicimod esed quo debit
enimet aut ut fugiae inveles es vercimpel idenestio ipsandia et
ute plitat.
Ces dolutem quisquatur?
Bus ex ent vollacestia sitam, id utate nonet lit quis consent
veremporia aute vit occust laut a por aperum et a veritia experru
mquodi ut laborru ntorerum eum seque volecestio. Ut quo occab
id ut maio. Bus molupta temoluption cuptatentur, erum dolupis
quaspis doluptas qui ommodion prepers pedionsequia ipsam
audaeribus aut autectatur?
Dandus dolorrum sa premo mint, nusdae excestia quas denis
pori imus que viducid emporiti il iumquo od quisque nost voleni
solorero is aut id que modicit latur?
Right Page Header
55
SC-14
54
SC-14
SC-16 • Parts Reference
SC-14/SC-15/ SC-16• Parts Reference
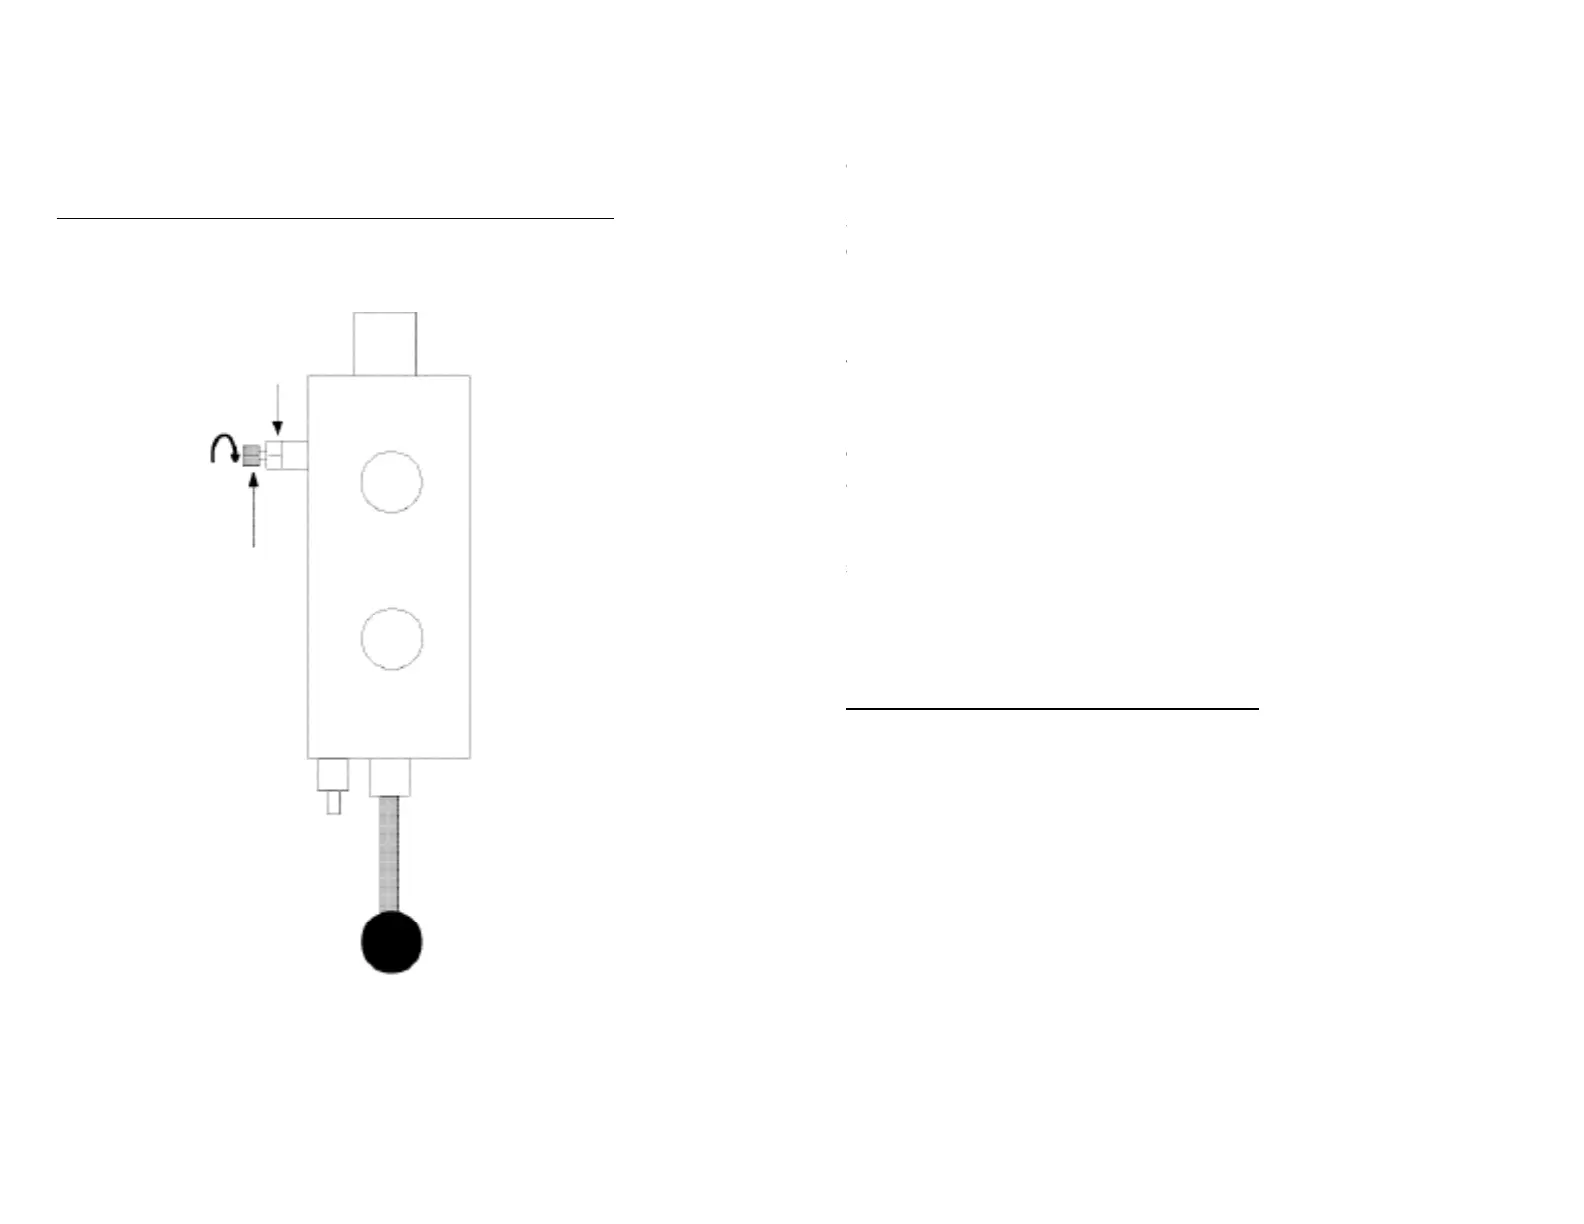
(2) TURN CLOCKWISE APPROX
¼ TURN TO INCREASE DETENT,
THEN RE-TIGHTEN JAM NUT
(1) LOOSEN JAM NUT
BOTTOM VIEW
DETENT ADJUSTMENT ON SPLITTER VALVE
Step 1. First grind the rails on the one side of the sawbar by starting at the
tip of the bar (make sure the grinding wheel is in between two teeth of the
sprocket) and slowly rotate the saw bar then continue down the sawbar.
(Make sure your grinding table is exactly 90 degrees from the grinding
wheel.) Check the bar rails for any undercuts in the rails. Grind the bar
until all chips or undercuts have disappeared. Flip the bar and do the other
side.
Step 2. Make sure chain oil ports in the sawbar are open. A thin wire (i.e.
welding wire) and an air nozzle work well if they are plugged.
Step 3. Take a light sanding disc (an angle die grinder works well, but a
palm sander or something similar would also work) and sand the edges of
the bar to remove all the burs.
Step 4. Take a bar cleaner tool (a Leatherman® multi-tool also works well
for this) and clean all the debris out of the bar rails. Now take a spray
cleaner (Sprayon® CR757 citrus degreaser or Transtar Autobody
Technology®’s Acry Solvent work well) and spray it into the the saw bar
rails and sprocket. Now take an air nozzle and blow into the rails and
sprocket to remove any metal particles. (If left in the bar, these metal
particles will act like sandpaper which would cause damage to your bar,
sprocket and chain) The sprocket should turn if you blow onto it with your
air nozzle, if it doesn’t you should spray more cleaner on the sprocket and
work it in a little. The sprocket should now turn freely if you blow onto it.
Step 5. Now pour some oil (bar & chain oil or air tool oil both work well)
it to the sprocket and along the rails on both sides of the saw bar.
CHAIN MAINTENANCE/SHARPENING
• Always set the clamp assembly at 35° for the left-hand side and right-hand
side
• Always set the grinding head assembly at 60°
• Always use the 3/16 grinding wheel. It will come along with your grinder(Op-
tional diamond grinding wheels are available. Though more expensive it is
faster and decreases risk of burning the tooth.)
• Dress your vitried grinding wheel often to maintain correct shape. (use the
dressing brick that will come with your grinder, also use the gauge to check
if it is the right shape )(this procedure is not needed with a diamond grinding
wheel)
• Always be sure you do not burn the saw-chain tooth. This will weaken the
tooth and it will lose its sharpness very quickly. To avoid burning the tooth,
use light, intermittent strokes.
Instruction For Sawbar Maintenance
 Loading...