8.1.7 Analog Output Calibration
Place the indicator in CAL mode by pressing and holding down the FUNC button while powering
up the unit. When the indicator show COnF, press the UP arrow once to show CAL on the
display. Press the FUNC button until the appropriate C parameter is displayed. Connect a
multimeter to DC Out + and DC Out -. Using the UP/DOWN arrows, adjusts the counts for the
appropriate output:
C6 Retransmission current output minimum value – adjust to 50.0µA (near Zero)
C7 Retransmission current output maximum value – adjust to 20.00 mA
C8 Retransmission voltage output minimum value – adjust to 0.00 VDC
C9 Retransmission current output maximum value – adjust to 10.00 VDC
When compete, hold down the FUNC button to return to Operating mode.
Note: The above procedure only applies to indicators order with the output option. Units are
precalibrated from the factory and do not require adjustment.26 COMMISSIONING
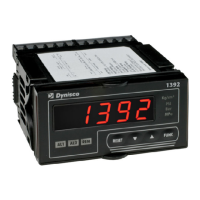
8.2 Operating Mode
In this mode the Model 1392 monitors the input signal, displays the measured value, and
performs alarm functions. You can display high and low peak values, lock and unlock the
keyboard, reset alarms, and perform transducer input calibration and alarm threshold settings. It
is also possible to load default parameters.
Parameter values listed below can always be viewed, but they can be modified only if the
indicator keyboard is unlocked. If anyone attempts to modify the parameters when the indicator
is locked, the display will show inh.
8.2.1 Keyboard Lock/Unlock
When the measured value is displayed (normal operating mode), you can lock or unlock the
keyboard by holding down the buttons in the following order, + RESET + FUNC. The display will
then show the new desired mode: Loc or UnLoc.
8.2.2 Alarm Set Points
If the indicator has automatically returned to operating mode you can return to set the alarms by
following this procedure.
1. Alarm 1
Press the FUNC key once. The display will alternately show 1.xxxx and the alarm set point,
where xxxx is a code for alarm operation mode. Only the alarm set point is shown during
modification. Use the and keys to modify this parameter. Resolution and decimal point position
are as selected for the readout value. Press FUNC to store your change. The indicator
automatically returns to the normal operating mode after 6 seconds if no changes are made.