Set throttle stick at lowest
possible position.
Set throttle stick at lowest
possible position.
Aileron Trim
Buttons
Elevator Trim
Buttons
Throttle Trim
Buttons
Rudder Trim
Buttons
Aileron Trim
Buttons
Throttle Trim
Buttons
Elevator Trim
Buttons
Rudder Trim
Buttons
Mode 2
Mode 1
QUICK START GUIDE
!
IMPORTANT: Read manual for full safety and warranty information.
E-fliteRC.com
CHARGE BATTERY
1.1 Connect power supply to an appropriate power source.
1.2 Insert output plug from power supply into the power input slot of the
4-port charger.
1.3 Insert up to four (4) flight batteries into the charger.
CAUTION: Only use supplied 6V power supply with charger.
TRANSMITTER PREPARATION
2.1 Please make sure you have fresh/charged batteries in your transmitter.
If applicable, set your transmitter model to Airplane. JR/Spektrum
transmitter servo settings should be set to default (normal) servo
direction. Futaba transmitters (equipped with Spektrum modules) may
require you to reverse the throttle channel.
2.2 If you decide to use an E-flite
®
LP5DSM or HP6DSM transmitter, please
position your channel reversal dip switches as shown above.
THE FOLLOWING STEPS OUTLINE THE
BINDING PROCESS
3.1 Confirm the process of entering the bind mode for your chosen
transmitter by reviewing the instruction manual included with the
transmitter.
3.2 Make sure the flight battery is disconnected from the 5-in-1 unit and the
transmitter is turned off.
3.3 Plug the flight battery into the 5-in-1 unit. After 5 seconds the LED on the
5-in1 unit will begin flashing.
3.4 After verifying the LED is flashing on the receiver/5-in-1, follow the steps
that allow your chosen transmitter to enter bind mode.
3.5 If you entered bind mode correctly, you will see a solid LED approximately
5–10 seconds later on the receiver/5-in-1. You should now be bound to
the transmitter, and have full control and function.
If you encounter any problems, repeat the binding process again or call the
Horizon Support Team at 1-877-504-0233.
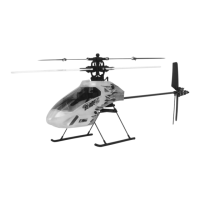
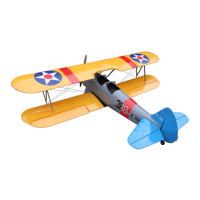
PROPERLY INITIALIZE AIRCRAFT
5.1 Place the helicopter on its side on a stable surface.
5.2 Insert flight battery into the mSR with the label facing towards the bottom
of the helicopter.
PROPERLY INITIALIZE AIRCRAFT (continued)
5.3 Connect the 5-in-1 connector to the flight battery. The connectors are
oriented for a proper polarity connection when the red dots are on the
same side (usually towards the top of the helicopter). DO NOT MOVE OR
SWAY THE HELICOPTER DURING INITIALIZATION PROCESS.
NOTE: The only time you should connect the flight battery to the
5-in-1 unit before powering the transmitter on is when you are binding
the receiver of the 5-in-1 unit to the transmitter. Please see the
Transmitter and Receiver Binding section of the instruction manual for
more information.
2.2 3
5.1 5.3
5.2
1.1
1.2
1.3
Red Dots
PRIOR TO INITIALIZATION
4.1 Place throttle stick and trim in the lowest possible position.
NOTE: The throttle stick MUST be set in the lowest possible position, and
the throtle trim must be set to the middle or a lower-than-middle position
(the middle position is indicated by a longer-than-usual beep/tone), in
order for the 5-in-1 unit to arm.
PRIOR TO INITIALIZATION (continued)
4.2 Turn the transmitter on and place at least 2 feet away from the helicopter.
NOTE: Each time before you fly, you should ALWAYS turn the transmitter
on before connecting the flight battery to the 5-in-1 unit. After each flight,
be sure that you always disconnect the flight battery from the 5-in-1 unit
before powering the transmitter off.
2–3 Feet Away
4.1 4.2
IMPORTANT: The following is a list of some of the Spektrum
™
DSM2
™
equipped transmitters and modules that will bind to the receiver/5-in-1 of
the Blade mSR BNF: E-flite
®
LP5DSM, E-flite HP6DSM, ParkZone
®
Vapor
Transmitter, JR
®
X9303 2.4, JR 12X 2.4, Spektrum DX5e, Spektrum DX6i,
Spektrum DX7, Spektrum Modules.
NOTE: The Spektrum DX6 (SPM2460) is equipped with DSM (not DSM2)
technology and is not compatible with the receiver/5-in-1 of the
Blade mSR BNF.
LP5DSM Transmitter HP6DSM Transmitter
NOTE: Keep a record of the existing settings in case you want to go back
and fly your other aircraft.