4810 Clover Road • Greensboro, NC 27450 • 1-800-336-2776 • www.eagleequip.com • © Eagle Equipment 2018.01 • page 11
ELECTRICITY AND PNEUMATIC CONNECTIONS
WARNING: Before installation and connection, check to be sure that the electricity power supply
corresponds to the machine technical data. All the installation of electric and pneumatic devices must
be operated by a professional electrician.
Connect the compressed air connector which is on the machine right side with compressed air system.
The electric grid that the machine connects to must have fuses protection device and good outer cover
grounding protection. Install the leakage automatic air switch on the maim power supply, leakage
current is set at 30A.
NOTE: The power plug for this machine is NOT INCLUDED. The user should self-connect one power
plug no less than 16A as well as in line with the machine voltage. Or directly connect the power supply
according to the above requirements.
1. ADJUSTING OPERATION
1.1 FUNCTION OF PEDAL
1. Tread rotation pedal (1), Tire installation base (17) rotates in a clockwise
direction; lift Rotation Pedal (1). Tire installation base (17) rotates in an
counter-clockwise direction
2. Tread bead breaker pedal (3), bead breaker shovel (5) closing toward inside;
loose bead breaking pedal (3), bead breaking shovel (5) returns to original
position.
3. Tread rise-fall pedal (2), Tire lifting device lifting up; lift the rise-fall pedal
(2), the tire lifting device will fall.
1.2 OPERATION OF A THE TIRE CHANGER
Operation of tire changer consists of three parts:
1. Breaking the tire bead
2. Demounting the tire
3. Mounting the tire
CAUTION: Before any operations, don’t wear loose clothing and wear
protective hat, gloves, and skid-proof shoes. Ensure to exhaust the air
in the tire completely, and remove all the wheel weights from the rim.
1.2.1. BREAKING THE TIRE BEAD
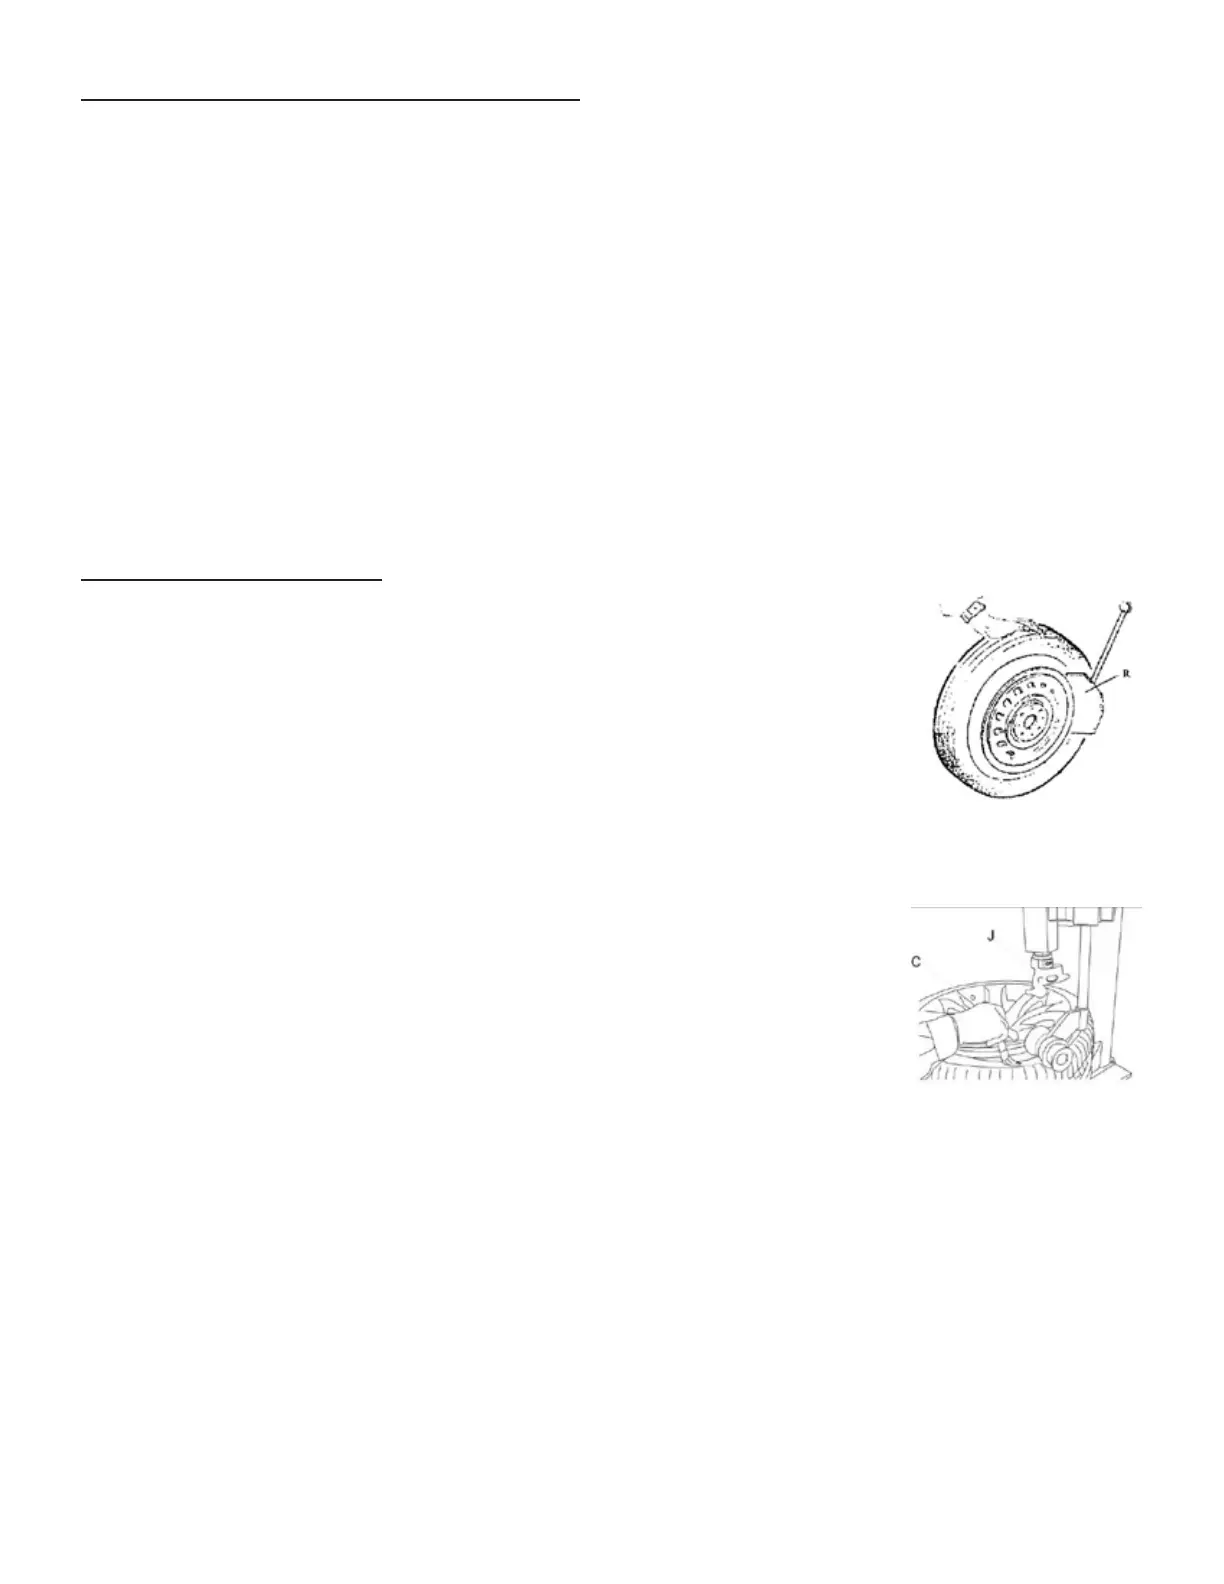
Exhaust the air in the tire completely. Place the tire against the rubber buffer (4). Bring the paddle (R)
against the bead about 10mm from the edge of the rim shown as Figure 8. Tread bead breaker pedal
(3) to push paddle into the tire. Repeat the above operations on different positions around the tire
and both sides of tire until tire bead is released completely.
Figure 8
Figure 9