This document describes the EasySMX KC-8236 Wireless Game Controller.
Function Description
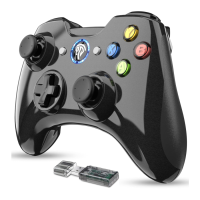
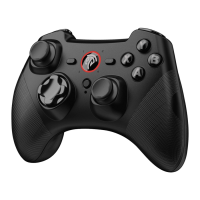
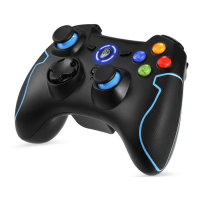
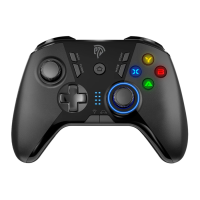
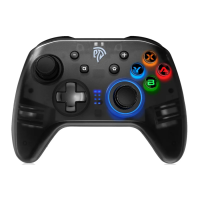
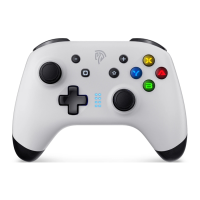
The EasySMX KC-8236 is a wireless game controller designed for a versatile gaming experience across multiple platforms. It utilizes 2.4G wireless technology for connection and is suitable for use with PCs, Android phones or tablets, and PS3 consoles. The controller features a standard gamepad layout with two joysticks, a D-pad, action buttons (X, Y, A, B), shoulder buttons (LB, RB), and triggers (LT, RT), along with Back, Start, and Home buttons. It also includes vibration feedback for an immersive gaming experience.
Important Technical Specifications
- Connection: 2.4G Wireless Technology
- Operating Voltage: 4.2V
- Operating Range: 10m (about 32.8ft)
- Battery Capacity: 550mAh Lithium Polymer Battery
- Applicable Platforms: PC (Windows XP/Win7/Win8/Win10), Android Phone or Tablet (Android 4.0 or above), PS3
- Vibration: Yes
- Interface: Micro USB (for charging)
- Charging Time: 2 Hours
- Operating Battery Life: 8 Hours or more
- Product Dimension: 15.3 * 10.6 * 6.2 CM
- Product Weight: 315g
Usage Features
Package Contents:
The package includes:
- 1x EasySMX KC-8236 Wireless Game Controller
- 1x USB Receiver
- 1x USB Cable
- 1x User Manual
Product Overview (Button Layout):
The controller features the following components:
- Left Joystick
- Back Button
- LED1
- LED2
- Start Button
- X, Y, A, B Buttons
- Right Joystick
- LED4
- LED3
- D-pad
- RB (Right Bumper)
- RT (Right Trigger)
- LB (Left Bumper)
- LT (Left Trigger)
Power On/Off:
To power on the game controller, insert the included USB receiver into your device and press the HOME button. The controller cannot be switched off manually. To power it off, unplug the receiver; it will shut down automatically after staying unconnected for more than 30 seconds. Additionally, the gamepad will automatically shut down if it remains connected without any operation for more than 5 minutes.
Charging:
- If the controller is unconnected during charging, all four LEDs will stay on for 5 seconds and then start flashing. Once fully charged, all four LEDs will turn off.
- If the controller is connected during charging, the corresponding LED will flash and remain on when fully charged.
- When the voltage drops below 3.6V, the LED will flash rapidly, and vibration will be turned off.
Connecting to PS3:
- Plug the USB receiver into a free USB port on the PS3 console.
- With all LEDs off, press the Home Button once to power on the gamepad. It will vibrate once, and all four LEDs will flash, indicating it's attempting to connect.
- The PS3 console supports up to 7 game controllers. The LED status indicates which controller number is connected:
- First One: LED1 stays on
- Second One: LED2 stays on
- Third One: LED3 stays on
- Fourth One: LED4 stays on
- Fifth One: LED1 and LED4 stay on
- Sixth One: LED2 and LED4 stay on
- Seventh One: LED3 and LED4 stay on
Connecting to PC:
- Insert the USB receiver into a free USB port on your PC.
- With all LEDs off, press the Home Button once to power on the gamepad. It will vibrate once, and all four LEDs will flash, indicating it's attempting to connect.
- When LED1 and LED2 stay on, the connection is complete, and the gamepad is in Xinput mode by default.
- To switch to Dinput mode, press and hold the Home Button for 6 seconds. All four LEDs will flash, and when LED1 and LED3 remain on, it signifies Dinput mode.
- In Dinput mode, pressing the HOME Button once will switch to Dinput digit mode, where LED1 and LED4 will stay on, swapping the functionality of the D-pad and left stick.
- One computer can support multiple game controllers.
Connecting to Android Smartphone/Tablet:
- Plug an OTG cable (not included) into the receiver, then insert the receiver into your Android phone or tablet.
- With all LEDs off, press the Home Button once to power on the gamepad. It will vibrate once, and all four LEDs will flash, indicating it's attempting to connect.
- When LED3 and LED4 remain on, the connection is complete, and the gamepad is in Android mode. If not, hold down the HOME Button for 6 seconds to achieve this.
- Note: Your Android phone or tablet must fully support the OTG function, which needs to be enabled first. Android games currently do not support vibration.
Button Test (PC):
After pairing the game controller with your computer, navigate to "Device and Printer," locate the game controller, right-click to access "Game Controller Settings," and then click "Property" to test the buttons and axes.
Maintenance Features
Troubleshooting (FAQ):
- USB receiver not recognized:
- Ensure the PC's USB port is functioning correctly.
- Try another free USB port, as insufficient power can cause unstable voltage.
- For Windows XP or lower operating systems, install the X360 game controller driver first.
- Controller not working in game:
- The game might not support game controllers.
- You may need to configure the gamepad in the game's settings.
- No vibration:
- The game might not support vibration.
- Vibration might not be enabled in the game settings.
- Controller fails to connect:
- The gamepad might have low battery; recharge it.
- The gamepad might be out of the effective operating range.
After-sale Services:
For any problems or suggestions, customers are encouraged to contact EasySMX support. Contact information for various regions is provided:
- USA: easysmx@easysmx.com
- UK: easysmx@easysmx.com
- France: fiona@easysmx.com
- Germany: leslie@easysmx.com
- Japan: support.jp@easysmx.com
- Spain: support.es@easysmx.com
- Italy: support.it@easysmx.com