EasyManua.ls Logo

EasySMX Bayard 9124 - User Manual

EasySMX Bayard 9124
12 pages
Print Icon
To Next Page IconTo Next Page
Loading...
EasySMX 9124
Game Controller Manual
Question and Answer IconNeed help?

Do you have a question about the EasySMX Bayard 9124 and is the answer not in the manual?

Summary

Product Information

Product Description

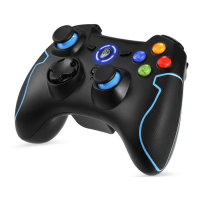
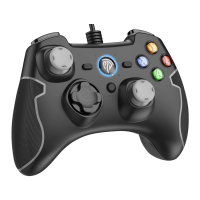
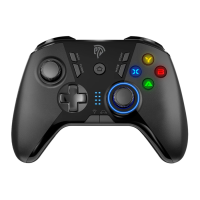
Multifunctional Bluetooth game controller compatible with PC, SWITCH, Android, and iOS devices.

Product Diagram

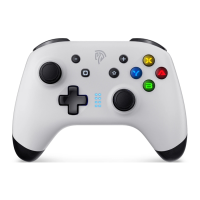
Visual guide to the controller's buttons, sticks, and other interactive elements.

Product Details and Connectivity

Technical Specifications

Details battery capacity, utility time, charging time, charging current, and charging type.

Connecting to Nintendo Switch

Instructions for initial and subsequent connections to a Nintendo Switch console.

Connecting to Mobile Devices

Steps for connecting the controller to Android and iOS devices via Bluetooth.

Connecting to PC

Guide for connecting the controller to a PC via USB data cable.

Functionality and Management

Light Management

Details on how the controller's backlights are managed and turned off.

TURBO Key Settings

Instructions for setting and canceling the TURBO function on controller buttons.

Advanced Features

Backlight Adjustment

Explains how to adjust the brightness and turn off the A/B/X/Y backlights.

Dual Vibration Adjustment

Details on how to adjust the vibration intensity across 5 levels.

Key Programming

Mode 1 Programming

Steps for entering macro programming mode and setting combined keys.

Mode 2 Programming

Instructions for macro programming mode 2, saving sequences and intervals.

Controller Management

Key Programming Notes

Covers default key values, macro data sharing, and clearing programming settings.

Resetting the Controller

Procedure to reset the controller to factory settings by using the reset hole.

Charging and Contents

Charging Indicators

Explains the meaning of indicator lights during charging and low battery status.

Packing List

Lists the items included in the product package.

Support and Contact

After-sale Services

Information on how to get better services and contact customer support.

Contact Information

Provides email addresses for customer support in various countries.

Overview

The EasySMX 9124 is a multifunctional Bluetooth game controller designed for a wide range of platforms, including PC, Nintendo Switch console, Android smartphones, Android TV, Android boxes, and iOS devices (specifically for MFI games on iOS 13.0 and above).

Product Diagram and Components:

The controller features a standard gamepad layout with several key components:

  • Left Side:
    • Left 3D/L3 (1): This refers to the left analog stick, which also functions as a clickable button (L3).
    • Direction Keys (8): A traditional D-pad for directional input.
    • Back Button (3): Used for navigating menus or returning to previous screens.
    • ZL (13): The left shoulder trigger, which also features linear pressure sensing for nuanced input.
    • Left Trigger L (11): The left shoulder button.
  • Right Side:
    • Right 3D/R3 (2): The right analog stick, which also functions as a clickable button (R3).
    • A/B/X/Y Buttons (7): Standard action buttons, often color-coded. These buttons also have a backlight feature.
    • Start Button (4): Used to pause games or confirm selections.
    • ZR (14): The right shoulder trigger, also equipped with linear pressure sensing.
    • Right Trigger R (12): The right shoulder button.
  • Center:
    • Turbo/snapshot Button (5): This button serves a dual purpose: enabling turbo functions and taking screenshots (on compatible platforms like Switch).
    • HOME Button (6): Used to return to the home screen of the connected device or to power on/connect the controller.
    • Channel and Charging Indicator Light (9): Provides visual feedback on the controller's connection status and charging state.
  • Top/Back:
    • TYPE-C Charging Port (10): The port for charging the controller.
    • Reset Hole (15): A small hole for resetting the controller in case of abnormal operation.
    • Programming Key M1, M3 (16): Customizable back buttons.
    • Programming Key M2, M4 (17): Customizable back buttons.
    • Product Back Stick Area (18): The general area on the back of the controller where the M keys are located.

Important Technical Specifications:

  • Battery Capacity: 600mA
  • Utility Time: ≥10 Hours
  • Charging Time: 2.5-3 Hours
  • Charging Current: 530mA
  • Charging Type: TYPE C

Usage Features:

Mode and Connection:

  • Connect Switch:
    • First Connection: Press X + HOME while the controller is powered off.
    • Subsequent Connections: If already paired, short press HOME while powered on to connect automatically.
    • Wake-up Function: The HOME key can wake up the Switch host via Bluetooth.
    • Pairing Process: Turn on the Switch, navigate to "controller," then "Change Grip / Order." The controller will automatically identify and pair, with the corresponding LED light remaining solid upon successful connection.
  • Connect your phone:
    • Android Mode:
      • First Connection: Press B + HOME.
      • Subsequent Connections: Short press HOME to power on.
      • Pairing: In Bluetooth pairing mode, LED1 flashes. Once connected, LED1 stays solid. The device name will appear as "Gamepad."
    • iOS Mode (MFI games on iOS 13.0 and above):
      • First Connection: Press A + HOME.
      • Subsequent Connections: Short press HOME to power on.
      • Pairing: In Bluetooth pairing mode, LED2 flashes. Once connected, LED2 stays solid.
  • Connect to PC:
    • Connect the controller to the PC using a USB data cable.
    • Default Mode (Xinput): Upon successful connection, LED1 + LED4 will be solid on.
    • Switching to Dinput Mode: Long press the Turbo button. The controller will vibrate, and LED2 and LED3 will become solid on, indicating a successful mode switch.

Light Management:

  • Automatic Backlight Off: The A/B/X/Y backlight will automatically turn off if there's no button pressing within 5 minutes during a wireless connection. The controller will also automatically turn off.
  • Backlight Adjustment: The A/B/X/Y backlight has 5 brightness levels (level 0 to level 4).
    • Adjust by pressing ZL + ZR + R3 + UP / DOWN buttons.
    • Level 0 turns all backlights off.
  • Toggle Backlight: Long press L + R for 5 seconds to turn the A/B/X/Y backlight on or off.

TURBO Key Settings:

  • Setting Turbo Function:
    1. Long press the desired key to set it to TURBO function.
    2. Press the TURBO button again.
    3. If the light flashes quickly, the setting is successful. Holding the TURBO key in-game with a set button will enable quick hit functionality, and the light will flash quickly.
  • Canceling Turbo Function: Long press the TURBO function button again, then press the TURBO button again.
  • Compatible Keys: Keys A, B, X, Y, L, R, ZL, ZR can be set as TURBO keys.
  • Switch Screenshot Button as Turbo:
    1. Simultaneously press the right stick and the screenshot button. The screenshot button will then be set as the TURBO button.
    2. Set or cancel the burst function using the operations mentioned above.

Dual Vibration Adjustment:

  • 5 Levels: 100%, 75%, 50%, 25%, 0.
  • Adjustment Method: Hold Turbo + UP / DOWN to increase or decrease vibration intensity. The indicator lights will show the current vibration intensity level (1-5).

Key Programming Settings (Macro Functionality):

  • Mode 1 (Combination Key Programming):
    1. Press M1, then press the BACK button. All lights will stay on, indicating entry into macro programming mode.
    2. Press and hold down the keys you want to combine (e.g., L and R3 simultaneously).
    3. Press M1 again to confirm the combination. The light recovery mode indication will turn on, signifying successful setting. When M1 is pressed, it will trigger both L and R3 functions.
  • Mode 2 (Sequence Key Programming):
    1. Press M1, then hold down the START button. The four indicator lights will turn on, indicating entry into macro programming mode.
    2. Press and hold down the keys you want to combine in succession (e.g., L, then R3).
    3. Press M1 again to confirm the combination. The light recovery mode indication will turn on, signifying successful setting. When M1 is pressed, it will trigger L and R3 functions successively.
    • Note: The spacing time between L and R3 presses will be mapped to the M key.
    • M1, M2, M3, and M4 can be set in the same way.
    • Mode 2 saves the sequence of keys, including the time and interval of each button press, to ensure accurate execution of various actions.
  • Default Key Values: Factory set M1-B, M2-A, M3-Y, M4-X.
  • Macro-key Data Sharing: Macro settings are universally shared across Xinput, Dinput, and Switch modes.
  • Clear Programming Setting: Long press M1 / M3 + M2 / M4 until the motor vibrates briefly to clear all programming settings and restore the initial settings.

Maintenance Features:

  • Reset the Controller: If the controller becomes abnormally inoperable, it can be reset. Insert a crankpin or toothpick into the RESET hole at the bottom of the controller until you hear a "tap" sound from the resetting switches. This will turn off the controller's power and complete the reset.

Charging:

  • Charging Indication: When charging, all 4 indicators flash slowly.
  • Full Charge Indication: Once fully charged, the 4 indicator lights remain solid on.
  • Wired Play While Charging: The controller can be used with a wired connection while charging. The corresponding indicator light will flash during charging and remain solid when fully charged.
  • Low Power Warning: When the battery power is below 20%, the indicator will flash to remind the user of the low power status in the current mode.

Packing List:

  • 1X Wireless Controller
  • 1X 1M Type-C Cable
  • 1X Product Manual
  • 1X After-service Card

EasySMX Bayard 9124 Specifications

General IconGeneral
BrandEasySMX
ModelBayard 9124
CategoryVideo Game Controller
LanguageEnglish

Related product manuals