9376
MTL Trunk Surge Module
DRAFT - 28 July 2014
January 2017
INS9376 Rev 2
Instruction sheet
MTL fieldbus networks
1
9376
MTL Trunk Surge Module
DRAFT - 28 July 2014
January 2017
INS9376 Rev 2
Instruction sheet
MTL fieldbus networks
1
Eaton Electric Limited,
Great Marlings, Butterfield, Luton
Beds, LU2 8DL, UK.
Tel: + 44 (0)1582 723633 Fax: + 44 (0)1582 422283
E-mail: mtlenquiry@eaton.com
www.mtl-inst.com
© 2017 Eaton
All Rights Reserved
Publication No. INS9376 Rev 2
January 2017
Eaton Electric Limited,
Great Marlings, Butterfield, Luton
Beds, LU2 8DL, UK.
Tel: + 44 (0)1582 723633 Fax: + 44 (0)1582 422283
E-mail: mtlenquiry@eaton.com
www.mtl-inst.com
© 2017 Eaton
All Rights Reserved
Publication No. INS9376 Rev 2
January 2017
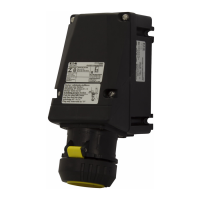
Introduction
T
he 9376-SP Trunk Surge module is designed to protect the 9370-
FB range of Fieldbus Barrier System from voltage and current
surges that could occur on the trunk wiring, and must be used only
with this equipment.
See the 9376-SP technical datasheet for full product details.
It is a 4-pin module that plugs into the upper end face of the Trunk
Terminator Assembly (TTA) and is provided with pin connectors
that will prevent an ignition spark when the module is installed or
removed.
The 9376-SP module may be installed or removed
without isolating the trunk power.
READ SAFETY INFORMATION OVERLEAF
Installing a module
Remove the module from any packaging provided.
Do not use, or attempt to repair, a module that has any of the pins
on its underside bent or damaged, because this might affect its
safety and invalidate the certification.
Orientate the module so that the smaller front clip is facing the
user, then:
• lower the module so that the safety retaining clip (5) on the
TTA housing fits into the loop (6) on the module,
• locate the terminal pins into their contact sockets on the
TTA housing, and push the module home until front and rear
retaining clips are engaged.
Removing a module
Removal is a two-step process that first breaks the electrical
connection, followed by the physical removal of the module from
the TTA.
• Press the clip at the rear of the module (1) and lift the rear of
the module (2) until the clip disengages.
• Press the front clip (3) and withdraw the module from its
socket (4) until it is stopped by the safety retaining clip (5).
• Press against the safety clip enough to release it and pull the
module straight out from the TTA body without rotating it.
Introduction
The 9376-SP Trunk Surge module is designed to protect the 9370-
FB Series Fieldbus Barrier System from voltage and current surges
that could occur on the trunk wiring, and must be used only with this
equipment.
See the 9376-SP technical datasheet for full product details.
It is a 4-pin module that plugs into the upper end face of the Trunk
Terminator Assembly (TTA) and is provided with pin connectors
that will prevent an ignition spark when the module is installed or
removed.
The 9376-SP module may be installed or removed
without isolating the trunk power.
READ SAFETY INFORMATION OVERLEAF
Installing a module
Remove the module from any packaging provided.
Do not use, or attempt to repair, a module that has any of the pins
on its underside bent or damaged, because this might affect its
safety and invalidate the certification.
Orientate the module so that the smaller front clip is facing the
user, then:
• lower the module so that the safety retaining clip (5) on the
TTA housing fits into the loop (6) on the module,
• locate the terminal pins into their contact sockets on the
TTA housing, and push the module home until front and rear
retaining clips are engaged.
Removing a module
Removal is a two-step process that first breaks the electrical
connection, followed by the physical removal of the module from
the TTA.
• Press the clip at the rear of the module (1) and lift the rear of
the module (2) until the clip disengages.
• Press the front clip (3) and withdraw the module from its
socket (4) until it is stopped by the safety retaining clip (5).
• Press against the safety clip enough to release it and pull the
module straight out from the TTA body without rotating it.