Eaton 93PM UPS (400kW Frame) Seismic Mounting Bracket Install Instructions P-164000774—Rev 01 1
SSeeiissmmiicc BBrraacckkeett IInnssttaallll IInnssttrruuccttiioonnss
EEaattoonn 9933PPMM UUPPSS ((440000kkWW FFrraammee)) SSeeiissmmiicc MMoouunnttiinngg BBrraacckkeett IInnssttaallllaattiioonn IInnssttrruuccttiioonnss
Use these instructions to install front and rear seismic mounting brackets to secure the Uninterruptible Power
Supply (UPS) to the facility floor.
NOTE Refer to the applicable installation and operation manual supplied with UPS for
dimensions and required clearances.
Seismic Mounting Bracket Kit Contents
Front Mounting Bracket 2
Rear Mounting Bracket 2
Hex Bolts 16
To install the brackets:
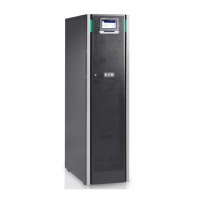
1. Unload and mechanically install the UPS according to the instructions in the applicable installation and
operation manual.
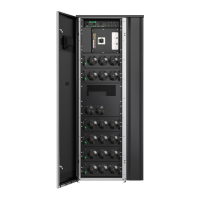
2. Drill holes in the floor for the mounting brackets. Size the holes for the type of customer-supplied hardware
being used to secure the brackets to the floor. See Figure 1 for the bracket mounting hole locations.
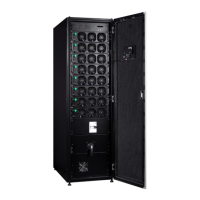
3. Remove the front seismic mounting brackets from the kit and secure to the UPS cabinet base using the
bolts supplied with the kit. See Figure 2 for mounting bracket installation location.
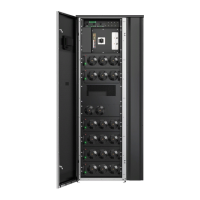
4. Remove the rear seismic mounting brackets from the kit and secure to the UPS cabinet base using the
bolts supplied with the kit. See Figure 3 for mounting bracket installation location.
5. Secure the cabinet to the floor with customer-supplied hardware.
FFoorr MMoorree IInnffoorrmmaattiioonn
Refer to the Eaton 93PM UPS (400 kW Frame) Installation and Operation Manual for the following additional
information:
• Installation instructions, including site preparation, planning for installation, wiring and safety information,
and detailed illustrations of cabinets with dimensional and connection point drawings
Visit www.eaton.com/powerquality or contact an Eaton service representative for information on how to obtain
copies of these manuals.