Crimping Procedures
Loading and Unloading Die Cages
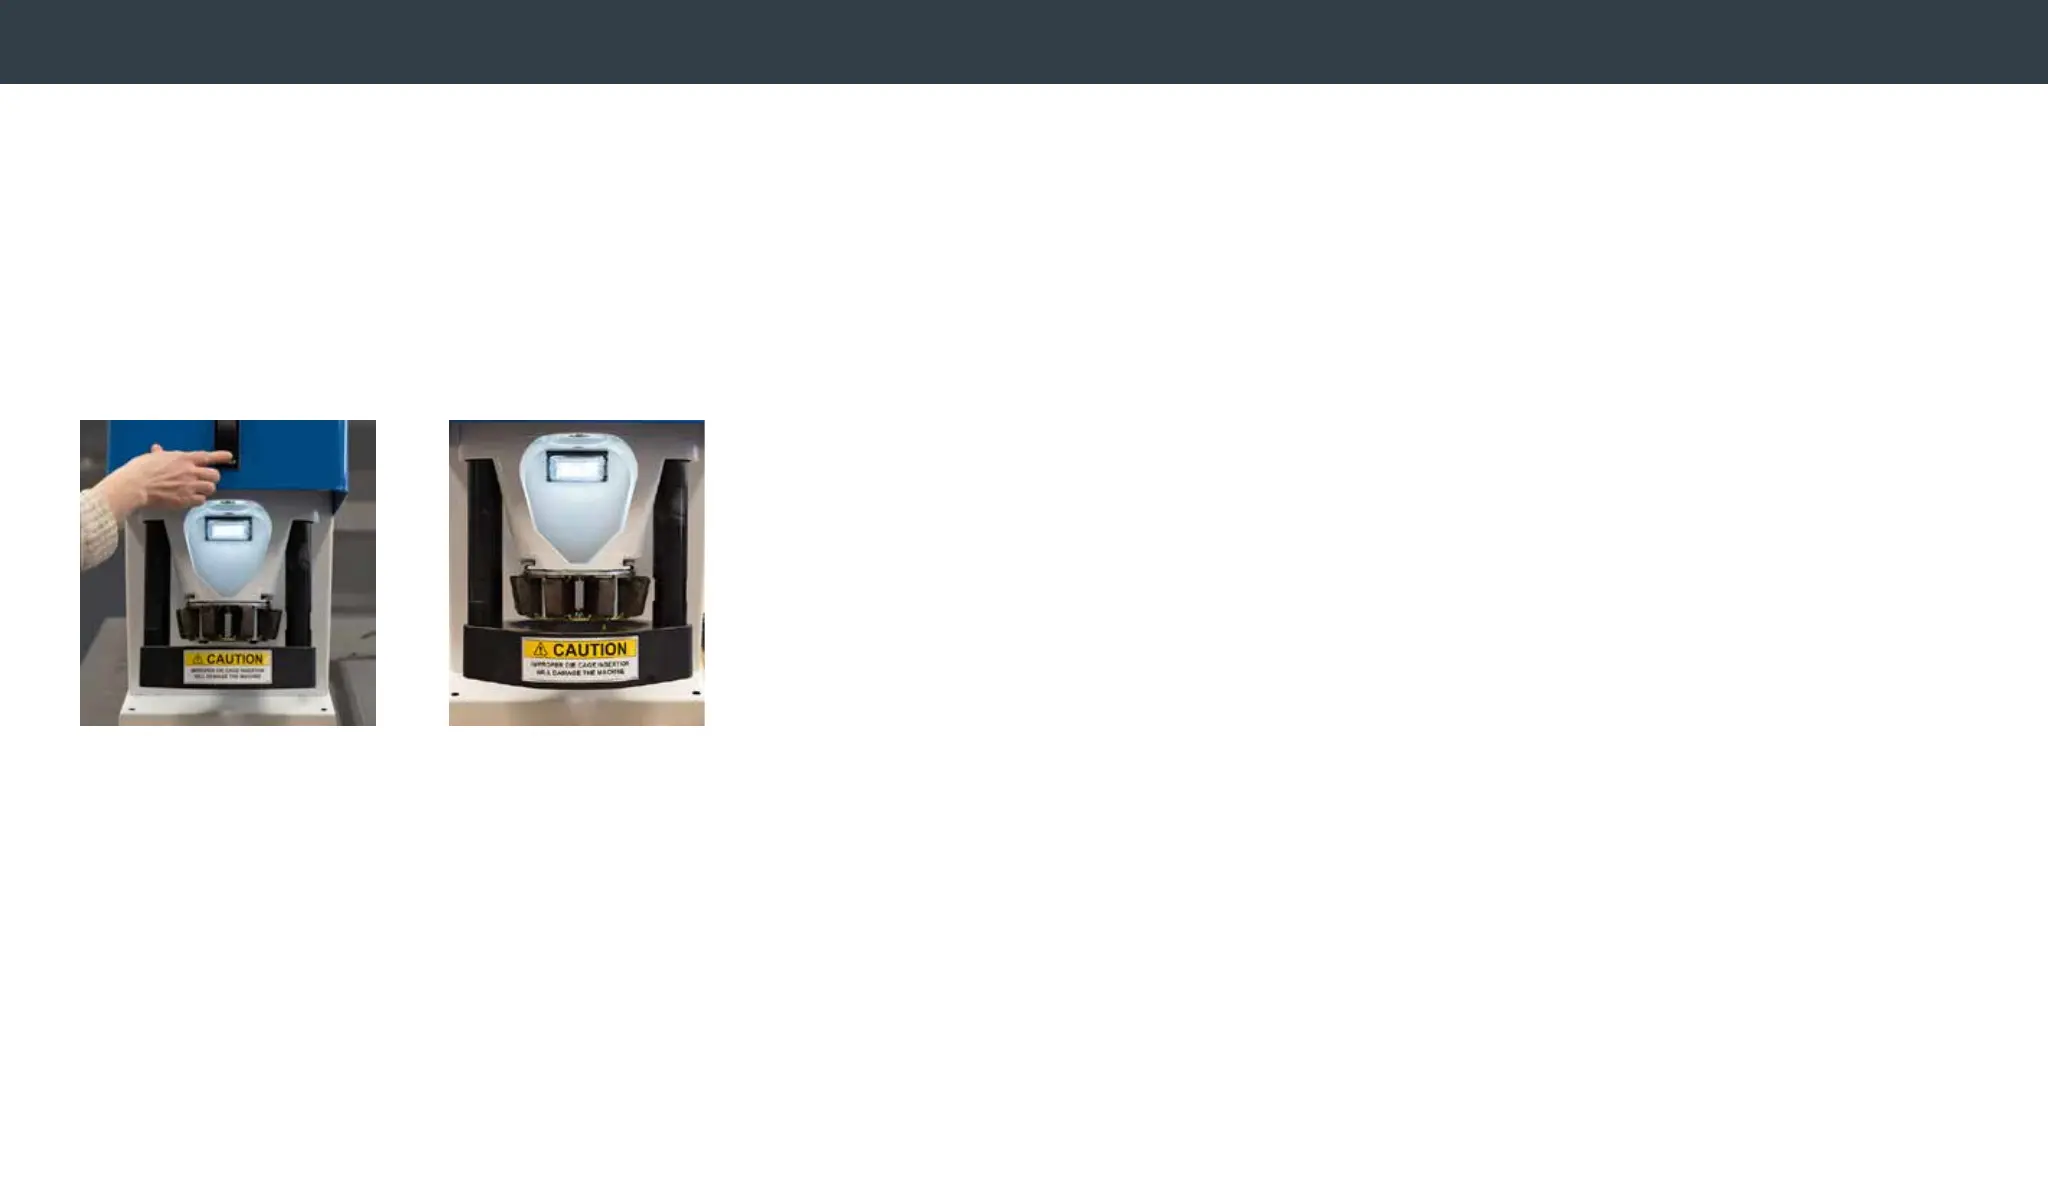
To load the die cage, press and hold the RETRACT switch (gure 1) until the crimp
ring reaches the “full retract” position and stops. The die cage may be inserted or
removed in this position (gure 2). The FT1380e crimp machine will automatically
retract when it has reached the target setting (this is when crimp is complete).
WARNING: Maintain clear distance from all moving parts.
Refer to the current Eaton PowerSource Crimp Spec tool for complete and
detailed crimp specication information for each hose and tting style.
1. Retract the crimp ring by depressing the retract switch until the crimp
ring is fully retracted. Select the proper die cage as shown in the
PowerSource Crimp Spec tool. Use the high efciency grease provided
to grease the outside of each of the die segments and then slide the die
cage into the cage holder slots.
2. Using the touch screen, navigate to the appropriate crimp spec production
screen via selection from the Product Library or the Favorites menu.
3. Position the tting within the crimp cage aligning the scribe line
to the top of the dies.
4. To crimp the tting, depress the CRIMP switch. The crimp ring will rise until
the tting is fully crimped. It will then stop and begin to retract, signifying
that the crimp is complete. Remove your nger from the CRIMP switch.
The crimp ring will automatically retract.
5. Verify correct crimp diameter.
Reminder: Full retraction is required for changing die cages.
Figure 1 Figure 2


 To Next Page