2/2Emergency On Call Service: Local representative (Eaton.eu/aftersales) or +49(0) 1805223822 (de, en)
04/18 IL03802001Z
Eaton Industries GmbH, Hein-Moeller-Straße 7-11, 53115 Bonn, Germany
04/18 IL03802001Z
© 1999 by Eaton Industries GmbH, Eaton.eu/documentation
Eaton.com/recycling
All Rights Reserved Printed in Great Britain (04/18)
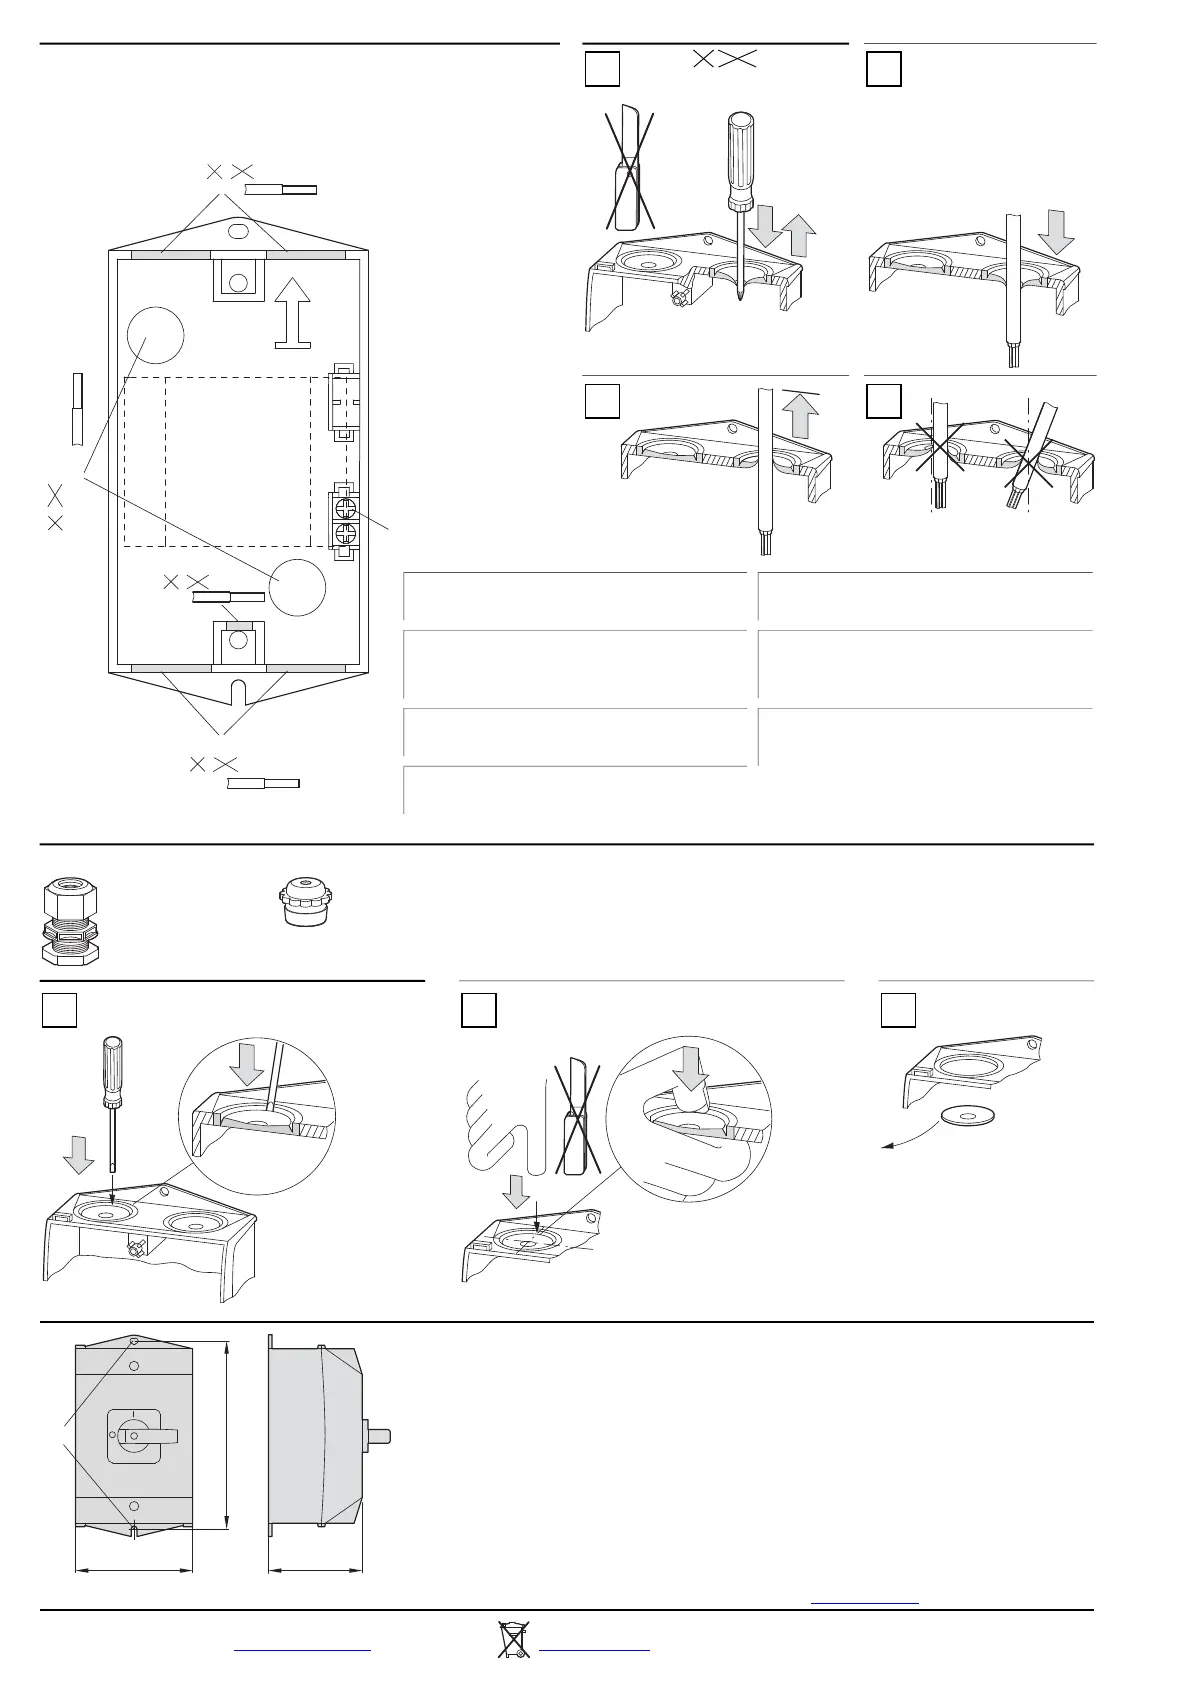
P1…/I2…
V-M25 KT-M25
P1.../I2 (H)(-NA): ⌀ ≦ 11 mm (⌀ ≦ 0.43”)
K-CI-K1/2
N-P1Z
HI11-P1/P3Z
P1...
P1.../I2(H)(-NA)
⌀ ≦ 8 mm
(⌀ ≦ 0.31”)
P1.../I2...: V-M25
P1.../I2(H)(-NA): ⌀ ≦ 16 mm (⌀ ≦ 0.63”)
P1.../I2...: V-M25
P1.../I2(H)(-NA): ⌀ ≦ 16 mm (⌀ ≦ 0.63”)
2
3 4
→
If you want to useboth N-P1Z and HI11-P1/P3,
you will have to remove terminal K-CI-K1/2.
→
Con l’utilizzo di ambedue N-P1Z e HI11-P1/P3
il morsetto K-CI-K1/2 deve essere rimosso.
→
Bei gemeinsamer Verwendung von N-P1Z und
HI11-P1/P3 muss die Klemme K-CI-K1/2 entfernt
werden.
→
N-P1Z
和 HI11-P1/P3 同时使用时,
必须移除端子 K-CI-K1/2。
→
L’utilisation de N-P1Z et HI11-P1/P3 en même
temps requiert le démontage de la borne K-CI-K1/2
→
Приодновременномиспользовании
N-P1Z и HI11-P1/P3 необходимоубрать
клемму K-CI-K1/2.
→
Al utilizar N-P1Z y HI11-P1/P3 juntos debe
eliminarse el borne K-CI-K1/2.
1 2 3
ON
OFF
171 mm (6.73”)
100 mm (3.94”)
M4
80 mm (3.15”)
 Loading...