Page | 13
This document is proprietary. No disclosure, reproduction or use of any part thereof may be made without the expressed
written permission of Ebbco Inc. or its subsidiaries.
Section 4: System Maintenance
Always disconnect power and relieve pressure from the system before performing
any maintenance on this Filtration System
Always follow correct lock out procedures when working on this Filtration System
4.2 Pump Maintenance
Inspect pump once a year: Replace any worn parts, mechanical pump seal, impeller, impeller
housing, and wear plates if necessary. Ebbco Inc. recommends keeping spare system pump and feed
pump seal kits in stock at all times.
4.3 Dirty Tank Pre Filter Maintenance (Filter #5)
Remove the tank lids and check the condition of the dirty tank inlet pre-filter bag. Remove and
clean as necessary; replace if worn or damaged.
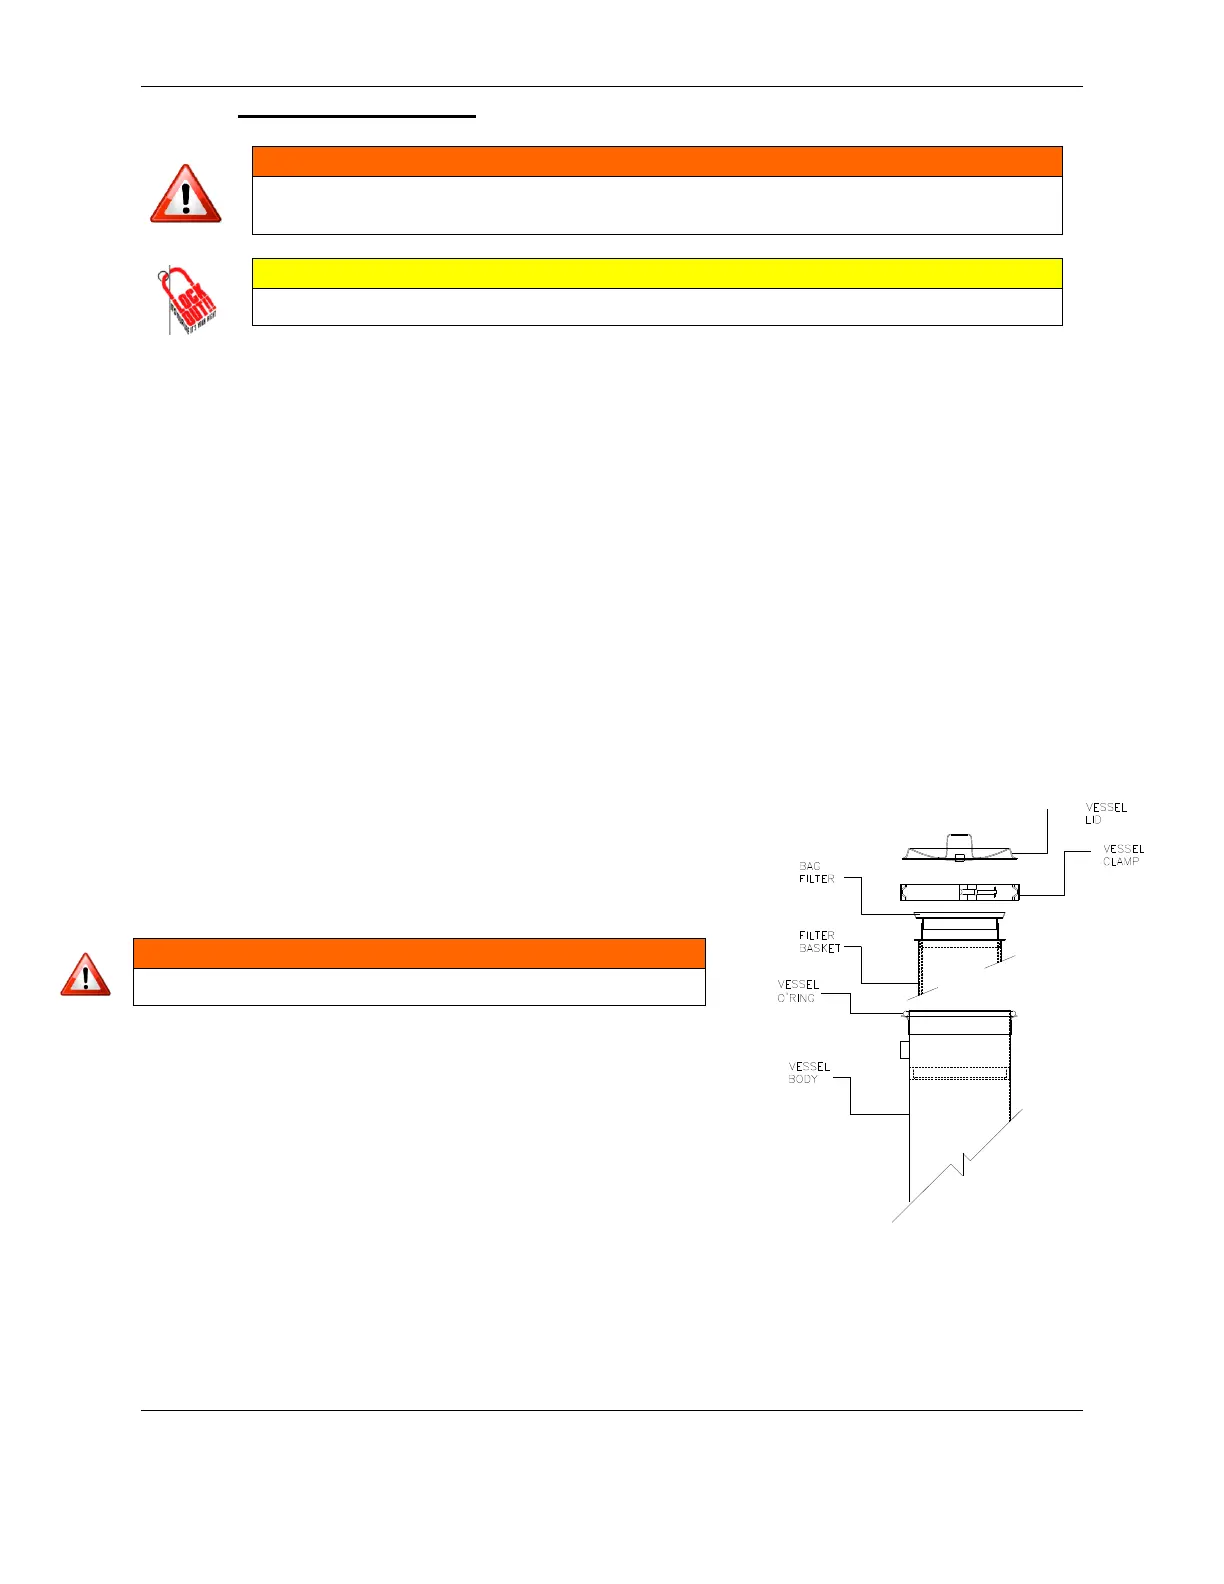
4.4 Bag Vessel Maintenance (vessel #1)
Change the bag filter when the outlet pressure gauge reads 10 PSI (or less).
Bag Filter change out procedure:
1) Shut down the filtration system by turning both the system
control switch and the rotary disconnect to the off position.
2) Carefully relieve vessel pressure by opening the bleeder valve,
located on top of the vessel lid.
3) Open the drain valve located near the bottom of the vessel (red
valve). Wait until the pressure gauge reads 0 PSI prior to
removing the lid.
Note: Do not forget to close the drain valve prior to restoring
power to the CLS!
4) Open the vessel by loosening the band clamp; remove the
band-clamp from the vessel followed by removing the lid.
5) Remove the bag filter from the inner basket using the plastic
pull tabs on the top seal.
6) Push the replacement bag filter into the vessel inner basket.
Ensure that the plastic ring sits flush in the sealing area.
7) Visually inspect the lid O-ring gasket. Ensure that it is free of
debris and sits flush inside of the O-ring groove. Replace the
O-ring gasket if it has become worn or damaged. It is
recommended that sufficient O-ring seal kits be kept in stock at
all times.
8) Reapply the lid on top of the vessel. Replace the band clamp and properly tighten.
9) Verify that the drain and bleeder valves are closed before restoring power to the CLS.
10) Restore power to the CLS. Place a rag over the bleeder valve and slightly open the valve to release
any trapped air inside of the vessel; close the bleeder valve once all the air is purged and fluid starts
to flow out of the valve.
Do not open the lid until the pressure gauge reads 0 PSI!
Figure 4.1
Bag Vessel (exploded view)