3 Camera Network Settings:
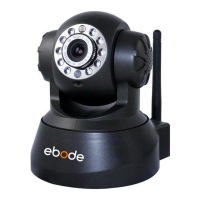
We need to change the default port number of the camera:
Open the IP Camera Tool from your Desktop, select the ebode camera (it will turn blue), right-mouse click
and choose “network configuration”. The default port of the camera is “80”, please change “80” to any
other port you like, such as 81, 82, 83 etc. Click “OK”, the camera will reboot, wait about 30 seconds.
Figure 3.0
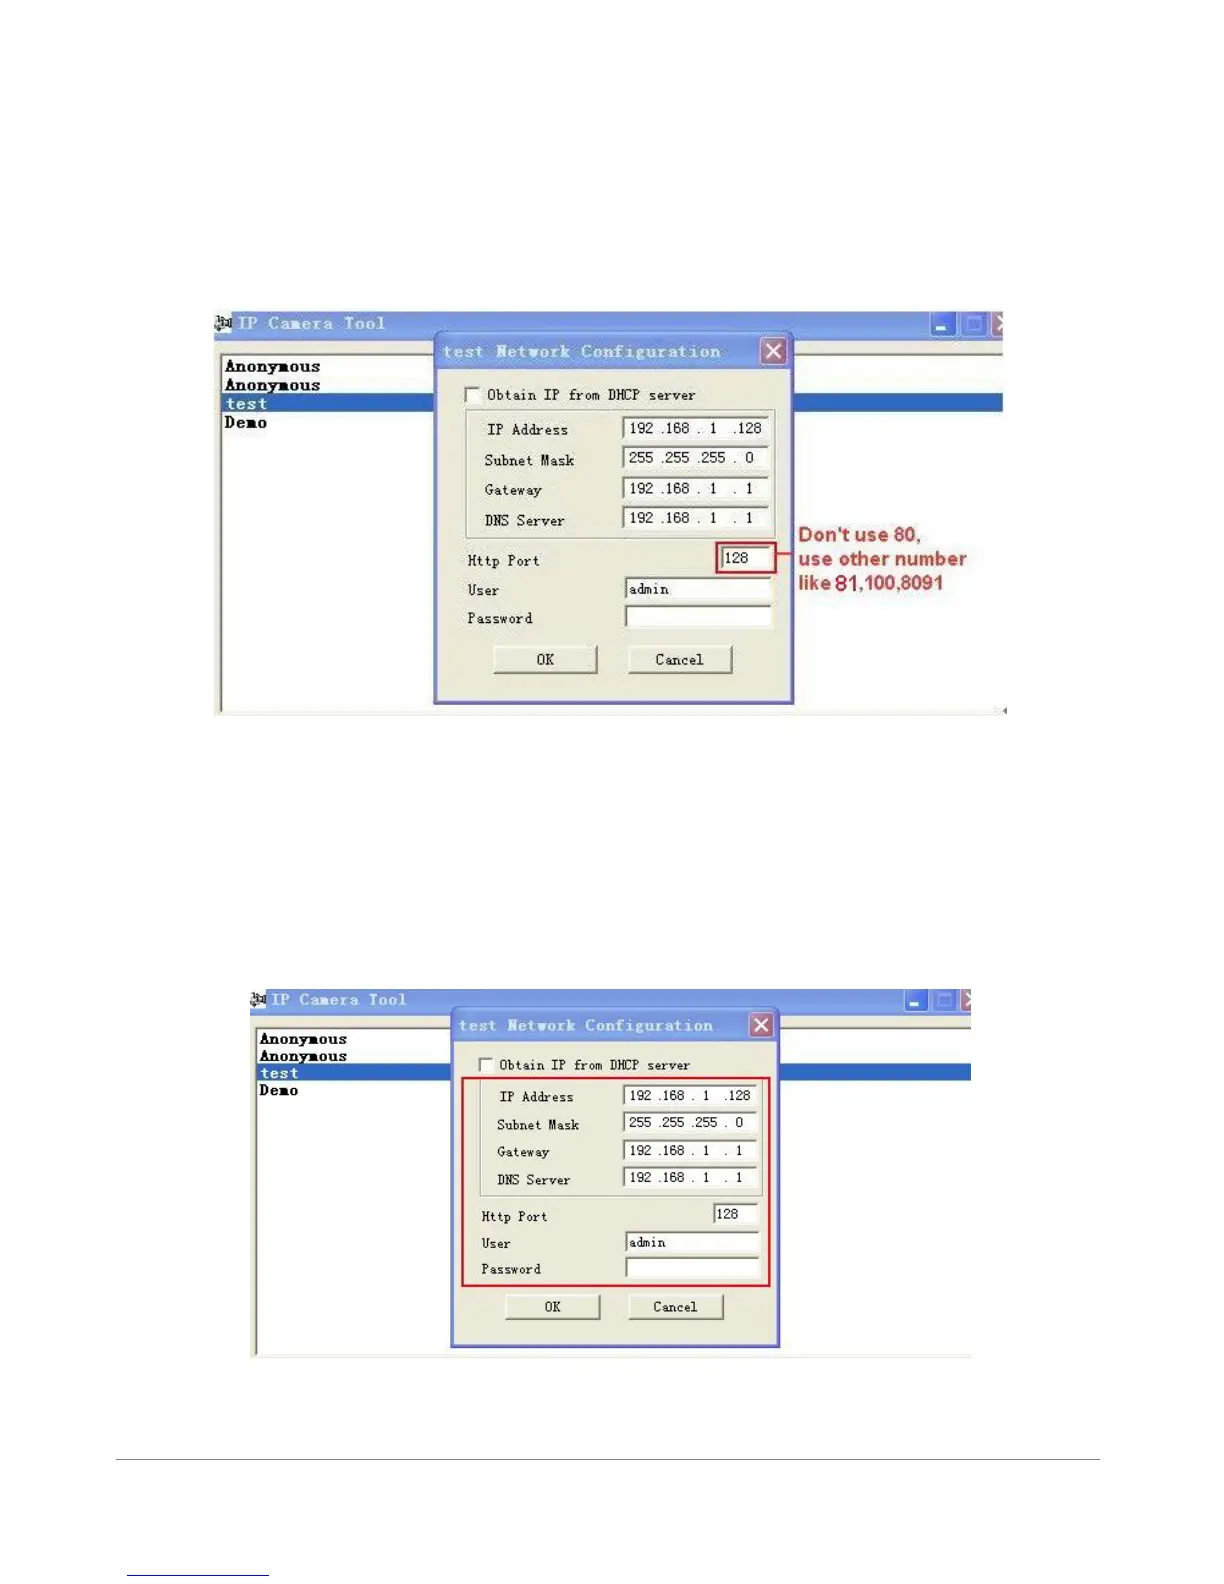
We need to set a Static IP for our camera:
By default the camera is set to “DHCP” which means your modem will give your camera a network address
in your modem automatically. The problem with DHCP is that it might change every time we connect the
camera and prevent us from doing a “Port-Forward” which we need to do in the next step.
1. Open the IPCameraTool and right-click your camera
Figure 3.1