Page 5 of 9
Setting
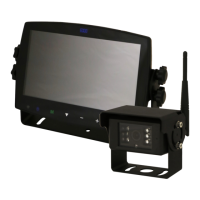
Camera
Please note that these parameters can only be adjusted when camera is
connected to correspondent channel
• To select channel, press ‘M’ button on monitor or ‘Menu’ on remote control, when
the icon background turns green, press ‘+’ or ’-’ button on monitor or VOL +/- on
remote control to switch to the channel you want to set.
• Press button on monitor or ‘OK’ on remote control to enter the channel’s
parameter.
• Press ‘+’ or ’-’ button on monitor or VOL +/- on remote control to select the
parameter to change. A GREEN outline will show on the current selected
parameter.
• Press button on monitor or ‘OK’ on remote control to select the current
parameter. When the outline turns RED, Press (or long press) ‘+’ or ’-’ button on
monitor or VOL +/- on remote control to adjust value, press button on monitor
or ‘OK’ on remote control, cursor return to green.
• Press ‘M’ button on monitor or ‘Menu’ on remote control to return to select
channel.
• Press ‘M’ on monitor or ‘menu’ on remote control to save and exit menu.
Record
Currently displayed channels are indicated by green lettering. The new selection is
indicated by a green background.
• Press ‘+’ or ’-’ button on monitor or VOL +/- on remote control to switch on
options.
• Press button on monitor or ‘OK’ on remote control to select.
• Press ‘M’ on monitor or ‘menu’ on remote control to save and exit menu.
Record time: Record duration of each le.
Format SD card: It is suggested to format all SD card when rst time use on the
monitor.
Power on record: Start recording upon power on monitor.
System
Dimmer value can be adjusted only when Auto is o.
• Select to set day and night dimmer value.Press ‘M’ on monitor or ‘menu’
on remote control to save and exit menu.
Day: Adjust the panel brightness in normal light condition.
Night: Adjust the panel brightness in low light condition.
Dual View
• Set camera combination in dual view mode.
Currently displayed channels are indicated by green lettering. The new selection is
indicated by a green background.
• Press ‘+’ or ’-’ button on monitor or VOL +/- on remote control to switch channel
display in dual view.
• Press button on monitor or ‘OK’ on remote control to save selection.
Quad View and H View
Same way of operation as Dual View.
Trigger
Trigger Delay: Setting range is 1~60s, The trigger delay indicates how long it will
take after the trigger wire is disconnected, before the monitor goes back to the
original view.
Priority: Setting range is 1~5.
Trigger is in priority over auto scan
Support trigger under standby mode
Display: Set trigger to show specic view mode when yellow trigger wire is
activated.
AutoScan
Auto scan duration range is 5~60s, The duration indicates how long a camera
view will be shown when the monitor is set to auto scan, before cycling to the next
camera view. Each camera view can be turned on or o to be included or removed
from the auto scan rotation.