- 4 -
©2023 ECHO Incorporated. All Rights Reserved
X7672230407
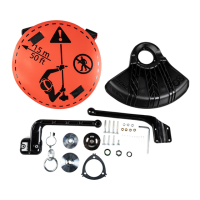
7. Align plastic blade shield (C) with the driveshaft,
and install on the bottom of the gear case ange.
8. Place shield plate (D) on shield and align holes.
Install three screws (E) and three lock nuts (F).
9. Tighten all fasteners
Install Optional Blade
Kit 99944200418 - Blade not included
Kit 99944200422 - Blade included
Tools Required: Torx T27 L-Wrench, T-Wrench
Parts Required: Upper Fixing Plate with 20 mm pilot,
Lower Plate, 10 mm Nut, Split Pin, Blade.
IMPORTANT: This kit can be mounted on sever-
al different style gear cases. A long-necked upper
xing plate (X), a short-necked upper xing plate
(Y), and a 10 mm shaft collar (Z) are included in the
kit and may be required to properly mount the blade.
Failure to install the correct upper xing plate cong-
uration will cause the gear case to bind. Refer to the
assembly instructions below to identify upper xing
plate assembly.
1. Check the type of the gear case assembly on
the unit:
• Measure the PTO shaft.
• If the shaft is 32 mm, proceed to Step 2.
• If the shaft is 42 mm, proceed to Step 3.
• If the shaft is 35 mm, proceed to Step 4.
2. Install short-necked upper xing plate (Y) onto
the PTO shaft.
3. Install shaft collar (Z) then short-necked upper
xing plate (Y) onto the PTO shaft.
4. Install small spacer (S) then long-necked upper
xing plate (X) onto the PTO shaft.
D
E
F
C
X
Y
E
PTO
Shaft




 To Next Page

